If you’re a professional hairstylist or a salon owner looking to level up your extension game, U Tip hair extensions are a brilliant addition to your service menu. With their keratin bonds and natural finish, they’re perfect for clients who want long-lasting, professional results. This guide will walk you through the installation process step-by-step and give you tips to make every application seamless and efficient.
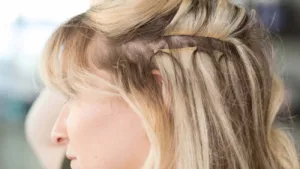
To install U Tip hair extensions, use a heat fusion tool to melt the keratin bond and attach the extension strand to a small section of your client’s natural hair. The process involves precise sectioning, clean application, and careful heat control to ensure a strong, discreet bond that lasts.
Want to ensure your U Tip installations are flawless every time? This guide covers everything from prepping your tools to aftercare tips, so you can deliver results your clients will love.

What Makes U Tip Extensions Unique?
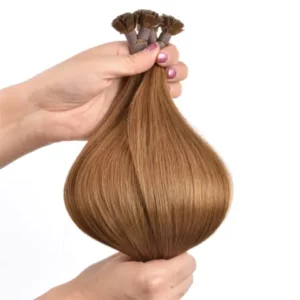
U Tip hair extensions (also known as fusion extensions) are pre-tipped strands of hair with keratin bonds shaped like a “U.” These extensions are applied using a heat tool that melts the keratin, bonding the extension securely to the client’s natural hair. Unlike other methods, U Tips offer long-lasting wear and a natural, flexible finish, making them a popular choice for high-end salons.
How to Install U Tip Hair Extensions
1. Prep Your Tools and Work Area
Before you begin, ensure you have the following:
U Tip hair extensions (preferably full-cuticle, high-quality hair).
A professional heat fusion tool.
Sectioning clips for clean parting.
Heat protectant spray.
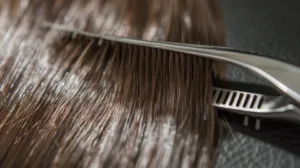
Tail comb for precise sectioning.
Set up your workstation so all tools are within easy reach.
2. Prepare the Client’s Hair
Start by washing and drying your client’s hair thoroughly. Avoid using heavy conditioners or oils, as these can prevent the keratin bond from adhering properly.
3. Section the Hair
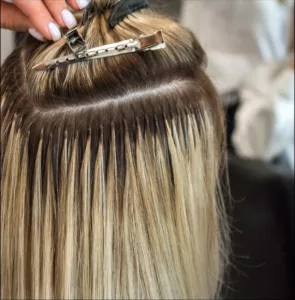
Divide the hair into clean, horizontal sections, starting from the nape of the neck and working upwards. Use sectioning clips to secure the upper layers, leaving the bottom layer free for the first row of extensions.
4. Attach the U Tip Extension
Select a small section of natural hair (about the same thickness as the U Tip strand).
Position the U Tip extension strand close to the scalp but not touching it directly.
Use the heat fusion tool to melt the keratin bond around the natural hair. Hold for a few seconds to ensure a secure bond.
Roll the melted keratin between your fingers to seal the bond.
Repeat this process strand by strand until the desired coverage is achieved.
5. Blend and Style
Once all extensions are installed, trim and shape the extensions to blend them seamlessly with the client’s natural hair. Style as desired using heat tools, ensuring the bonds remain protected from direct heat exposure.
Tips for a Flawless Installation
1. Use High-Quality Hair Extensions
Invest in premium U Tip extensions made from 100% human hair with intact cuticles. High-quality hair ensures durability, natural movement, and client satisfaction.
2. Maintain Proper Spacing
Place the extensions evenly and avoid crowding the scalp. Proper spacing ensures a comfortable and natural finish.
3. Control Heat Precisely
Always use a professional heat fusion tool with adjustable settings. Too much heat can damage the natural hair, while too little heat can result in weak bonds.
4. Educate Your Clients
Advise clients on how to care for their U Tip extensions, including brushing techniques and product recommendations. Proper care prolongs the life of the extensions and ensures repeat business.

Maintenance and Aftercare
For Stylists:
Schedule maintenance appointments every 8–12 weeks to check the bonds and replace extensions as needed. Regular touch-ups keep the client’s hair healthy and looking flawless.
For Clients:
Brush Daily: Use a loop brush to detangle gently.
Wash with Care: Recommend sulfate-free, extension-friendly shampoos and conditioners.
Avoid Excessive Heat: Educate clients to keep heat tools away from the keratin bonds.
Protect During Sleep: Suggest tying hair in a loose braid before bed to prevent tangling.

Why U Tip Extensions Are a Salon choice
U Tip extensions are a game-changer for clients who value long-lasting results and versatility. Their discreet bonds and ability to move naturally make them a favorite for special occasions, daily wear, or dramatic transformations.
For stylists, U Tips offer an excellent opportunity to showcase precision and creativity. Plus, the premium nature of this service can significantly boost your salon’s revenue while delivering outstanding value to your clients.

Conclusion
Mastering the art of U Tip hair extension installation not only enhances your skillset but also elevates your salon’s reputation. With proper techniques, high-quality materials, and a dedication to client satisfaction, you’ll create stunning transformations that keep clients coming back for more. Ready to make U Tip extensions a standout service in your salon? The time to start is now!
Hibiscus Hair Manufacturer has been focusing produce high quality U Tip hair extensions for 25 years and are an industry leader in this field. If you are interested and want to find a reliable hair extensions supplier, please check for our more details.
U Tip Hair Extensions


