Removing hair extensions sounds easy until the wrong method causes pulling, breakage, sticky residue, or damaged bonds. This is one of the most common mistakes I see when customers or even inexperienced stylists try to remove extensions too fast.
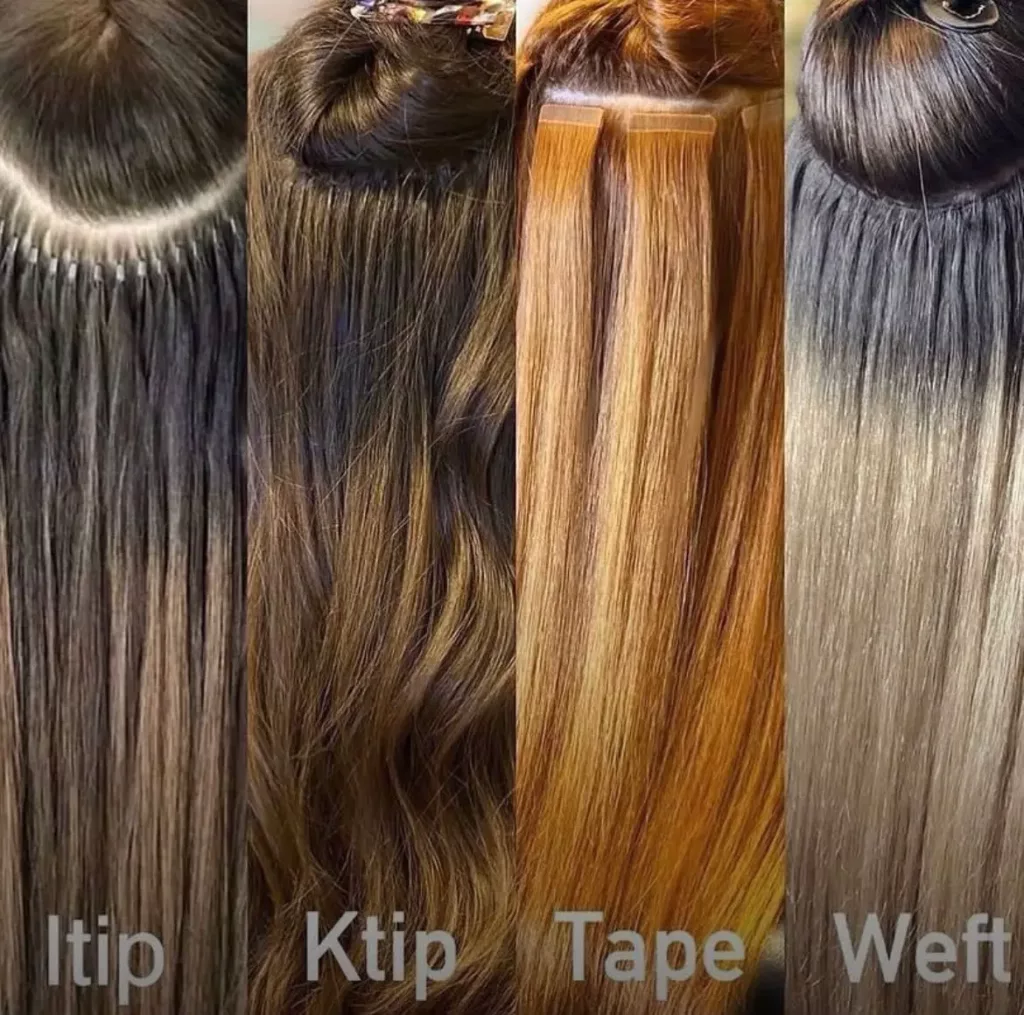
To take hair extensions out safely, the removal method must match the extension method. Tape-ins need adhesive remover. K tip or fusion bonds need bond remover and controlled crushing. Beaded methods need bead opening. Clip-ins only need gentle unclipping. The biggest rule is simple: never pull extensions out by force.
From my point of view, the key to safe removal is not speed. The key is correct method matching. Every extension type is attached differently, so every type must also be removed differently.
Why Is Safe Removal So Important?
Many people focus only on installation. But removal affects the natural hair just as much. If removal is rushed or done with the wrong product, even good extensions can end with unnecessary hair loss, breakage, or client complaints.
Safe removal matters because the wrong technique can damage the client’s natural hair, create shedding during service, and reduce the chance of clean reinstallation or reuse.
Removal Affects Hair Integrity
If the bond or attachment point is not released properly first, pulling pressure transfers directly to the natural hair.
Different Methods Need Different Removal Logic
Tape, keratin, bead, and clip systems are not removed the same way. One universal method does not exist.
Good Removal Protects Reuse Value
For reusable methods, clean removal also protects the extension hair itself and supports better reinstall results.
| Removal Factor | Why It Matters |
|---|---|
| Correct remover | Helps release the bond safely |
| Correct tool | Reduces unnecessary pulling |
| Controlled sectioning | Keeps the service cleaner |
| Patience | Prevents breakage and panic pulling |
| Method matching | Protects both natural hair and extension hair |
This is where a lot of problems begin. Someone sees one removal video online and assumes the same process works for every method. But extensions are not one category. They are several attachment systems. And each system has its own release logic.
That is why I always start with one question: what exactly is attached to the natural hair, and how was it fixed in place? Once that is clear, the removal process becomes much safer and much more professional.
How Do You Take Out Tape-in Hair Extensions?
Tape-ins are one of the most common methods for salon use. They are also one of the easiest to remove if the correct remover is used first.
To remove tape-in hair extensions, apply a proper tape bond remover, let it break down the adhesive, separate the tabs gently, and then clean away leftover residue before reinstallation or aftercare.

The Adhesive Must Be Released First
Tape-ins should not be peeled apart dry. The adhesive must soften first.
Separation Should Be Gentle
Once the remover starts breaking down the bond, the tabs should slide apart more easily without hard pulling.
Residue Must Be Cleaned Properly
After the tabs come out, leftover tape residue should be removed so the hair and scalp feel clean and so any reinstallation starts from a better base.
how tape-in hair extensions are removed during a salon move-up service[^1]
| Tape-in Removal Step | Best Practice |
|---|---|
| Section the hair | Keep rows clean and visible |
| Apply remover | Saturate the adhesive area |
| Wait briefly | Let the solvent work |
| Separate tabs | Slide apart gently |
| Clean residue | Remove leftover adhesive fully |
Tape-ins are often easier to remove than bonded methods, but that does not mean they should be rushed. The biggest mistake is trying to peel the tabs apart before the adhesive has softened enough. That creates pulling stress on the natural hair and can make the removal feel worse than it needs to.
I prefer a clean sectioning approach, enough remover, and a calm pace. If the adhesive is properly broken down, the extension should release with much less force. That makes the whole service cleaner for both the stylist and the client.
How Do You Remove K Tip or Fusion Hair Extensions?
K tip, U tip, and other keratin bond methods need a very different removal process. These methods are not peeled or slid out. The bond must be broken down first.
To remove K tip or fusion hair extensions, apply the correct bond remover, soften the keratin area, crush the bond carefully with the proper plier, and slide the extension away without pulling.

Keratin Bonds Need Bond Remover
The remover helps weaken or soften the bond so it can be broken apart more safely.
The Bond Is Crushed, Not Ripped
A proper fusion removal tool or plier is used to break the keratin bond structure after the remover is applied.
The Extension Should Slide Out After Release
If the bond is properly loosened, the extension should come away with much less resistance.
how keratin bond hair extensions are installed and removed step by step[^2]
| K Tip Removal Step | Best Practice |
|---|---|
| Isolate the strand | Work on one bond at a time |
| Apply bond remover | Focus on keratin area |
| Crush the bond | Use the correct plier carefully |
| Release the strand | Slide out gently |
| Comb out residue | Remove leftover broken keratin |
This is one of the removal methods where impatience causes the most damage. If the bond is not softened enough first, the stylist may squeeze too hard or pull too early. That increases the risk of breakage and client discomfort.
I always prefer a controlled bond-by-bond process. It takes more time than tape-in removal, but it protects the natural hair much better when done correctly. K tip removal is not difficult when the method is respected. It only becomes risky when someone treats it like a fast, force-based service.
How Do You Take Out Beaded, Micro Link, or Ring Extensions?
Beaded systems use mechanical attachment instead of glue or tape. That means the release step is different again.
To remove beaded, micro link, or ring extensions, open the bead with the correct tool, reverse the pressure that closed it, and slide the extension out carefully without tugging.

The Bead Must Be Opened Correctly
The goal is to reverse the clamp pressure, not crush the natural hair.
Section Control Still Matters
Clean sections make the removal faster and safer.
Do Not Yank the Strand
Once the bead is open, the extension should release much more easily.
general hair extension integration methods including ring and mechanical systems[^3]
| Beaded Removal Step | Best Practice |
|---|---|
| Find the bead position | Expose it clearly |
| Use the correct plier | Open the bead in reverse direction |
| Hold the hair steady | Reduce tension while releasing |
| Slide the extension out | Do not pull forcefully |
| Check the section | Make sure nothing is still caught |
This category is often easier to understand because there is no adhesive bond to dissolve. But that does not mean rough handling is safe. If the bead is bent incorrectly or squeezed the wrong way, it can still trap the natural hair and create unnecessary stress during removal.
That is why tool angle and section visibility matter. I want the bead fully visible, fully controlled, and properly opened before I move the extension out.
How Do You Remove Clip-in Hair Extensions?
Clip-ins are the easiest category to remove because they are temporary by design.
To remove clip-in hair extensions, open each clip gently, support the section, and lift the piece away without dragging or snagging the natural hair.

Open the Clips Fully
Do not pull before the clip is fully released.
Remove Section by Section
This keeps the process smoother and reduces tangling.
Brush and Store the Hair After Removal
Temporary extensions last better when they are brushed, cleaned if needed, and stored correctly after use.
a simple clip-in hair extension removal and handling demonstration[^4]
| Clip-in Removal Step | Best Practice |
|---|---|
| Find each clip | Work one piece at a time |
| Open fully | Avoid snagging |
| Lift away gently | Support the hair while removing |
| Brush after removal | Reduce tangles before storage |
| Store properly | Help keep the hair cleaner and smoother |
Clip-ins are the least risky category in removal because they are not designed for long-term fixation. But even here, rough handling can still create tangles or stress if the user pulls the piece before opening every clip fully.
What Should You Never Do When Removing Hair Extensions?
A lot of removal damage comes from the same few mistakes. That is why I think this section matters just as much as the step-by-step method sections.
When removing hair extensions, never pull by force, never skip the correct remover, never rush through a bond that is still attached, and never assume all extension methods come out the same way.
Never Pull a Bond That Is Still Active
If it still feels stuck, the release step is not finished yet.
Never Use the Wrong Product
Tape remover, bond remover, and bead tools are not interchangeable.
Never Treat All Methods the Same
Every extension system has its own release logic.
| Removal Mistake | Why It Causes Problems |
|---|---|
| Pulling too early | Can break natural hair |
| Skipping remover | Leaves the bond too strong |
| Using the wrong tool | Creates messy and unsafe release |
| Rushing section control | Increases tangling and confusion |
| Treating every method alike | Leads to poor technique matching |
From my perspective, this is where professionalism shows. A good removal service is usually calm, method-matched, and controlled. A bad removal service is usually rushed, force-based, and careless.

My View
From my point of view, safe extension removal is one of the clearest signs of real technical understanding. Installation gets more attention, but removal often reveals the true skill level.
I always prefer a removal method that respects the attachment system. Tape should be dissolved before separation. Keratin bonds should be softened and broken down before sliding out. Beads should be opened correctly before release. Clip-ins should be unclipped before lifting away.
If the method is matched correctly, removal becomes cleaner, safer, and much easier to control.
Conclusion
To take hair extensions out safely, match the removal method to the extension method, release the attachment first, and never remove by force.
[^1]: This video shows how tape-in extensions are removed during a move-up service, including adhesive release and panel separation.
[^2]: This video demonstrates how keratin bond extensions are installed and removed, which helps explain controlled K tip removal.
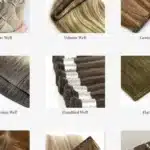
[^3]: This resource explains general hair integration methods, including bonded, taped, clipped, and mechanically attached systems.
[^4]: This video demonstrates a simple clip-in extension removal routine and helps show why unclipping fully matters.