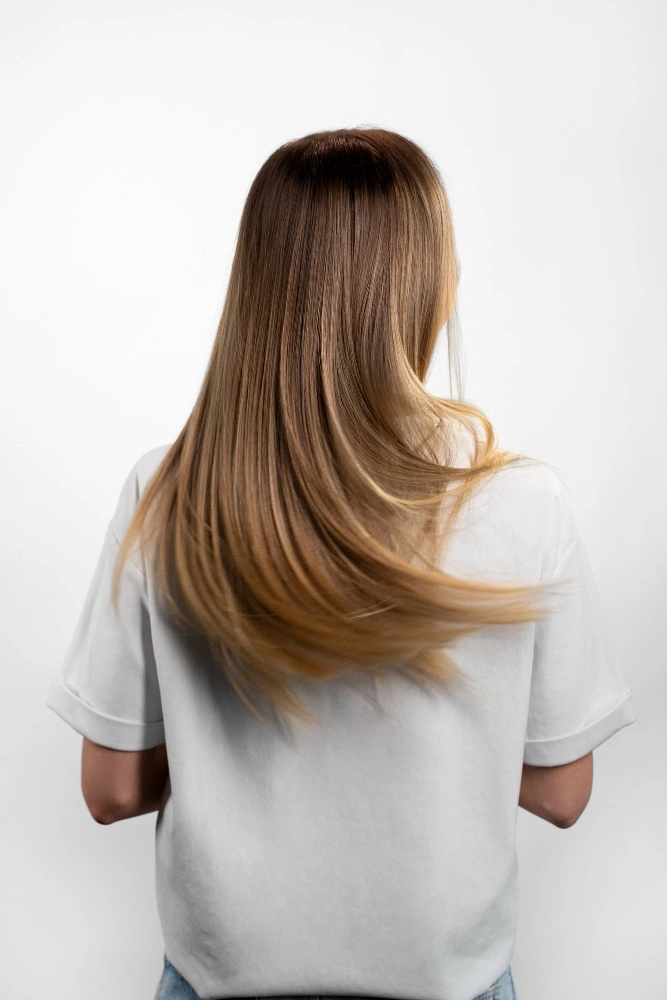
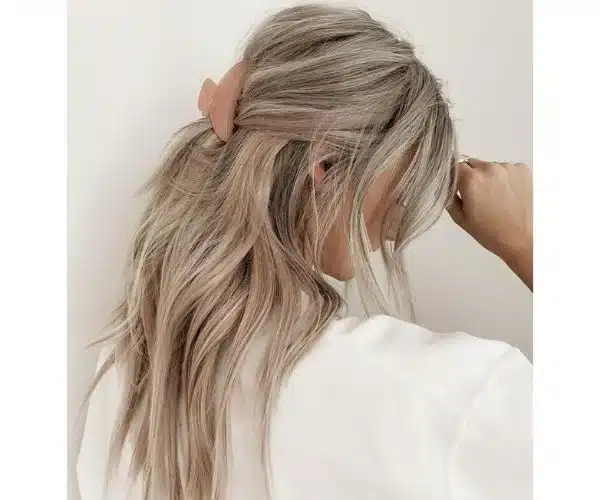
You love the extra length, but the mirror shows a line. You turn your head and the hair looks like two layers. Are you worried people can tell?
You can blend hair extensions with your own hair by matching tone and end density first, then choosing the right method, then shaping the haircut, and then finishing with one texture. Most blending problems come from a big length gap, a blunt perimeter, or a small tone mismatch in daylight.

This guide is different from clip-in-only tips. This guide covers blending rules for all extension types. It also shows how your haircut, texture, and color history change the strategy. You will get simple steps you can follow and clear checks you can do at home.
Why Are Your Extensions Not Blending With Your Own Hair?
You might feel confused because the extensions look pretty on the hanger. Then you wear them and the ends look heavy or the color looks off. That can feel disappointing.
Extensions usually do not blend with your own hair because the undertone is slightly different, the ends are a different thickness, or the transition zone is not shaped. Daylight and phone camera make these issues look bigger.
Dive deeper
Blending is not only “good hair” or “bad hair.” Blending is fit. Your hair has a natural pattern that the eye expects. When extensions break that pattern, the join becomes visible.
Tone mismatch is the silent problem
Many people match the color level but miss the tone. Your hair can be warm, cool, or neutral. Your extensions can be the same level but a different tone. Warm hair next to cool hair looks wrong, even if both look “brown.” This is why some blends look fine indoors but off outside.
End density mismatch creates the visible line
A lot of blends fail at the last 3–5 inches. Natural ends are often finer. Extensions often have fuller ends. The eye reads that as a “ledge.” The opposite also happens. Thick natural ends with thin extension ends look weak and see-through.
Your haircut shape can fight the blend
A blunt haircut edge can sit on top of extension hair like a ruler line. Short layers can poke out and separate. This is not a “you did it wrong” issue. This is a shape issue. The fix is a connected shape, not more hair.
Placement or method can change the silhouette
Some methods sit flatter. Some add bulk in one zone. If the bulk sits in the wrong place for your head shape, the blend looks stacked.
Use this quick diagnosis table:
| What you notice | What it often means | What you fix first |
|---|---|---|
| clear line at the ends | blunt edge or density gap | shape and end density |
| color looks “almost” right | undertone mismatch | tone match in daylight |
| top looks separate from bottom | wrong weight distribution | reduce bulk or change map |
| hair looks thick in one band | method adds bulk there | flatter method or fewer pieces |
| short pieces stick out | layers or length gap | transition shaping |
If you want one simple rule, check ends and tone in natural light. Most answers show up there.
How To Blend Hair Extensions With Your Own Hair Step By Step?
You can do a lot with small changes. You do not need to chase perfection first. You need a clean order that reduces the biggest problems early.
You can blend hair extensions with your own hair by checking tone, matching end density, building a smooth transition zone, and finishing with one consistent texture. A simple daylight check after styling helps you confirm the blend.
Dive deeper
This is a method-neutral routine. You can use it for clip-ins, tape-ins, wefts, keratin tips, or other systems. The details change, but the logic stays the same.
Step 1: Do a daylight test before you change anything
Stand by a window. Look at mid-length and ends. Move your head left and right. If the color shift shows, you have a tone issue. If the line shows, you have a shape or density issue. This one minute test saves hours.
Step 2: Match the blend at the ends, not only at the roots
Most people focus on roots. Most people should focus on ends. If your natural ends are fine, you need lighter end density. If your natural ends are thick, you need enough hair so the finish does not look thin.
Step 3: Build a transition zone
A transition zone is the area where your hair ends meet the extension length. If that zone is too sharp, you see a line. If it is soft, you see one hairstyle. You create this zone with shape, not with random thinning.
Step 4: Choose one texture for the whole head
If your hair is straight and the extension hair is wavy, the join shows. If your hair is wavy and the extension hair is straight, the join shows too. You can pick a soft bend that both hair types can follow. You can also match the curl direction so the hair moves as one.
Step 5: Check again, then stop touching it
Over-brushing and over-oiling can separate hair. That can expose tracks and joins. After you finish, do one last check, then let the hair sit.
Use this routine table:
| Step | What you do | What you look for |
|---|---|---|
| daylight check | window test | tone shift or end line |
| end match | compare last inches | thick vs thin contrast |
| transition zone | soften the join | no “ledge” line |
| one texture | wave or bend | same movement |
| final check | video or mirror | no visible separation |
If you follow the order, you fix the biggest issues first. Your blend improves fast.
How To Blend Extensions If Your Hair Is Blunt, Layered, Or Short?
A blunt cut looks clean, but it shows lines. Layers can look soft, but they can stick out. Short hair can look amazing with extensions, but it needs more planning.
You can blend extensions with blunt, layered, or short hair by reducing the length gap, shaping the perimeter, and choosing a finish style that hides the join. A small trim or reshape often changes everything.
Dive deeper
Your haircut is not “neutral.” Your haircut decides how easy blending will feel. The goal is not to change your identity. The goal is to connect two shapes into one.
If your hair is blunt
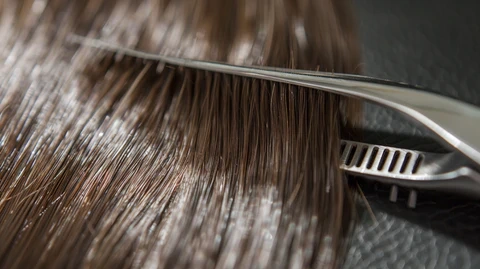
Blunt ends create a sharp border. Extensions under that border can look like a second layer. You need a softer join. A light point-cut on the last 1–2 cm can reduce the hard line while keeping the blunt look. You also want end density that is not thicker than your natural ends.
If your hair is layered
Layers can poke out and create a choppy look. The fix is not to hide everything. The fix is to match the movement. Layers need extension hair that supports the layer flow. A soft wave often helps because it “collects” the layers into one look.
If your hair is short
Short hair blending is a transition project. Big length jumps are harder to hide when hair is straight. Soft bends help. A conservative length increase often looks more natural and needs less daily work. If you want dramatic length, you will need more styling and a cleaner shape plan.
What you can do at home vs what needs a pro
You can test tone, you can test texture, and you can pick a better finish style at home. A connected cut is best done by a professional stylist. A good stylist will keep your shape but remove the harsh join.
Use this haircut-based table:
| Your haircut | Common blend issue | Best focus |
|---|---|---|
| blunt bob or lob | ruler line at ends | soften the last edge |
| long layers | short pieces pop out | match texture and movement |
| short hair | big step line | smaller length jump or more styling |
| fine ends | thick extension ends | lighter end density |
Your haircut can still be your haircut. You just need a bridge between lengths.
How To Blend Extensions With Straight, Wavy, Or Curly Hair?
Texture is where many blends fail. Not because the hair is bad, but because the pattern is different. Your eyes notice pattern breaks fast.
You can blend extensions with straight, wavy, or curly hair by matching the texture pattern and setting one finish style for the whole head. Straight hair needs cleaner shape. Curly hair needs pattern matching and less tension.
Dive deeper
Texture blending is about harmony. If your natural hair and the extension hair do not behave the same way, the join will show during movement.
Straight hair blending
Straight hair shows lines. Straight hair shows tone mismatch. Straight hair also shows density steps. If you love straight styling, you need very clean end density match and a smoother transition shape. Heavy oil can separate straight hair into strings, so light finishing works better.
Wavy hair blending
Wavy hair is forgiving. A wave can hide small mismatch. Still, wave patterns matter. If your hair has loose S-waves and the extensions are very straight, you will see separation. If your hair has tighter wave and the extensions have loose wave, you also see a difference. You can set both with the same wave tool and the same direction.
Curly hair blending
Curly hair needs pattern matching. It also needs correct weight. Too much weight can pull curls flat near the root, then the extensions look different from your natural curl. A curl-friendly routine helps. You want hydration, gentle detangling, and less friction. You also want to avoid tight tension at the hairline.
Use this texture table:
| Your texture | What makes blending hard | What helps |
|---|---|---|
| straight | lines and shine show everything | clean shape + light finish |
| wavy | pattern mismatch | set one wave pattern |
| curly | curl pattern and weight | pattern match + gentle routine |
If texture is your main issue, focus on one consistent finish first. Then adjust color or density.
How To Blend Extensions When The Color Is Close But Not Perfect?
“Close” is a tricky zone. You can feel it is almost there, but the camera says no. This happens a lot with highlighted hair and multi-tone hair.
You can blend extensions when the color is close by correcting undertone, adding dimension, and styling to reduce harsh contrast. Human hair extensions can be toned, but heavy bleaching can damage the cuticle and shorten lifespan.
Dive deeper
Color blending is not only about dark or light. Color blending is about undertone and dimension. Your natural hair usually has more variation than you think.
Undertone is the first check
If your hair reads warm in daylight and your extensions read cool, the blend looks gray. If your hair reads cool and the extensions read warm, the blend looks brassy. A small undertone shift can improve the blend more than a big color change.
Dimension matters for balayage and highlights
If your hair has highlights, a flat extension shade can look like a solid block. A rooted shade or mixed tones often blend better. If you wear high contrast, you may need a custom blend using two close shades.
Toning can help, but it needs caution
Human hair extensions can take toner. Still, you should test first. Some lighter shades were already processed during production. Extra chemical work can increase dryness and tangling. Bleach is high risk for extensions, even when it works on natural hair. If you want lighter hair, it is often safer to buy a lighter shade than to bleach the hair you already have.
Use this color decision table:
| What you see | What it often is | Better action |
|---|---|---|
| hair looks too warm | undertone mismatch | gentle tone shift |
| hair looks too cool | undertone mismatch | gentle tone shift |
| hair looks flat | lack of dimension | rooted or multi-tone set |
| hair looks darker in photos | contrast issue | softer styling or better shade |
| hair needs to be lighter | lifting required | avoid bleach, choose lighter set |
Color is important, but it should not destroy the hair. A blend that lasts is better than a risky color win.
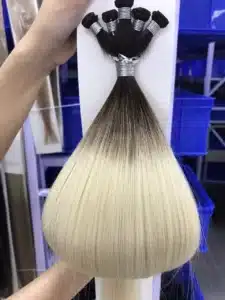
Which Extension Method Blends Best For Your Hair Type?
Sometimes the blend problem is not your styling. The problem can be the method. Some methods sit flatter. Some methods add bulk. Some methods suit fine hair better.
The best blending method depends on your hair density, your haircut, and how you style daily. Clip-ins offer flexibility. Tape-ins can look flat. Wefts add volume well. Keratin tips can feel natural when placed well. Your goal is the method that matches your lifestyle.
Dive deeper
You can think of method choice like choosing shoes. A shoe can be great, but wrong for the day. A method can be premium, but wrong for your hair type and habits.
Clip-ins
Clip-ins are great for occasional wear. They can blend well when color and density match. They can also look bulky if you use too much hair for fine natural ends. Clip-ins are also sensitive to placement and sectioning. If you want daily wear, you may want a more stable method.
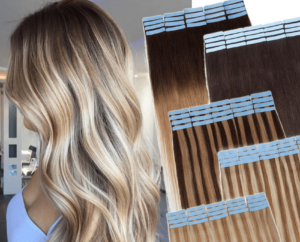
Tape-ins
Tape-ins can look very flat. They can blend well for fine to medium hair when the shade match is right. They also need clean aftercare because oil near the tape can cause slipping. Tape-ins can be a great option for clients who want a natural fall and a low-profile feel.
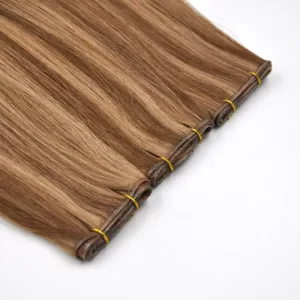
Wefts (hand-tied, genius, machine)
Wefts are strong for volume and length. They can blend very well when the haircut shape is connected. They can also feel heavier if the weight plan is too aggressive for thin hair. Wefts work best when the distribution is smart.
Keratin tips (U tip and similar)
Keratin tips can feel very natural because the hair moves in small sections. They can blend well for clients who want natural movement. They require careful maintenance and correct section size. If the sectioning is not right, you can get tension or visible separation.
Use this method table:
| Your hair situation | Methods that often blend well | Methods that need extra caution |
|---|---|---|
| fine ends | tape-ins, light keratin tips | heavy weft volume plans |
| blunt haircut | tape-ins, keratin tips, wefts with good cut | clip-ins with big length gap |
| short hair | keratin tips, tape-ins, layered clip-in sets | very long clip-ins worn straight |
| thick hair | wefts, keratin tips | low-density clip-ins |
If your blend keeps failing, your method may be fighting your hair type. A different method can make blending easier.
What Should You Check Before Buying Extensions For A Seamless Blend?
Many people try to “blend later.” That costs time and money. If you want a clean blend, you should choose the right match before you buy.
Before buying extensions, you should check undertone, end density, length gap, and whether you need dimension like balayage or rooted shades. You should also ask about hair quality because hair that stays smooth and consistent keeps the blend looking good longer.
Dive deeper
A seamless blend starts at the selection stage. This is where most people save or lose the result. If you pick the wrong density or the wrong tone, you will chase fixes later.
Check undertone in natural light
Ask for photos in daylight. If you are buying online, compare against your mid-length and ends, not only the roots. If your hair is multi-tone, consider dimensional options.
Check end density and weight plan
Look at your natural ends. Are they fine or thick? Choose extension ends that match that look. If you have fine ends, a very thick set can look obvious. If you have thick ends, a thin set can look weak.
Check length gap honestly
A big length jump is harder to blend, especially if you wear hair straight. If you want dramatic length, you may need more styling or a more layered set. If you want easy daily blending, choose a more realistic jump.
Check hair quality for long-term blending
Hair that stays smooth and aligned holds style better. That means your texture match stays stable. It also means less tangling and less frizz at the join. This is one reason many salons prefer full cuticle hair. It keeps the finish consistent over time.
Use this buyer checklist table:
| What you want | What you check | Why it matters |
|---|---|---|
| seamless everyday blend | tone + end density | most visible factors |
| highlighted blend | dimension options | flat color looks obvious |
| straight sleek finish | perfect density and shape | straight shows lines |
| long lifespan | hair quality and processing | reduces frizz and tangles |
Buying smart makes blending easy. Buying random makes blending stressful.
My opinion
A natural blend is built from the ends up. Tone match and end density match come first. Shape comes next. Texture finish comes last. If you keep that order, your extensions look like your own hair, not like a second layer.
If you feel stuck, do not add more hair. Reduce mismatch. Choose a better tone, a better density, or a better method. Small changes create the biggest blend wins.
FAQ
How to blend hair extensions with your own hair if your ends are very thin?
You should use lighter end density and avoid overloading weight at the bottom. A soft bend also helps hide the transition.
Do extensions blend better curled or straight?
Most blends look easier with soft waves because waves hide small mismatch. Straight looks great too, but it needs cleaner shape and better density match.
Can you tone hair extensions at home?
You can tone human hair extensions, but you should strand test first. You should avoid bleach because it can damage hair and shorten lifespan.
Why does the blend look fine indoors but bad outside?
Daylight shows undertone differences and shows density steps more clearly. Always do a window check.
If the color is close, should you dye or buy a new shade?
If the difference is undertone, toning can help. If the difference is level or the hair needs to be lighter, buying the right shade is usually safer than heavy processing.
What is the biggest mistake that makes extensions look fake?
A sharp transition at the ends. This comes from a blunt natural edge, a big length gap, or thick extension ends on fine natural ends.
Conclusion
You can blend hair extensions with your own hair by matching tone and end density first, shaping a soft transition, and finishing with one texture. The best blend starts before you buy and stays stable with good hair quality.