You clipped them in, you felt excited, and then the mirror told the truth. The ends look like two different haircuts. The color looks “almost right” but not right. Does this sound familiar?
You can blend clip in extensions with natural hair by fixing three things first: shade and tone, end density, and placement height. Then you use a simple style finish to connect both textures. Most “not blending” problems are not caused by bad clip-ins. They are caused by mismatch and setup.

This guide is written for clip-in users who want a natural look, not a costume look. You will see why clip-ins do not blend, how to blend step by step, and when toning helps. You will also see common mistakes that make clip-ins look obvious on camera.
Why Do Clip In My Hair Extensions Not Blend?
It is frustrating because clip-ins can be expensive, and the photos online look perfect. Then real life happens. Your hair moves, light changes, and the blend line shows.
Clip-in hair extensions usually do not blend because the color tone is slightly off, the natural hair ends are thinner than the extension ends, or the clip-ins sit too low or too high. A blunt natural cut and very straight styling can also make the join look stronger.
Dive deeper
Most blending issues follow a pattern. A small mismatch becomes a big mismatch when your hair is in motion. The good news is that clip-ins are removable, so you can test and adjust without long-term commitment.
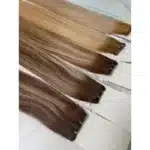
Tone mismatch is more common than “wrong color”
Many people pick a shade that matches the root area, then the ends look off. This happens because natural hair often has multiple tones. Sunlight lifts the mid and ends. Past color work leaves warmth or coolness. Clip-in hair often looks more “even” in tone. When you put even tone next to natural dimension, the eye catches the difference.
End density mismatch creates the “step line”
A blend line is often a density line, not a color line. If your natural ends are fine and your clip-in ends are thick, you will see a shelf. If your natural ends are thick and your clip-ins are thin, you will see a weak finish. This is why some people say “my clip-ins look like a tail.” It is a density problem.
Placement height decides if your natural hair can cover the join
If you clip too low, your natural ends sit on top like a hard edge. If you clip too high, you may see gaps underneath, especially when wind moves the hair. You need a placement that lets your natural hair fall over the clips and connect into the extension length.
Texture mismatch shows fast under bright light
If your natural hair is slightly wavy and the clip-ins are very straight, the join shows. If your natural hair is straight and the clip-ins are more textured, the join shows too. Texture does not need to be identical, but it needs to look like one style.
Use this quick diagnosis table:
| What you see | What it usually means | What to fix first |
|---|---|---|
| clear line at ends | blunt cut or density gap | blend trim or softer finish |
| “almost same color” but off | undertone mismatch | tone correction or better shade |
| top looks fine, bottom looks heavy | clip-ins too thick for your ends | reduce weight or add layers |
| pieces separate when you move | placement is wrong | re-clip higher or stagger rows |
| looks okay curled, bad straight | straight shows lines | improve cut and density match |
If you want a simple thought: blending starts with matching what your hair is doing at the ends, not what your hair looks like at the roots.

How To Blend Your Hair With Clip-in Extensions?
This is the part you can actually follow at home. You do not need complicated tools. You need a clear order. If you skip the order, you will keep chasing the same problems.
You can blend your hair with clip-in extensions by matching your parting, sectioning cleanly, clipping in with staggered placement, brushing with support, and finishing with one consistent texture. A light wave or bend often blends faster than pin-straight.
Dive deeper
Clip-ins blend best when your setup respects the head shape. The goal is not “more hair everywhere.” The goal is “support where you need it, and softness where the join happens.”
Step 1: Start with a realistic clip-in plan
If you use every weft in the pack, your hair can look bulky. If your natural hair is fine, this is a common mistake. You should choose fewer wefts and place them smarter. You can also choose narrower wefts for the sides so the blend looks lighter.
Step 2: Section cleanly and leave enough top hair out
If you take sections too thick, the clip does not sit flat. If you take sections too thin, the clip can slip. You also need enough top hair to cover the track line. Many “showing clip” problems come from not leaving enough hair out on top.
Step 3: Clip in with a staggered map, not one straight line
If you place each row in a straight horizontal line, you can create shelves. You can stagger your placement slightly so the hair blends more naturally. This also helps when you turn your head and the hair moves.
Step 4: Blend the join, then stop brushing
Brushing helps connect the hair, but over-brushing creates frizz and separates texture. You should brush gently at the join, then style. You should hold the hair near the clips while brushing so you do not pull.
Step 5: Finish with one texture that matches your hair
Soft waves are forgiving. Loose bends are also good. If you love straight hair, you can still blend clip-ins, but you need better density match and a cleaner end shape. A flat iron can also expose a blunt line if your natural ends are much shorter than the extension length.
Use this styling guide table:
| Your natural hair type | Fastest blend finish | What to avoid |
|---|---|---|
| fine ends | loose wave or bend | heavy bulky set |
| blunt ends | soft bend + end blending | pin-straight with no trim |
| wavy hair | match wave pattern | straight clip-ins only |
| thick hair | add enough density | thin ends that look weak |
If you want a fast daily routine, waves are your friend. They hide small mismatch and keep the look soft on camera.
Can I Tone My Clip-in Hair Extensions?
A lot of clip-in users ask this because the shade is close, but the tone is wrong. The hair looks too warm, too cool, or too flat. Toning can help, but the method and the goal matter.
You can tone clip-in hair extensions if they are real human hair. Toning works best for small tone changes, not for big color moves. You should avoid bleaching clip-in extensions because bleach can damage the cuticle, shorten lifespan, and create dryness and tangling.
Dive deeper
Toning is not the same as dyeing darker or bleaching lighter. Toning is about shifting undertone. It can remove brass, add warmth, or soften a harsh color. It is also one of the safer color steps when done correctly on human hair clip-ins.
First, confirm what the hair is
If your clip-ins are synthetic, most toners will not work. If your clip-ins are real human hair, toning can work, but the hair still needs care. Clip-ins may already be processed during manufacturing, especially lighter colors. That means the hair can be more sensitive to chemicals.
Second, set the goal: tone shift, not major color change
Toning is best when your shade is already close. Example: your natural hair looks cool beige, and the clip-ins look slightly warm. That is a good toning case. If the clip-ins are three levels darker, toning will not solve it.
Third, do a strand test every time
A strand test protects you from surprises. Some clip-in hair reacts faster than natural hair. Some turns too ashy. Some grabs unevenly if the hair has mixed processing history. A strand test also shows how long the toner should stay.
Fourth, protect the hair after toning
Any chemical step can reduce softness if aftercare is weak. After toning, you should rinse well, use a gentle mask, and let the hair dry fully. You should also reduce heat for a few days. This keeps the hair smooth and reduces tangles.
Use this toning safety table:
| Situation | Is toning a good idea? | Why |
|---|---|---|
| slight brass on blonde clip-ins | yes, with strand test | tone shift only |
| clip-ins are too dark | no | toner will not lift |
| clip-ins are already very light | caution | light hair may be pre-bleached |
| clip-ins feel dry already | caution | more processing can worsen it |
| synthetic clip-ins | no | product will not absorb well |
If your client wants a perfect match for events and photos, a small tone correction can be a smart move. Bleach is not.
How To Blend Clip-ins With Thin Hair Without Looking Obvious?
Thin hair is a common clip-in buyer profile. Thin hair also shows clips and shelves more easily. The fix is not “more hair.” The fix is smarter weight and smarter placement.
You can blend clip-ins with thin hair by using fewer wefts, keeping placement higher, choosing lighter density, and finishing with soft texture. Thin hair blends best when the ends match and the top has enough cover to hide tracks.
Dive deeper
Thin hair needs a conservative plan. If you overload thin hair, you get a bulky bottom and a flat top. You also risk discomfort because clips create pressure points when there is not enough supporting hair.
Use fewer pieces, but place them better
Many clip-in packs include multiple wefts. Thin hair often does not need all of them. You can focus on adding volume in the mid-back area instead of stacking at the nape. This keeps the look balanced.
Keep the lowest row higher than you think
Thin perimeter hair does not cover well. A very low row can show, especially in wind and in ponytails. A slightly higher first row often looks more natural because the natural hair can cover the join.
Choose clip-ins with flatter wefts and lighter weight
Thick weft bands can show under thin hair. Flatter wefts and lighter weight reduce the track look. This matters a lot for side pieces.
Use a finish style that hides small mismatch
Soft waves reduce visibility. Straight styles show the join. If the client wants straight, the client needs a better density match and sometimes a small blend trim.
Use this thin hair blending table:
| Thin hair issue | Why it happens | What works |
|---|---|---|
| clips show | not enough cover hair | higher placement + fewer wefts |
| bulky ends | too much extension density | lighter set + better end match |
| “two layers” look | shelf placement | stagger placement + waves |
| discomfort | clips pull | reduce weight and rows |
Thin hair can still look luxury with clip-ins, but the plan must be light and controlled.
How To Blend Clip-ins With Short Hair Ends?
Short natural ends are the hardest part of clip-in blending. The short ends create a clear boundary. Your goal is to turn that boundary into a transition.
You can blend clip-ins with short hair ends by reducing the length gap, using a blend cut if possible, placing clips to support the transition zone, and styling with soft texture. A very big length jump needs more styling effort.
Dive deeper
Short hair blending is a transition problem. If your natural hair is shoulder length and your clip-ins are waist length, the gap is big. The short ends will sit on top like a ledge unless the set is designed for transition.
Reduce the length gap when you can
A smaller gap blends faster. If you want very long hair for one event, waves will be more forgiving than straight. You can also choose a “layered” clip-in set that is designed to blend with shorter natural hair.
Place clips to support the join area
If all the weight is low, the short ends sit on top. If you add support a bit higher, the join becomes smoother. A staggered map also helps, because the hair does not start at one straight line.
Style the short ends into the extension hair
The short ends should not sit flat and separate. You can curl or bend the short ends so they travel into the longer hair. This is why “one quick curl” often makes a huge difference for short hair clip-in users.
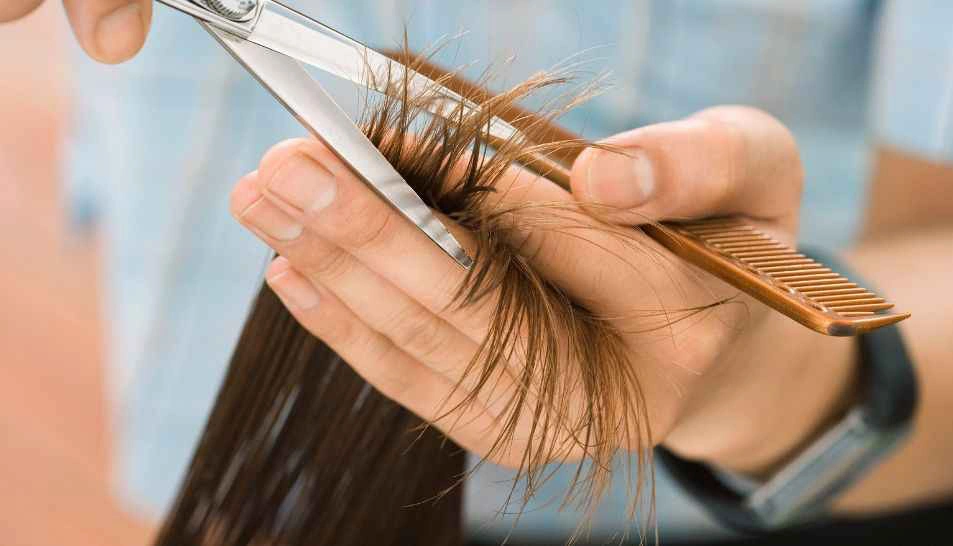
Consider a professional trim for frequent wearers
If clip-ins are used often, a small blend trim on the natural hair can help a lot. It does not need to remove length. It just needs to soften the harsh blunt edge that creates the step.
This table helps you choose a plan:
| Short hair case | Best finish | Why |
|---|---|---|
| blunt ends | soft bend or wave | hides the ledge |
| lots of layers | matched texture | reduces pop-out |
| big length jump | wave styling | straight will show line |
| frequent wear | small blend trim | long-term better result |
Short hair can blend with clip-ins, but it needs a transition strategy.
How To Make Clip-ins Look Natural In Photos And Video?
Many clip-ins look okay in the mirror, then look obvious on iPhone video. Cameras catch tone mismatch, track lines, and density shelves. Your client also moves more in real life than in the mirror.
You can make clip-ins look natural on camera by checking natural light, matching tone, reducing bulk at the bottom, and using a finish style that creates one consistent texture. A simple daylight check can prevent most “video regrets.”
Dive deeper
Camera blending is its own topic. Many clients buy clip-ins for weddings, trips, and content. That means the blend must survive flash, side light, and movement.
Natural light test is non-negotiable
Indoor light hides mismatch. A window test shows the truth. You should check the blend from the side and from the back. You should also check movement by shaking the hair lightly. If shelves appear, you adjust placement and weight.
Avoid shiny “plastic” finish
Some hair looks too shiny, especially under ring lights. A natural texture and a clean finish help. Too much serum can create stringy separation. Light smoothing works better than heavy oil.
Balance volume top to bottom
Many clip-in users overload the bottom and keep the top flat. That looks unnatural. You should support the mid section so the volume has a natural gradient.
Match hair direction and part
If the part is different, the hair can split and expose tracks. You should clip in to support the client’s real parting and direction.
Use this camera checklist:
| Camera issue | What causes it | Fix |
|---|---|---|
| track line shows | not enough cover hair | adjust sectioning + placement |
| color looks off | undertone mismatch | tone correction or different shade |
| ends look heavy | too much density | reduce wefts or choose lighter set |
| hair looks stringy | too much product | lighter finish routine |
If the client is buying clip-ins for content, the camera test should happen before the event day.
My opinion
Clip-in blending is mostly logic, not luck. Shade and tone match comes first. End density match comes second. Placement comes third. Styling comes last. If you follow that order, clip-ins look natural and feel easy.
If clip-ins keep looking obvious, the issue is usually a mismatch, not a “bad clip-in.” The fastest fix is often a lighter plan and a softer finish, not more hair.
FAQ
How to blend clip in extensions with natural hair if the ends look blunt?
You can soften the finish with a wave or bend, and you can reduce the density shelf by using fewer wefts. A small blend trim also helps frequent wearers.
Why do my clip-in extensions look thicker than my real hair?
This is an end density mismatch. You can use lighter density clip-ins, fewer pieces, or place them differently so the bottom does not look heavy.
Can I tone my clip-in hair extensions at home?
You can tone human hair clip-ins, but you should do a strand test. You should avoid bleach. If the goal is a small tone change, a gloss-style toner is usually safer.
Can clip-in extensions be dyed darker?
Human hair clip-ins can usually be dyed darker. You should still strand test and avoid heavy processing. Darkening is safer than lightening.
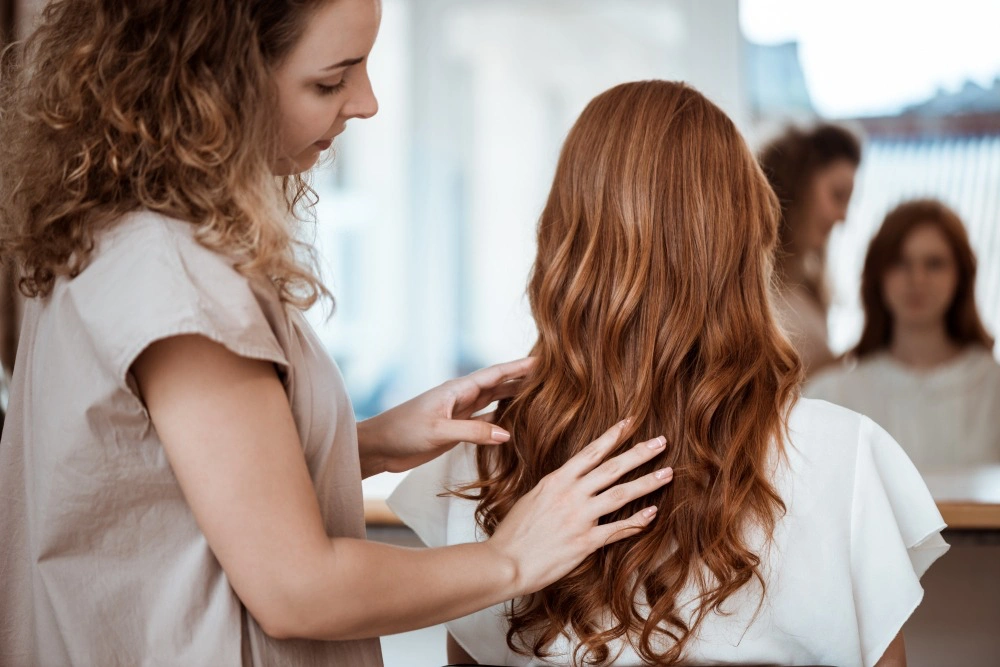
Do clip-ins blend better curled or straight?
Most clip-ins blend easier curled because texture hides small mismatch. Straight can still look perfect, but it needs a cleaner density match and a cleaner end shape.
How can I stop clips from showing on thin hair?
You can place clips higher, use fewer wefts, and leave more top hair out for coverage. You can also choose flatter wefts and lighter weight.
Conclusion
You can blend clip in extensions with natural hair by matching tone and end density first, then using smart placement and one consistent finish texture. Small adjustments often fix most “not blending” problems.