Genius Wefts are quickly becoming a favorite among hairstylists for their ultra-thin design, durability, and ease of customization. But how exactly do you install them to ensure a seamless and secure finish? Whether you’re a pro or just starting, this guide will walk you through the steps for a flawless Genius Weft install.
To install a Genius Weft, create a beaded foundation, sew the weft onto the beads, and ensure even weight distribution. The ultra-thin, customizable design makes installation simple and comfortable for clients.
Want to master the art of installing Genius Wefts? Keep reading for a step-by-step guide, tips for a perfect finish, and advice on maintaining client satisfaction.

What Makes Genius Wefts Unique for Installation?
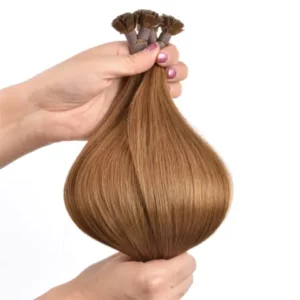
Before diving into the steps, it’s essential to understand why Genius Wefts are a stylist’s dream. Unlike other extensions, Genius Wefts are ultra-thin and don’t have return hair (the prickly short hairs that often cause discomfort). This makes them easier to work with, as they lie flat against the scalp and can be cut without fraying.
Key Installation Advantages:
Customizable Width: Genius Wefts can be cut to fit any head size or section without unraveling.
No Return Hair: Ensures a smooth and irritation-free experience for clients.
Lightweight Design: Perfect for distributing weight evenly, reducing tension on natural hair.

Step-by-Step Guide to Installing Genius Wefts
1. Prep the Client’s Hair
Start with clean, dry, and tangle-free hair.
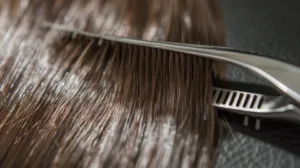
Use a tail comb to create neat, horizontal sections. Begin at the nape and work your way up.
Clip the upper sections of hair out of the way for a clear working area.
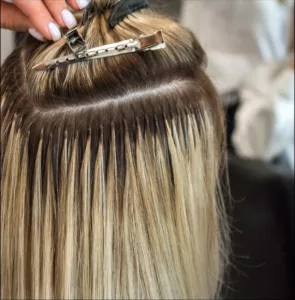
2. Create a Beaded Foundation
The beaded row forms the base for sewing the Genius Weft.
Take a small section of hair and thread it through a silicone-lined bead using a loop tool.
Position the bead close to the scalp but not too tight to avoid discomfort.
Secure the bead by clamping it with pliers.
Repeat this process across the row, ensuring even spacing for stability.
3. Attach the Genius Weft
Measure the weft against the sectioned row and cut it to size if needed.
Align the weft with the beaded foundation.
Use a curved sewing needle and nylon thread to sew the weft onto the beads.
Stitch securely but avoid overtightening to maintain flexibility and comfort.
4. Blend and Style
Once all rows are installed, release the upper sections of hair to cover the wefts.
Blend the extensions with the client’s natural hair using a flat iron, curling iron, or scissors for layering.
Pro Tips for Flawless Installation
1. Ensure Even Weight Distribution
Avoid overloading the beaded rows with too many wefts. Distribute the weight evenly to reduce tension on the natural hair.
2. Use High-Quality Tools
Invest in professional-grade beads, thread, and needles for a secure and long-lasting install.
3. Customize for Each Client
Tailor the number of rows and the placement of the wefts based on the client’s hair density and desired look.
4. Educate Clients on Aftercare
Provide detailed instructions on washing, styling, and maintaining the extensions to prolong their lifespan.
Frequently Asked Questions
1. How Long Does It Take to Install Genius Wefts?
The installation process typically takes 1–2 hours, depending on the number of rows required.
2. Can Genius Wefts Be Installed on Fine Hair?
Yes, their lightweight design makes them ideal for fine or fragile hair. Just ensure proper tension and spacing during installation.
3. How Often Should Clients Schedule Maintenance?
Clients should return every 6–8 weeks for maintenance, where the wefts can be adjusted or reinstalled as the natural hair grows.
4. Are Genius Wefts Suitable for Active Clients?
Absolutely! When installed securely, Genius Wefts hold up well during workouts and other physical activities.
5. Do Genius Wefts Work for Short Hair?
Yes, Genius Wefts can be blended seamlessly into short hair, though additional layering may be needed for a natural look.

Why Stylists Love Installing Genius Wefts
Genius Wefts are designed with both stylists and clients in mind. The ultra-thin, no-return-hair design makes installation quicker and more comfortable, while the durable construction ensures long-lasting results. Plus, their versatility allows stylists to create personalized looks for every client.
Conclusion
Installing Genius Wefts is a straightforward process that delivers stunning, natural-looking results. By following these steps and incorporating pro tips, you can ensure your clients leave your chair feeling confident and satisfied. Ready to elevate your extension game? Genius Wefts are here to transform your styling routine!
Hibiscus Hair Manufacturer has been focusing produce high quality genius weft hair extensions for 25 years and are an industry leader in this field. If you are interested and want to find a reliable hair extensions supplier, please check for our more details.
Genius Weft Hair Extension


