For both hair enthusiasts and professionals, keratin hair extensions, including types like flat tip, v tip, and u tip, hold undeniable allure. Their durability and potential for reuse present significant economic and aesthetic benefits. While these hot fusion extensions need a ‘move up’ after a few months, with appropriate care and rebonding, high-end extensions can last 1-2 years. Let’s delve into the art of reusing these keratin hair extensions.
Reusing Hot Fusion Keratin Hair Extensions: A Quick Guide
Assessment: Evaluate extensions for rebonding suitability.
Removal: Gently crush aged bonds, removing residual keratin.
Preparation: Cleanse, air-dry, trim, and measure new bonds.
Rebonding: Preheat iron, melt keratin, shape swiftly, and apply.
Installation: Section hair, use hot fusion, and blend seamlessly.
Post-Care: Wait 48 hours before washing; use sulfate-free products.
1

1
READ ON:
Reusing extensions is both cost-effective and eco-friendly. For stylists, it’s a value-added service; for clients, it’s about sustaining their preferred look without constant investment. The process may seem intricate, but its benefits are manifold. Below is a detailed, step-by-step guide tailored for seasoned professionals:
1
Professional Assessment and Client Expectations
1
Before any rebonding process begins, the hair extension technician assesses the condition of the client’s extensions and the state of the keratin bonds. This step ensures that the extensions are still in good shape for rebonding. Clients should be informed of the necessity of this procedure for the longevity of their extensions, the technician educates them about the process, answering questions and ensuring the client’s comfort.
1
Essential Tools for the Rebonding Procedure
1
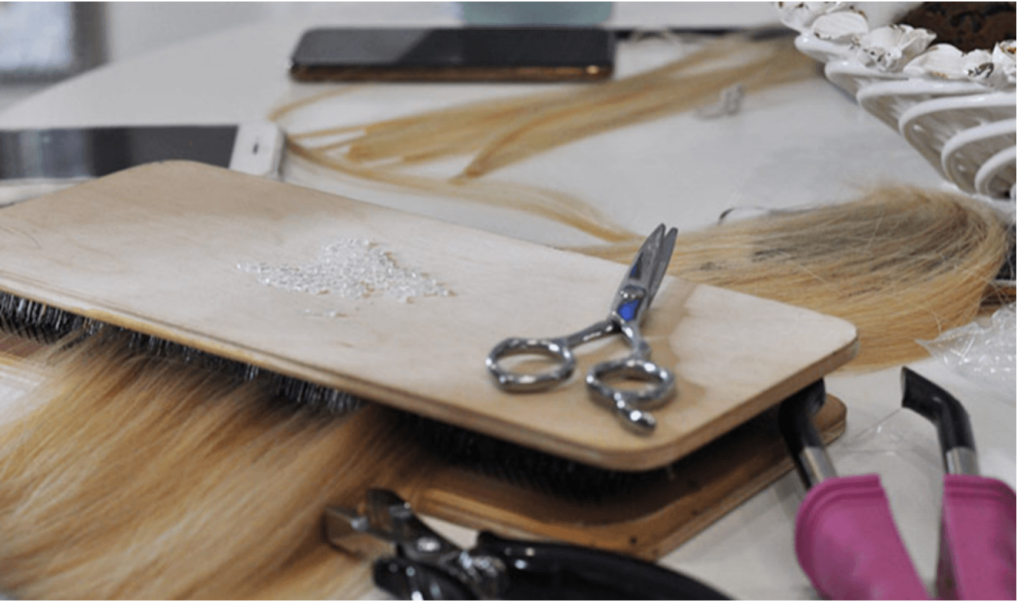
Pliers: Using the right hair extension pliers can easily crush the aged keratin bond.
Fusion Iron: A high-quality fusion iron ensures the keratin bonds are melted uniformly, preventing hair damage.
Scissors: Precision scissors allow for accurate trimming, crucial for prepping the extensions.
Re-Bonding Pliers: Specially designed for safe and effective keratin bond removal.
Italian Keratin Re-bonds: Sourced for their exceptional quality and compatibility with most hair types.
1
Pre-Rebonding Protocol
1
a. Cleansing:
Begin with a thorough cleanse using a premium sulfate-free shampoo to rid the extensions of any lingering product residues or environmental contaminants.
Ensure the extensions are devoid of conditioners or leave-in treatments, as these can interfere with the rebonding process.
b. Drying:
Extensions must be perfectly dry before proceeding. Opt for air drying when time permits, as this maintains the integrity of the extensions.
If using a hairdryer, exercise caution. Ensure heat isn’t directed at the bonding area, as this can weaken the existing bond.
1

1
Expert Removal of Existing Keratin Bond
1
a. Safe Crushing:
Client Comfort: Seat the client comfortably in the salon chair. This ensures they are relaxed, which in turn makes the removal process smoother.
Isolation: Carefully select a small section of the keratin hair extensions, ensuring not to tug or pull too hard to cause discomfort.
Bond Crushing: With the client’s hair sectioned off, employ the hair extension pliers and delicately crush the aged keratin bond. This is an art perfected over time and is crucial to ensure the hair isn’t damaged. Once the bond is softened, slide the extension down in the direction of the hair strand to remove it.
b. Residual Keratin:
Gentle Detangling: Systematically comb out the section where the old keratin was to remove any remnants. A fine-toothed comb is ideal, ensuring a gentle approach to prevent breakage.
Dealing with Stubborn Keratin: If bits of old keratin are stubborn and difficult to remove, consider applying a minimal amount of acetone. However, this must be done in a well-ventilated area, ensuring safety and comfort for both the stylist and the client.
1

1
Masterful Preparation for Rebonding
1
a. Trimming:
With precision scissors, gently trim the extension’s upper section. Retain a portion of the original bond as it provides a foundational grip for the new bond, ensuring a stronger hold and reducing the chances of shedding.
b. Re-bond Measurement:
Custom-fit the new keratin bond tip to match the extension’s end. Depending on the type and brand of the keratin bonds you’re using, you might need to cut or mold them to the desired size. Ensure you have the exact measurements so that the new bond fits seamlessly.Before applying heat, place the keratin bond at the end of the extension to visualize how it will look post-rebonding. This preemptive check guarantees that there are no overhanging edges or visible discrepancies.
1
Advanced Rebonding Technique
1
a. Fusion Iron Activation:
Optimal Settings: Before starting, consult the manufacturer’s guide on the fusion iron for the recommended temperature settings. Preheating the fusion iron to this optimal temperature ensures that the keratin melts efficiently without causing damage to the hair fibers.
Safety First: Always use the fusion iron on a heat-resistant surface and avoid direct contact with the skin to prevent burns.
b. Melting & Coating:
Consistent Movement: While using the fusion iron, maintain a steady hand movement to ensure the old keratin is uniformly melted. Avoid prolonged contact in one area, as it can cause overheating.
Layering: Ensure that you coat the hair evenly with the melted keratin, creating a consistent layer around the hair strand. This ensures a stronger bond.
c. Shaping:
Immediate Molding: After melting, immediately mold the keratin into its desired shape before it starts to cool and harden. The faster the shaping, the smoother the finish.
Sleek Finish: Aiming for a ‘stick tip’ form ensures that the bond is not only strong but also blends seamlessly with the rest of the hair.
d. Application:
Bonding Time: Once the keratin re-bond reaches a moldable consistency, it should be applied promptly to prevent premature hardening.
Alignment: Ensure the keratin bond aligns perfectly with the hair strand’s end for a seamless look.
e. Coating Mastery:
Thorough Integration: Ensure the old tip is entirely covered with freshly melted keratin, leaving no gaps. This fusion of the old with the new guarantees bond durability.
Smooth Finish: Using a rebonding tool or the back of the fusion iron, press the bond gently to achieve a smooth, flat finish.
f. Solidification:
Cooling Process: Allow the newly rebonded hair to cool naturally. Rushing this process can weaken the bond.
1

1
Testing
1
Gently tug on the bond to ensure it’s secure before moving on to the next section.
1
Expert Installation
1
Sectioning and Preparation:
Start by partitioning the client’s natural hair into manageable sections. This makes the installation process smoother and more organized.
Selection of Extensions:
Choose extensions that match the client’s hair in terms of color, texture, and density. This ensures a seamless blend.
Placement:
Attachments should begin from the nape of the neck, moving upwards. This method ensures that the extensions lay flat and are concealed by the client’s natural hair.
Hot Fusion Method:
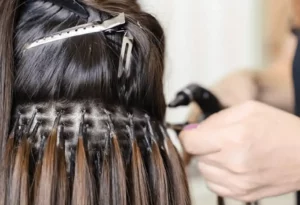
Bonding: Using the preheated fusion iron, melt the keratin bond of the extension onto small sections of the client’s natural hair.
Rolling: Once the keratin is melted, quickly roll it between your fingertips to secure the bond.
Spacing: Maintain uniform spacing between each bond to ensure even weight distribution and prevent stress on the client’s scalp.
Styling and Blending: After all the extensions are installed, trim and style them to blend seamlessly with the client’s natural hair.
1

1
Post-Rebonding Care
1
a. Rest Phase:
To ensure the bond’s integrity, advise clients to refrain from washing or mechanically stressing the extensions for at least 48 hours.
b. Maintenance:
Clients should be educated on the importance of using sulfate-free shampoos and conditioners. Additionally, direct them to avoid the bond area when applying conditioner to prevent potential slippage. Avoiding high-heat styling tools directly on the bonds.
1
The Benefits of Reusing Hair Extensions:
1
Economic Savings:
For clients, reusing extensions is economically efficient. With proper care and professional rebonding, there’s no need for regular reinvestments in brand-new extensions.
Technician Advancement:
Reusing hair extensions diversifies their skill set, and fosters client loyalty, this approach introduces a new revenue stream through rebonding services, solidifying their standing in the competitive market.
Industry Evolution:
The emphasis on reuse propels industry progression, compelling hair extension producers to enhance hair extension quality and pioneer advanced fabrication techniques. Concurrently, keratin suppliers are spurred to optimize their formulation methodologies.
Environmental Considerations:
Reusing hair extensions curbs the need for constant production, which conserves resources and diminishes our carbon footprint. Simultaneously, it reduces waste in the beauty industry, alleviating pressures on waste management and landfills.
Incorporating the practice of reusing hair extensions is a testament to the industry’s evolving ethos – one that recognizes beauty needn’t be ephemeral, but can be sustainable and lasting.
1

1
Conclusion
1
The art of reusing hot fusion keratin hair extensions epitomizes the beauty industry’s ability to marry aesthetics with sustainability. For professionals, mastering this nuanced skill offers a distinctive edge in a bustling market, while clients benefit from sustained beauty without the need for continual expenditure. As we embrace such eco-conscious techniques, we navigate towards a beauty industry that’s not just about fleeting trends, but one anchored in lasting value and care for our planet.


