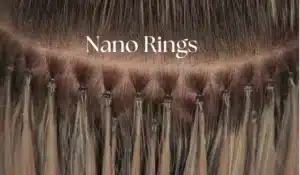
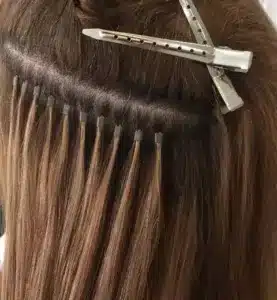
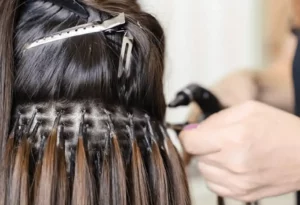
Nano ring hair extensions can completely transform a client’s look, but when it’s time to remove them, things can get tricky. Don’t stress! Whether you’re a pro hairstylist or tackling this at home, I’ll guide you through the whole process clearly and confidently, ensuring you avoid damaging natural hair in the process.
Nano ring hair extensions are removed using specialized nano ring removal pliers (nano bead removal tool) to gently open each bead, allowing the extension strand to slide out easily. Alternatively, flat-nosed jewelry pliers can be used if professional tools are unavailable.
That’s just the quick answer—keep reading, and I’ll cover every detail, including exactly how to remove nano bead extensions at home, even if you don’t have professional pliers handy.

How to Remove Nano Ring Hair Extensions Properly
Nano rings (also called nano beads) are incredibly popular due to their tiny size and discreet appearance. But let’s face it—when it’s time to remove them, things can get fiddly, especially if you haven’t done it often. The good news? With a few simple tips and the right tools, removal is straightforward and safe.
Here’s exactly how to do it like a pro:
Step-by-Step Guide to Remove Nano Ring Hair Extensions
Step 1: Prepare Your Workspace and Tools
Before starting, gather everything you need within easy reach:
- Nano ring removal pliers (also known as a nano bead removal tool)
- A fine-tooth comb or tail comb
- Hair clips for sectioning
- Detangling spray or nourishing hair oil (optional but highly recommended)
If you or your client misplaced the professional tool, don’t worry—I’ll also teach you how to remove nano rings without pliers later on.
Step 2: Clearly Section the Hair
Divide the hair into manageable sections. Trust me, clear sections save time and prevent frustration. Clip away sections you’re not working on and focus on one extension at a time.
Step 3: Locate the Nano Ring
Nano rings will be placed close to the scalp, often hidden within natural hair. Use your tail comb to isolate each bead clearly. You want to clearly see what you’re dealing with.
Step 4: Gently Open the Nano Ring
Take your nano bead removal tool, place the bead inside the pliers, and gently squeeze to loosen the bead. Be careful—gentleness is key here. Nano beads open easily with minimal pressure. Too much force can damage both the extension and the natural hair.
Step 5: Slide Out the Hair Extension
Once you’ve opened the nano bead enough, gently slide the extension down and out. If the bead feels stubborn, stop, squeeze slightly more, and apply a tiny amount of detangling spray or oil.
Step 6: Comb and Repeat
After removing each extension, comb through the section to remove any shed hairs or residue. Keep moving systematically until all nano rings are removed.
Congrats—you did it like a true pro!
How to Remove Nano Rings Without Pliers?
Imagine this scenario: Your client urgently needs their extensions out, or maybe you’re at home with no nano ring removal pliers in sight. Can you still remove nano bead extensions without professional tools? Absolutely, though you’ll need extra patience and caution.
Here’s how to handle this:
- Use small, flat jewelry pliers (make sure they’re smooth inside to prevent hair damage).
- Gently clamp the nano bead from each side, applying minimal pressure until it loosens.
- Once loosened, carefully slide the hair extension out.
A quick heads-up: although removing nano rings without proper pliers works, it’s not ideal. Professional nano ring removal pliers exist for a reason—they make things safer and easier.
What Tool is Used to Remove Nano Beads?
Hands-down, the best tool to remove nano bead extensions is a specialized nano bead removal tool or nano ring removal pliers. These pliers have a unique, smooth grip specifically designed to loosen nano beads safely, ensuring no damage occurs to your client’s natural hair.
But hey, if you’re stuck, jewelry pliers work in a pinch, as mentioned earlier. Just promise me you’ll get the proper tools soon, alright?
Can You Remove Nano Extensions at Home?
If your client asks you, “Can you remove nano extensions at home?” tell them confidently—yes, absolutely! In fact, nano beads are among the safest and easiest extensions to remove at home.
Still, it’s critical to educate them clearly on the correct process to avoid breakage or damage. Always advise them to use the right tools and take their time. Rushing this process is never a good idea.
Here’s how to confidently guide your clients:
- Use nano bead removal pliers or similar safe tools.
- Keep the hair neatly sectioned.
- Apply a detangling solution to ease any stubborn strands.
- Comb each section thoroughly afterward to prevent knots.
How to Take Out Nano Bead Extensions at Home (Safely!)
If your clients still want to DIY at home, here are some additional safety tips for removing nano bead hair extensions at home without issues:
- Work slowly, especially around delicate areas.
- Never tug or pull aggressively—if it’s stubborn, use detangler or oil first.
- After removal, instruct clients to gently shampoo and deep condition their hair to nourish and restore natural moisture.
Extra Tips and Aftercare Advice
A Few More Expert Tips:
- Oil or Detangler is Your Friend
If nano beads seem stuck, applying a small drop of hair oil or detangler helps immensely. Hair slips out easily with minimal tugging. - Keep Tools Clean
Always disinfect your tools after each use to prevent bacteria build-up, especially important for salon hygiene. - Don’t Reuse Nano Beads
While nano rings can technically be reused, it’s far better to use new beads for every installation. Fresh beads grip better, making subsequent removals easy and damage-free.
Post-Removal Hair Care Tips:
Once the nano ring extensions are out, instruct clients on caring for their natural hair to maintain its health:
- Shampoo gently and thoroughly to remove any buildup.
- Follow with a deeply nourishing conditioner or mask.
- Wait at least 48 hours before reinstalling new extensions to allow the scalp to rest.
Your clients will appreciate these extra tips, building trust and long-term loyalty.
Wrapping Up: You’ve Got This!
Removing nano ring hair extensions doesn’t need to be stressful or complicated. By following this detailed guide, you’ll confidently answer every question—from “how to remove nano bead extensions” to “how to remove nano bead extensions at home.”
Armed with the right knowledge and tools, you’re not just removing extensions—you’re protecting your clients’ hair and solidifying your reputation as a trusted professional.
Now, you’re officially a nano ring removal expert. Nice job!


