Ever felt unsure about the safest way to remove I tip hair extensions without damaging your client’s hair or your professional reputation? You’re definitely not alone—I’ve been there, too. Today, I’ll guide you step-by-step through the most reliable, stress-free technique to master I tip extension removal confidently and professionally.
To safely remove I tip extensions, use specialized hair extension pliers to gently open each micro-bead, carefully slide out each extension strand without pulling, and meticulously comb away any residual buildup to preserve the integrity of your client’s natural hair.
Stick around, because I’m about to share an in-depth, foolproof guide filled with professional insights and practical tips to make your I tip extension removal smooth and hassle-free.

How to Remove I Tip Extensions: Step-by-Step
Removing I tip extensions correctly might sound simple—but the details really count. Here’s the most thorough method I swear by to safely remove I tip hair extensions every time:
Step 1: Section and Prep Hair Thoroughly
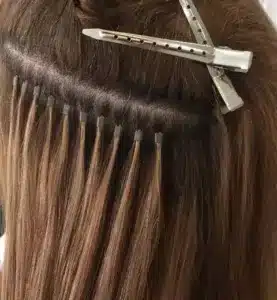
Always begin by clearly sectioning your client’s hair into neat, manageable areas using professional-grade clips. This not only saves time but ensures accuracy and prevents accidental tangling or hair damage during removal.
Step 2: Identify and Assess the Micro-Beads
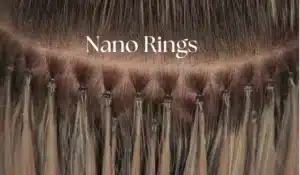
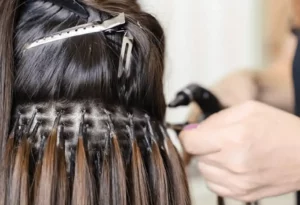
Carefully inspect each section to locate the micro-beads used for attachment. Micro-beads are small metal rings clamped securely around both the natural hair and extension strand. Evaluate their condition—damaged beads may require extra care.
Step 3: Gently Open the Micro-Beads
With professional micro-bead removal pliers, gently apply pressure in the reverse direction of the bead’s initial clamping. Patience is key here. The goal is to open the bead gently, not to crush it. Applying too much pressure can cause discomfort or hair damage.
Step 4: Slide Out the Extensions Carefully
Once the bead is sufficiently loosened, carefully slide the I tip extension out. Hold your client’s natural hair firmly at the roots to prevent tugging. If an extension resists removal, avoid pulling; instead, reapply gentle pressure to open the bead further and use a small drop of hair-friendly oil to help slide the extension out easily.
Step 5: Remove Residual Buildup
After extracting the extensions, use a fine-tooth comb to carefully remove any residual adhesive or buildup. Gentle strokes are essential—aggressive combing can break or damage hair strands. Finish by shampooing the hair gently with a nourishing, sulfate-free shampoo to cleanse thoroughly.
More Pro Tips for Seamless I Tip Extension Removal
Why Choosing the Right Tools Matters
Using specialized hair extension pliers designed specifically for micro-bead extensions isn’t optional—it’s crucial. Proper tools protect both your client’s hair and your salon’s professional reputation by preventing accidental damage.
Tackling Stubborn Beads Like a Pro
Encountering stubborn beads is common, but there’s no need to panic. Apply gentle, steady pressure, add a bit more oil or adhesive remover if needed, and give it a moment to loosen. Persistence, not force, ensures safety and success.
Protecting Natural Hair
Always prioritize your client’s comfort and hair health. Consistent gentleness and patience are essential for protecting the hair’s integrity. If your client feels any discomfort, pause and reassess your technique.
Essential Aftercare Advice
Always recommend deep conditioning treatments or hydrating masks post-removal to restore moisture, strength, and overall hair health. Educating your client on aftercare significantly boosts their trust and loyalty.

FAQs About Removing I Tip Extensions
Q1: Can clients safely remove I tip extensions themselves at home?
Technically, yes—but professional removal significantly reduces the risk of hair damage or breakage. DIY removal is not usually recommended.
Q2: How long does professional I tip extension removal typically take?
On average, expect the process to take around 30–60 minutes, depending on the volume of extensions and their condition.
Q3: Can I tip extensions be reused after removal?
Yes! High-quality I tip extensions are designed for reuse. Ensure they’re properly cleaned and maintained after each removal.
Q4: Is the removal process painful for clients?
Absolutely not, when done professionally. Proper technique, gentle handling, and patience ensure a pain-free experience.
Q5: Can micro-beads damage natural hair?
Only if incorrectly applied or improperly removed. Using professional techniques, quality beads, and careful removal prevents potential damage.
Q6: What should I do if residue remains after removing the extensions?
Apply a small amount of residue remover or mild clarifying shampoo, let it sit briefly, then gently comb or wash it out.
Q7: How often should I tip extensions be removed and repositioned?
Ideally, every 6–8 weeks to maintain optimal hair health and extension integrity.
Q8: What’s the best type of pliers for micro-bead removal?
Choose pliers specifically designed for micro-bead hair extensions with a precision tip to safely open beads without damaging hair or extensions.

Conclusion
Removing I tip extensions is easy when approached with care, patience, and the right techniques and tools. By following this detailed guide, you’ll protect your client’s hair, boost your salon’s reputation, and guarantee happy, loyal clients every single visit.
where to buy i tip hair extensions
Hibiscus Hair Manufacturer has been dedicated to producing high-quality I tip hair extensions for 25 years and is a recognized leader in the industry. If you are interested in finding a reliable hair extensions supplier and wholesale for your brand, please visit our website for more information:


