Struggling to make long extensions look natural on short hair? This can frustrate clients and ruin your reputation. With the right techniques, you can create a seamless, undetectable transition.
Yes, you can perfectly blend long hair extensions with short hair. The secret lies in three key steps: choosing the right length and weight, meticulously planning the placement, and finishing with a strategic blending cut to connect the natural hair with the extensions seamlessly.

Going from a short bob to long, flowing locks is one of the most powerful transformations in our industry. It’s a service that can bring so much joy to a client. However, it’s also one of the easiest to get wrong. After 28 years of manufacturing high-end extensions, I’ve seen firsthand what works and what doesn’t. A poor blend is immediately obvious and undermines the quality of even the best full-cuticle hair. Let’s walk through the professional process to ensure you nail this transformation every time and leave your clients feeling amazing.
How Do You Choose the Right Length and Weight for a Seamless Blend?
Choosing the wrong extensions can create a bulky, “mushroom” effect or visible wefts. This is a common and costly mistake that leaves you with an unhappy client and wasted product.
For short hair, avoid drastic length differences. A good rule is to choose extensions no more than twice the length of the natural hair. You must also select a higher weight (more grams) to match the density of a short, blunt cut and prevent the ends from looking thin.

In our factory, we produce millions of extensions a month, and I can tell you that the specifications are everything. For a short-to-long transformation, getting the length and weight right from the start is about 50% of the job. It sets the foundation for a natural look. I remember a new partner salon trying to put 24-inch extensions on a sharp, jaw-length bob. The result was a visible “shelf” where the bob ended and the long, thin extensions began. It was a learning moment for everyone.
The Length Rule
The biggest mistake is going too long, too fast. If a client’s hair is at their chin, aiming for waist-length hair is a recipe for a bad blend. The gap is just too large to bridge naturally. You need to create a gradual transition. Here’s a simple guide we teach:
| Natural Hair Length | Recommended Max Extension Length |
|---|---|
| Chin-Length (Bob) | 14-16 inches (Shoulder Blade) |
| Shoulder-Length | 18-20 inches (Mid-Back) |
| Collarbone-Length | 20-22 inches (Lower-Back) |
This isn’t a strict law, but it’s a professional guideline that ensures the final blending cut has enough hair to work with to create connecting layers.
Why Weight Matters
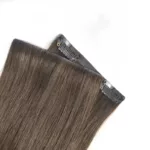
Short hair, especially a blunt cut, is dense. To blend this, you need extensions that are equally dense from top to bottom. This is where hair quality and type come into play. For this kind of work, we always recommend double-drawn hair. This means the shorter hairs have been removed, so the bundle is thick all the way to the ends. Using single-drawn hair will result in wispy ends that don’t match the solid weight line of the client’s natural hair. You’ll need more grams of hair than you would for a client who already has long hair. For a full head on short hair, expect to use 150-250 grams to achieve a believable density.
What’s the Best Way to Plan the Installation on Short Hair?
Placing wefts or bonds randomly on short hair is a recipe for disaster. You’ll end up with gaps, bumps, and a very unnatural “shelf” where the short hair stops.
Before you touch the client’s hair, map out your placement. A brick-lay pattern is your best friend. This means staggering the extensions so the seams don’t line up. Place them closer together near the bottom to build weight and hide the blunt lines of the natural hair.

In our training programs, we always start with a mannequin head and a dry-erase marker. We have stylists draw their plan before they even pick up a piece of hair. It might feel like a slow start, but a five-minute sketch can save you an hour of corrections later. It’s the difference between an amateur application and a professional installation. The goal is to create a hidden internal structure that supports the final look.
Creating Your Placement Map
Think like an architect building a foundation. The lowest rows of extensions are the most critical for hiding the blunt line of a bob.
- Start Low: Your first row should be placed very low, near the nape of the neck. This begins to build the new, longer perimeter.
- Stay Below the Occipital Bone: The area below the occipital bone (the prominent bone at the back of the skull) is your main “blending zone.” Pack your extensions a bit closer together here to build the necessary weight.
- Angle for Volume: As you move up the head, you can slightly angle the wefts to build volume and help the layers fall more naturally.
The “Brick-Lay” Technique and Covering the Evidence
The brick-lay pattern is essential. If you stack wefts directly on top of each other, you create a visible line. By staggering them like bricks in a wall, you create a diffused, seamless curtain of hair.
Most importantly, you must leave enough of the client’s own hair out to cover the top and sides. A common error is placing extensions too high on the head or too close to the hairline. Always leave a “veil” of at least one inch of the client’s natural hair around the entire perimeter (hairline and part line). This ensures that when the client wears their hair up, no bonds or wefts are visible.
Is Cutting the Extensions After Installation Really Necessary?
You’ve installed beautiful, high-quality extensions, but something still looks disconnected. Skipping the final cut leaves a visible line, undermining all your hard work and investment.
Yes, cutting is absolutely essential. This isn’t about removing length; it’s about blending. After installation, you must point-cut and slide-cut layers into the extensions to create a seamless flow from the client’s short hair into the new length. This is the final step that makes it look real.

I once worked with a master stylist in Milan who called this final step “making the hair talk to each other.” You’re not just trimming ends; you are creating a conversation between the short hair and the long hair so they become one. It completely changed my perspective. You can have the best hair in the world—like our full cuticle extensions—but without this final artistic touch, they will never look completely natural on short hair.
The Art of “Blending”
The goal of the blending cut is to erase any hard lines. You are creating new, soft layers within the extensions that connect to the client’s shortest layers.
| Technique | Purpose | Best Tool |
|---|---|---|
| Point Cutting | Softens the ends and creates a textured, piecey look. | Sharp Shears |
| Slide Cutting | Creates long, seamless layers that connect lengths. | Sharp Shears |
| Thinning Shears | Use sparingly to soften the “shelf” of the bob. | Blending Shears |
Start by combing all the hair together. Identify the line where the natural hair ends. This is your target. Using point cutting and slide cutting, you will soften this line and create a “waterfall” effect where the hair flows down seamlessly. Be very careful with thinning shears; overusing them can make the extensions look stringy. They should only be used on the very ends of the client’s natural hair to soften a blunt line.
Final Styling for a Perfect Finish
Once the cut is complete, styling is your final tool for a perfect blend. Adding soft waves or curls is the best way to marry the layers together. The movement in the hair makes it almost impossible to tell where the natural hair ends and the extensions begin. Straight styles are less forgiving, so if your client prefers to wear their hair straight, your blending cut has to be absolutely perfect. Advise clients that a soft wave will always provide the most natural-looking result.
Conclusion
Mastering short-to-long blends comes down to three things: smart selection, strategic planning, and a skilled blending cut. Get these steps right, and you’ll deliver flawless transformations every time.