Hair extensions can look simple from the outside. Still, many buyers and salon clients do not really know what keeps them in place or why one method feels so different from another.
Hair extensions attach in several ways, including clips, wire support, adhesive tabs, keratin bonds, beads, and sewn or row-based systems. The best attachment method depends on hair type, wear time, maintenance needs, and whether the client wants temporary or salon-installed extensions.
When I explain hair extension methods, I do not start with brand names or trends. I start with the attachment system itself. Once I understand how a method attaches, I can judge how it wears, how it moves, how it is removed, and which client it suits best.
What Does It Mean for Hair Extensions to Attach?
Many readers hear extension names all the time. Still, the real question is much simpler. They want to know what physically holds the extension to real hair.
Hair extensions attach when the extension hair is connected to natural hair through a support method such as clips, adhesive, keratin, beads, thread, or wire. Each method creates a different wear cycle, comfort level, and maintenance plan.
When I use the word attach, I mean the exact point where the extension stays connected to the client’s natural hair or sits securely on the head. This point matters more than many people think. It affects the look, the feel, the upkeep, and the lifespan of the service. If I do not understand the attachment system, I cannot judge the method fairly.
Some attachments are direct. A tape-in tab sticks to a small section of natural hair. A keratin tip bond wraps around the natural hair strand. A bead holds the extension and natural hair together with pressure. A sewn method attaches the extension hair to a built row. These are all direct attachment systems. They stay in the hair for a wear cycle and need salon maintenance.
Some attachments are indirect. A halo extension does not attach directly to the natural hair strand. It sits on the head with a hidden wire, and the natural hair covers it. Clip-ins are also different from adhesive or bonded systems because the client can remove them at any time. They attach securely for wear, but not in the same long-term way.
This is why I think attachment method should always come before sales language. A client may ask about volume, comfort, or long wear. I still begin with the same question: what is actually holding the extension in place?
| Attachment question | What I look at | Why it matters |
|---|---|---|
| Is it attached to the hair or just supported on the head? | Direct vs indirect hold | Changes wear type |
| Does it use glue, tape, bead, thread, or clip? | Core attachment material | Changes maintenance |
| Is it removable at home? | Temporary vs salon-installed | Changes user routine |
| Does it need a stylist to install and remove? | Skill level required | Changes service model |
Once I explain attachment this way, the rest of the article becomes much easier for salon owners, stylists, and wholesale buyers to understand.
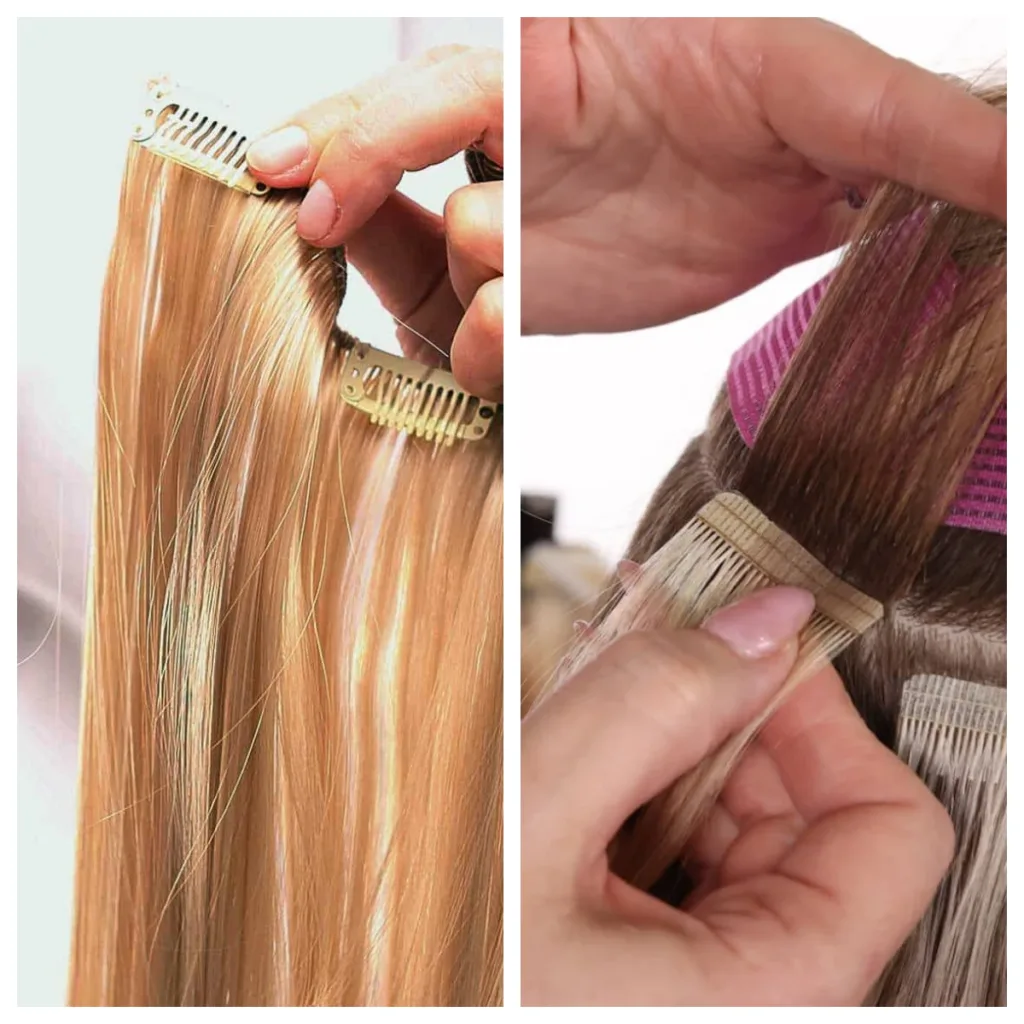
How Do Clip-In and Halo Extensions Attach?
Many clients want more hair without salon commitment. That is where removable methods usually enter the conversation.
Clip-in extensions attach with small pressure clips that open and close onto sections of natural hair. Halo extensions attach with a hidden wire that rests on the head while the natural hair covers the top.
When I explain temporary methods, I usually start with clip-ins and halo hair because these are the easiest ways for most readers to picture. They are also very important in retail and e-commerce because they do not require a professional install in the same way as tape-ins, keratin tips, or wefts.
Clip-in extensions work through small built-in clips. The client sections the hair, opens the clips, places the extension near the root, and snaps the clips shut. The clips grip the natural hair and hold the extension in place for daily wear. This method is popular because it is flexible. The client can add volume or length in minutes, then remove the hair again at night. It is temporary, but that does not mean it is low quality. A premium clip-in made from full cuticle hair can still be a very strong product.
Halo extensions work differently. They do not clip or bond into the hair. Instead, the extension sits on the head with a clear or nearly invisible wire. The client places the halo, then pulls her own hair over the wire so the support disappears. This creates a fast and low-commitment wear system. Many clients like halo hair because it feels simple, especially when they want occasional styling without attachment stress on the natural hair.
These methods are best for clients who want control, easy removal, and no salon maintenance cycle. They are not the same as semi-permanent or bonded methods, but they fill an important need.
| Method | How it attaches | Main advantage | Main limit |
|---|---|---|---|
| Clip-in | Small clips grip natural hair | Fast and flexible | Not for continuous wear |
| Halo | Hidden wire supports the piece | Very easy to wear | Less secure than installed methods |
When I talk with salon buyers, I often point out that removable methods should not be treated like lower-tier products. They simply solve a different wearing need.

How Do Tape-In Extensions Attach?
Tape-ins look smooth and flat when done well. Still, many people do not fully understand what holds them in place.
Tape-in extensions attach with thin adhesive tabs. A small section of natural hair is placed between two tabs, and the adhesive seals around that hair like a flat sandwich.
Tape-in extensions are one of the clearest examples of adhesive attachment. I think they are also one of the most misunderstood methods because clients often see the finished result but not the logic behind it. The key point is simple: tape-ins do not hang from a single point. They stay in place because two adhesive tabs press together with the client’s natural hair in the middle.
This flat sandwich shape is what gives tape-ins their reputation for lying close to the scalp. It is also why preparation matters so much. If the root area is oily, coated, damp, or poorly cleaned, the adhesive will not hold as well as it should. So when I talk about how tape-ins attach, I never stop at “they use tape.” I also explain that the bond depends on clean hair, even pressure, and correct placement.
Tape-ins are usually considered a semi-permanent or salon-installed method. They stay in for a wear cycle and then need to be removed, retaped, and reapplied. That does not mean they are weak. It only means they work on a maintenance schedule. Many clients like them because the install is fast, the result is flat, and the rows can look very clean.
From a B2B and salon angle, tape quality matters as much as hair quality. The hair may be beautiful, but if the tape tabs are inconsistent, the service becomes less predictable. That is why professional buyers often look beyond softness and color. They also look at adhesive stability, tab construction, and replacement tape performance.
| Tape-in factor | What it does | Why I care |
|---|---|---|
| Adhesive tabs | Hold the extension to natural hair | Core attachment system |
| Clean root prep | Supports strong bond | Reduces slipping |
| Flat sandwich shape | Keeps result close to scalp | Improves comfort and look |
| Retaping system | Allows reuse and maintenance | Increases service value |
So when someone asks how tape-ins attach, my answer is direct: they attach through adhesive tabs that seal around a small section of natural hair, and the quality of both the tape and the application decides how well that attachment performs.
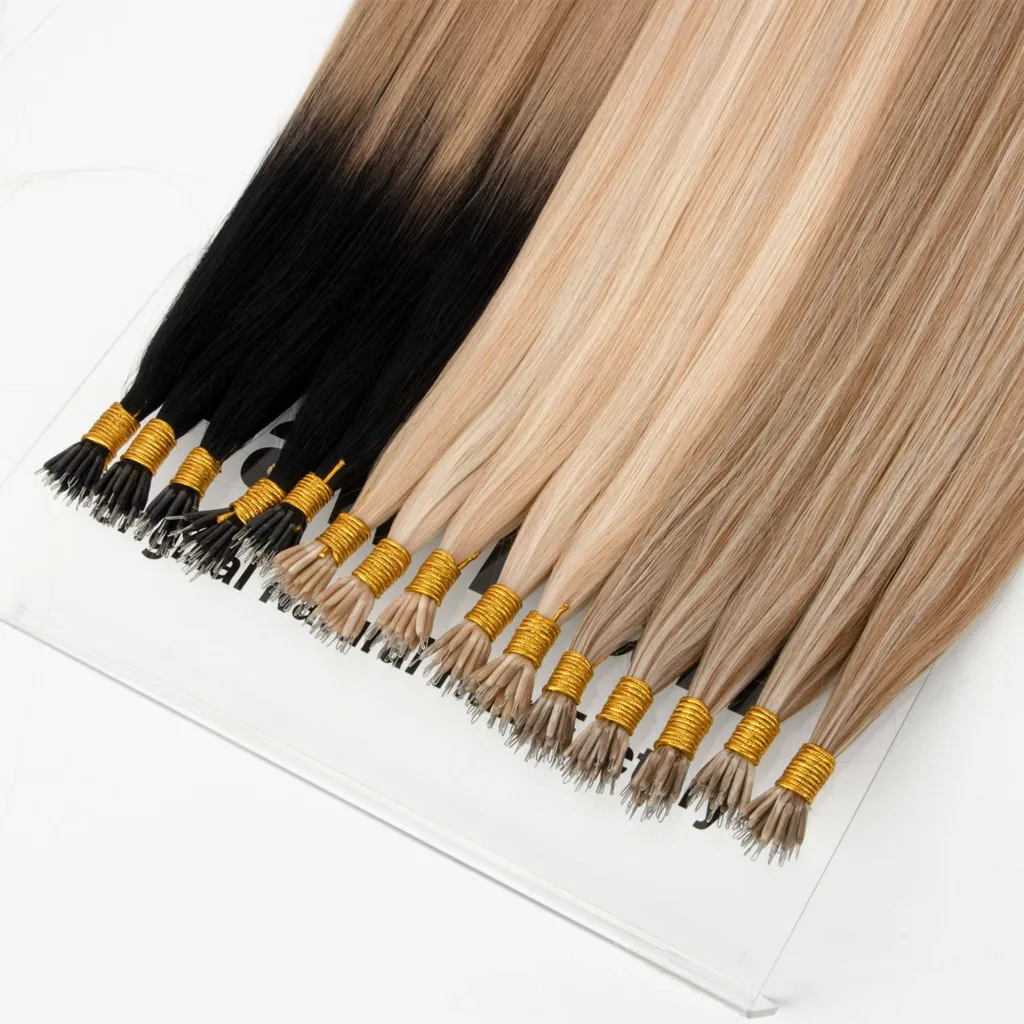
How Do Keratin Tip and U Tip Extensions Attach?
Bonded methods often look very natural. Still, many readers do not know what the bond is or how it connects the extension to the hair.
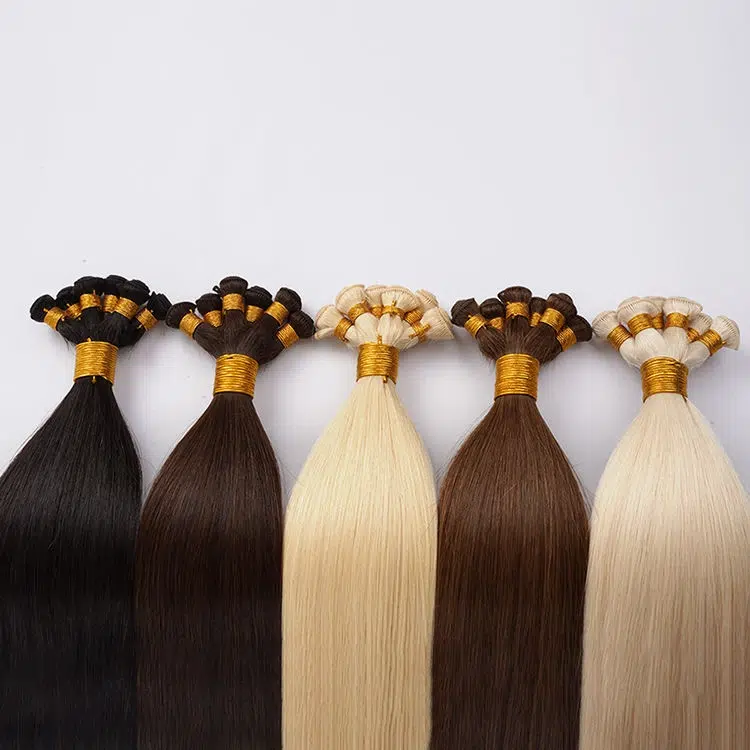
Keratin tip and U tip extensions attach by using keratin bond material that is heated, softened, and shaped around a section of natural hair. This creates an individual bonded attachment point.
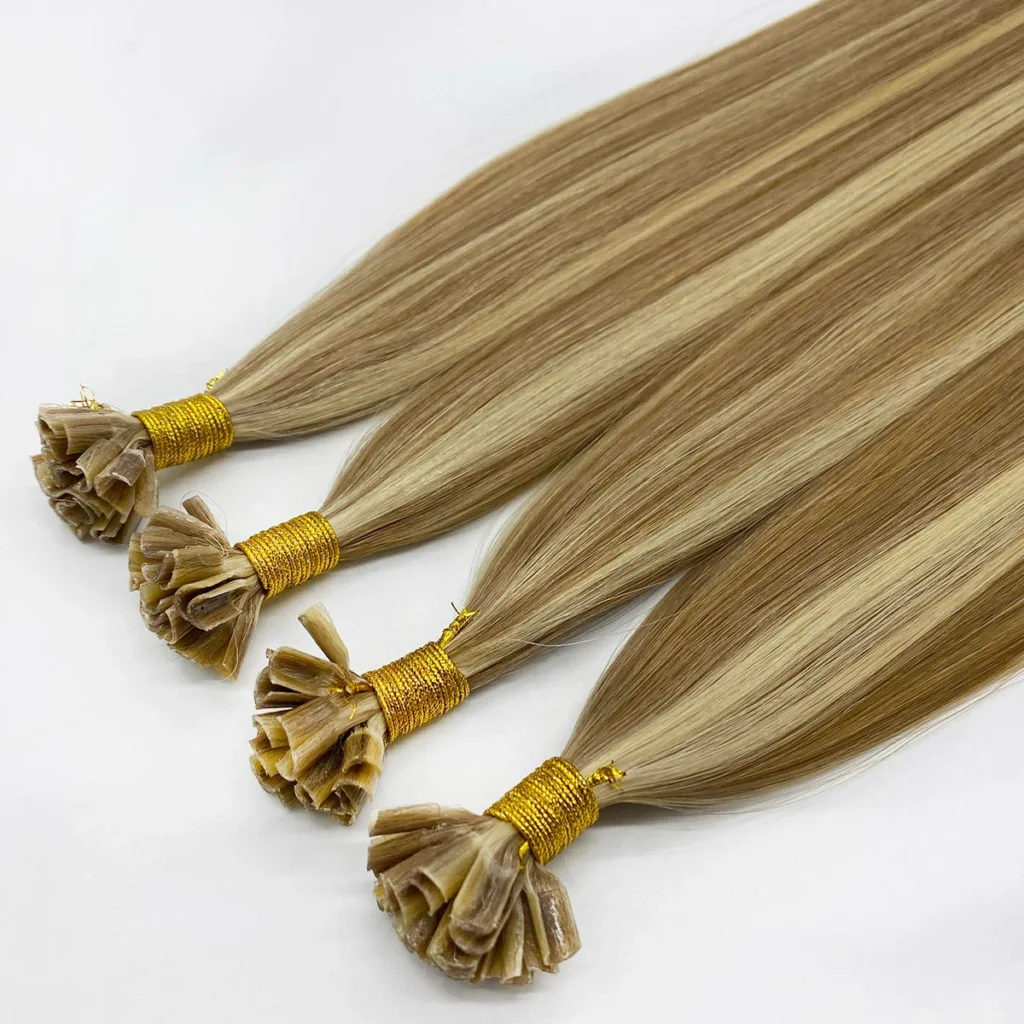
When I explain bonded methods, I usually begin with one important point: this is not the same as glue in the casual sense many clients imagine. Keratin tip and U tip methods use bond material designed for extension application. The extension strand comes with a pre-formed tip, and that tip is attached to the natural hair through controlled heat and shaping.
In practical salon work, the stylist sections the natural hair, places the extension strand, softens the keratin bond with a heat tool, and rolls or shapes the bond around the natural hair. Once it cools, the bond becomes the attachment point. This creates a strand-by-strand system, which is one reason clients often describe keratin methods as natural in movement and blending.
U tip and keratin tip methods share the same basic idea. The main difference is usually bond shape and application preference. In both cases, the bond is what holds the extension to the client’s hair. This means bond quality, strand weight, section balance, and placement are all very important.
I see bonded methods as salon-only services because they require control and training. The result can be beautiful, but the method is not forgiving if the stylist rushes the bond or mismatches the strand to the client’s hair.
From a manufacturing view, bond consistency matters a lot. If one tip melts cleanly and another behaves differently, the salon loses control over the service. That is why professional buyers often want stable bond size, predictable melt quality, and consistent strand weight.
| Bonded method factor | What it affects | Why it matters |
|---|---|---|
| Keratin tip material | The actual hold point | Core security |
| Heat control | How well the bond forms | Impacts retention |
| Strand-to-section balance | Load on natural hair | Impacts comfort and safety |
| Bond placement | Movement and visibility | Impacts wear and look |
So when I answer how keratin and U tip extensions attach, I say they attach through heated keratin bond points that wrap around the natural hair and create individual, long-wear attachment points.
How Do I Tip, Micro Bead, and Microlink Extensions Attach?
Many clients ask for methods without glue or heat. That is where bead-based systems become important.
I tip, micro bead, and microlink extensions attach with small beads or rings. The natural hair and the extension strand are placed together inside the bead, and the bead is clamped to hold both in place.
Bead-based methods are popular because they avoid adhesive tabs and heated keratin bonds. I think that is why many readers ask about them in a very direct way. They want to know, if there is no tape and no glue, what is actually holding the extension in place? The answer is the bead itself.
In an I tip or microlink install, the extension strand has a firm tip at the top. The stylist pulls a small section of natural hair through a bead, adds the extension strand, and then clamps the bead closed. Once the bead is compressed, it becomes the attachment point. The hold comes from pressure and grip, not from adhesive or bond material.
Micro bead and microlink are often used as broad terms in the market. In practical use, the system is the same basic idea: a bead secures the extension strand to the natural hair. Some beads are lined, some are not, and some suit finer or softer hair better than others. That means attachment quality depends not only on the bead itself, but also on bead size, strand weight, clamping method, and hair type.
I think bead-based methods are attractive for salons because they offer removability, flexibility, and no glue application. Still, they are not automatically easier. If the bead size is wrong or the section is poorly chosen, retention suffers. So while the attachment mechanism is simple to describe, the execution still needs skill.
| Bead-based factor | What it does | Why I check it |
|---|---|---|
| Bead or ring | Holds hair and extension together | Main attachment point |
| Bead size | Controls grip | Must suit hair type |
| Clamping pressure | Secures the attachment | Affects retention |
| Strand weight | Balances tension | Protects natural hair |
So when I explain how I tip, micro bead, and microlink extensions attach, I keep it simple: they attach by securing the extension and natural hair together inside a small bead that is closed to hold them in place.
How Do Sew-In, Hand-Tied Weft, Genius Weft, and Machine Weft Extensions Attach?
Weft methods are very common in salons. Still, many readers do not realize that not all wefts attach in exactly the same way.
Sew-in and weft extensions attach to a built foundation, such as a braid or beaded row. The extension hair is then sewn or secured onto that structure rather than attached strand by strand.
When I explain weft methods, I start with one key idea: the weft itself is not always the attachment system. The weft is the format of the extension hair. The real attachment system is the foundation it is installed onto. This is where many beginners get confused.
In a classic sew-in, the stylist first creates a braid base. Then the extension weft is sewn onto that base with thread. In beaded row methods, the stylist creates a row with beads and then sews or secures the weft onto that row. In both cases, the attachment is indirect compared with strand-by-strand methods. The extension hair is connected to a row structure, and that structure is what connects to the client’s natural hair.
Hand-tied wefts, genius wefts, and machine wefts are different product formats, but they often use a similar row-based installation logic. The main difference is the construction of the weft itself. Hand-tied wefts are known for a lighter seam. Genius wefts are designed to stay thin and flexible while still being cut-friendly. Machine wefts are often stronger and fuller in construction. Still, all of them need a professional foundation and placement plan.
I think row-based methods are very strong for salon maintenance because they can be reused and moved up in a structured way. They are not “better” than bonded or taped methods by default. They simply use a different attachment system and suit different clients.
| Weft method factor | What it means | Why it matters |
|---|---|---|
| Foundation row or braid | Main base of attachment | Supports the weft |
| Weft format | Hair construction type | Changes seam feel and use |
| Sewing or securing step | Connects weft to base | Final hold point |
| Move-up system | Maintains result over time | Supports reuse |
So when I answer how sew-in and weft extensions attach, I say they attach by building a row or braid foundation first and then sewing or securing the weft hair onto that base.
What Keeps Hair Extensions Secure?
Many clients ask a deeper version of the same question. They do not only want to know how the method attaches. They want to know why it stays in place.
Hair extensions stay secure because the attachment point is supported by the right material, correct sectioning, proper application, and a maintenance routine that suits the method. Security comes from both the method and the way it is used.
I think this is one of the most useful sections for salon professionals because attachment and security are related, but they are not identical. A method can have a strong attachment design and still perform badly if the install is poor. On the other hand, a method can seem simple and still perform very well when the details are handled correctly.
The first thing that keeps extensions secure is the correct attachment material. Tape-ins need stable adhesive. Keratin tips need reliable bond material. Bead-based methods need the right bead type and size. Weft methods need a balanced row and secure stitching. Removable methods need clips or wire systems that are built properly. So product construction matters a lot.
The second thing is correct matching. A strong extension can still fail if it is not matched to the client’s natural hair. Fine hair, oily roots, fragile hair, and very dense hair all respond differently to each attachment system. I always see better results when the stylist chooses the method to fit the client instead of forcing one system onto every head.
The third thing is application quality. Clean sectioning, correct tension, good pressure, neat placement, and proper balance all affect security. This is why two salons can use the same product and still get different results.
The fourth thing is maintenance. Extensions do not stay secure only because they were installed well on day one. They stay secure because the client follows the right routine and returns on time for maintenance.
| What keeps extensions secure | Why it matters |
|---|---|
| Stable attachment material | Creates a reliable hold point |
| Correct method-to-hair match | Reduces stress and slipping |
| Strong technical application | Improves durability |
| Good home care | Protects the attachment area |
| Timely maintenance | Prevents avoidable problems |
So when I answer what keeps hair extensions secure, I do not point to one magic factor. I explain that the method, the product, the stylist, and the client routine all work together.
What Is the Best Way to Attach Hair Extensions?
Many readers ask for one winner. Still, the best attachment method changes with the client, the hair, and the service goal.
The best way to attach hair extensions is the method that fits the client’s hair type, maintenance level, wear plan, and styling goal. Clip-in, halo, tape-in, keratin, bead-based, and weft methods can all be excellent in the right situation.
I do not think one honest professional answer can name a single best attachment method for everyone. In real salon work, that would be too simple. The best method depends on what the client actually needs.
If the client wants flexibility and home removal, clip-in or halo hair may be the best fit. These methods do not require long-term installation, and they work well for occasional wear, events, or e-commerce customers who want simple use.
If the client wants a flat salon finish and a structured maintenance cycle, tape-ins may be the best fit. They work very well when the root prep is right, the tabs are stable, and the client understands the move-up schedule.
If the client wants strand-by-strand movement and a longer wear cycle before removal, keratin tip or U tip methods may be the best fit. These methods suit clients who want a more detailed bonded system and are comfortable with salon installation.
If the client wants a no-glue method, I tip, micro bead, or microlink methods may be the best fit. These work especially well when the bead size and strand balance match the natural hair.
If the client wants a reusable salon system with row-based maintenance, hand-tied wefts, genius wefts, machine wefts, or other weft-based methods may be the best fit.
| Client priority | Method that may fit best | Why |
|---|---|---|
| Easy home use | Clip-in or halo | Removable and simple |
| Flat salon result | Tape-in | Clean adhesive finish |
| Individual movement | Keratin tip or U tip | Bonded strand system |
| No glue | I tip or microlink | Bead-based hold |
| Reusable row method | Weft-based install | Structured salon maintenance |
So when I answer this question, I do not crown one method. I match the attachment system to the client’s real needs. That gives a far better result than chasing one “best” answer.
My Opinion
I think the smartest way to talk about hair extension methods is to start with attachment logic, not trend language. Once I understand what holds the extension in place, I can explain the wear cycle, the maintenance level, the client fit, and the service value much more clearly.
From a professional and factory point of view, I also believe product consistency matters a lot. A method may sound simple on paper, but the real salon result depends on stable construction, reliable materials, and the right fit for the client’s natural hair. That is why I never separate attachment style from product quality.
FAQ
Do all hair extensions attach the same way?
No. Hair extensions can attach with clips, wire support, adhesive tabs, keratin bonds, beads, or sewn row systems.
Do hair extensions always use glue?
No. Many methods do not use glue. Clip-ins, halo hair, I tip, micro bead, microlink, and many weft systems use other attachment methods.
How do tape-in extensions stay in place?
Tape-ins stay in place through adhesive tabs that seal around a small section of natural hair.
How do bonded extensions attach?
Bonded extensions attach with keratin material that is heated and shaped around the natural hair.
How do weft extensions attach?
Weft extensions usually attach to a braid or row foundation and are sewn or secured onto that base.
What is the easiest attachment method for home use?
Clip-in and halo methods are usually the easiest for home use because the client can put them in and remove them without salon installation.
Conclusion
Hair extensions attach in different ways, and each method creates a different wearing experience. The best attachment system is the one that fits the client’s hair, routine, and service goals.