So… the clip-ins look great, but the ends look a bit heavy, right? That moment usually happens in front of the mirror with scissors already in hand. The good news is that clip-ins are one of the safest extension types to trim at home.
Yes, clip-in hair can be cut, and it is often the best way to make them blend. Use sharp hair shears, trim on dry hair, cut in small steps, and never cut the stitched track or the clip area.

A trim does not need to turn into a full haircut. In most cases, the goal is simple: remove dry ends and soften the bottom line so the hair looks like one haircut.
Can clip-in hair extensions be cut?
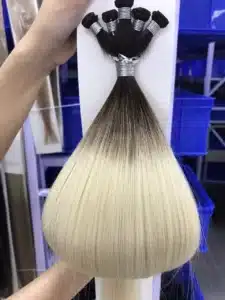
Clip-ins often come with a straight, factory-finished perimeter. That looks neat in a box. It can look blunt on a real head. A small trim can fix that fast.
Yes, clip-in hair extensions can be cut, and it is common to do it for length matching and a more natural finish. The safe rule is to cut only the hair length, not the top stitched band.**

Dive deeper
A lot of people worry that cutting clip-ins will “ruin” them. That usually comes from confusing two different things: cutting hair length vs cutting the structure.
Hair length can be cut. The structure should not be cut. The structure means the stitched top band, the thread lines, and the areas holding the clips. Once stitching is cut, shedding and loose clips can show up. That is why the no-cut zone matters.
The next question is what kind of cut makes clip-ins look natural. A straight chop across the ends usually creates a thick, solid edge. Natural hair rarely ends in a perfect line. So the goal is not only shorter hair. The goal is a softer edge.
A safe plan is to start with a “dusting trim.” That means removing only a small amount at the tips. After that, point cutting can soften the edge without removing much length.
It also helps to think about why clip-ins look obvious:
- The length does not match the natural haircut
- The ends are too blunt
- The density at the bottom is too heavy for fine hair
- The clip-in set is longer than the wearer’s natural layers
A trim can solve most of these issues, but only if it stays controlled.
Use this quick guide before cutting:
| Your goal | Safe DIY? | What to focus on |
|---|---|---|
| Make clip-ins shorter | Yes | Cut small, check often |
| Remove dryness at ends | Yes | Dust 0.5–1 cm only |
| Make ends look softer | Yes | Point cut the perimeter |
| Add full layers to match a layered haircut | Risky | Better with a stylist |
If the haircut has strong layers around the face, a pro cut usually blends faster. For simple length and end-softening, home trimming works well.
Can you cut hair extensions with scissors?
The scissors question is the most important one because it decides whether the ends look clean or frayed. Many people cut with kitchen scissors and blame the hair later.
You can cut hair extensions with scissors, but hair cutting shears give a cleaner edge and reduce fraying. Household scissors often crush the ends and make them look rough.**
Dive deeper
Let’s keep this practical.
If the scissors are dull, the blades do not slice hair cleanly. They squeeze and tear. That torn end can tangle more and feel dry faster. That is why hair shears matter.
Now for technique. Even with good shears, the wrong cutting style creates a “clip-in line.” That line looks like a curtain of hair under the natural hair. It happens when the ends are too uniform.
The best at-home method is usually:
- Trim for length first (tiny amount)
- Then soften with point cutting
- Then style and reassess
Point cutting means holding the scissors vertically and making small snips into the last 1–2 cm. This breaks up the blunt edge. It also helps the ends blend with natural hair movement.
Also, avoid thinning shears unless you really know what you are doing. Thinning shears can remove too much hair in one pass, and the result can look wispy or uneven. Clip-ins already have their own density pattern. Too much thinning can make the ends see-through.
Here is a simple tool and result chart:
| Tool | Typical result | Best use |
|---|---|---|
| Hair cutting shears | Clean edge | Trim length and soften ends |
| Household scissors | Rough edge | Only in emergencies |
| Thinning shears | Can over-thin | Only light end-softening |
| Razor | Frays the ends | Not recommended for DIY |
If only one tool upgrade is possible, pick sharp shears. That single change improves the finish more than any “technique hack.”

How to cut clip in extensions?
Cutting clip-ins is easier than cutting installed extensions because everything can be laid flat and controlled. The method still needs a system. Random cutting creates random results.
The safest way to cut clip in extensions is to match length first, then soften the ends with point cutting, while keeping the stitched track and clips untouched.**
Dive deeper
Here is a clean process that works for most DIY trims and keeps the clips safe.
Step 1: Decide the goal
A goal can be “shorten by 2 cm” or “remove dryness.” A goal should not be “give myself layers like a salon cut” unless you are experienced.
Step 2: Work on dry hair
Dry hair shows the real length and texture. Wet hair can hide unevenness.
Step 3: Clip-ins off-head method (best for beginners)
Lay each weft flat. Comb smooth. Trim the bottom edge in tiny steps. Then point cut lightly.
This method is safe because it avoids cutting near your own hair and avoids accidental overcutting from mirror angles.
Step 4: On-head blending method (best for natural blending)
Wear the clip-ins. Style the hair how it will be worn. Then trim only what looks bulky or too long.
This method creates better blending, but it carries more risk. Mirror angles can trick you.
Step 5: Cut less than you think
Start with 0.5–1 cm. Brush. Check. Repeat only if needed.
Step 6: Soften the edge
Use point cutting at the ends to avoid that blunt finish.
A lot of people ask where to cut first. This simple order helps:
1) Longest wefts (back pieces)
2) Side wefts
3) Small face-framing pieces (last)
Use this checklist to stay out of trouble:
| Checkpoint | Good sign | Danger sign |
|---|---|---|
| Section control | Hair stays smooth and flat | Hair shifts while cutting |
| Cut size | Tiny trimming steps | Big cut “to save time” |
| Track safety | Track stays far away | Track is near scissors |
| Finish | Ends look soft after styling | Ends look blunt and heavy |
If you want the clip-ins to look like part of one haircut, soft ends matter more than length.
What can you not do with clip-in extensions?
Clip-ins feel simple, so people treat them like “no rules.” That is when damage shows up fast. The hair is not the only part to protect. The clips and stitching also need care.
Clip-in extensions should not be slept in, swum in, or washed too often. The clips and stitching should not be cut, overheated, or pulled with force.**
Dive deeper
Clip-ins are removable, so the maintenance rules are different from installed extensions.
The main “do not” list usually looks like this:
1) Do not sleep in them
Clips rub on the scalp and create tension. Hair can mat at the base. Clips can bend. The next day feels uncomfortable and the hair looks messy.
2) Do not swim in them
Chlorine and salt can dry hair fast. Clips can rust or weaken. Tangling increases. If swimming happens, it is better to remove them first.
3) Do not over-wash
Clip-ins do not collect scalp oil like installed hair. Frequent washing strips moisture. A better schedule is to wash only when there is product buildup or odor. Many people can go 15–25 wears depending on styling products.
4) Do not apply heavy heat at the top band
The top band holds the structure. Too much heat near stitching can loosen thread or damage the band. Heat on the hair length is fine with a heat protectant, but the top area should be treated gently.
5) Do not cut or thin into the stitched track
This is worth repeating. Trimming hair is fine. Touching the track is not.
Here is a simple “safe vs unsafe” chart:
| Action | Safe | Not safe |
|---|---|---|
| Trim ends | Yes | Cutting into track |
| Curl and style | Yes, with protectant | High heat on top band |
| Sleep | No | Yes (avoid) |
| Swim | No | Yes (avoid) |
| Wash | Sometimes | Too often |
If clip-ins are treated like a “special occasion hair piece,” they stay pretty longer. When they are treated like installed hair, they age faster.

How do you make clip-ins look natural after cutting?
Cutting makes them shorter, but natural blending is a different goal. Blending depends on shape, density, and styling.
Natural-looking clip-ins come from soft ends, matched length, and a styled finish that blends the natural hair and extension hair into one shape.**
Dive deeper
A natural result has three parts: the edge, the shape, and the placement.
1) The edge
The edge is the bottom perimeter. If the bottom is too blunt, it looks like a sheet. Point cutting fixes the edge without losing length.
2) The shape
Many clip-in sets have more density than fine natural hair. That is not “wrong.” It just means the shape must be managed. If the bottom looks too heavy, the first fix should be a softer edge and some movement in styling.
If the shape still looks bulky, then light texturizing can be done at the last few centimeters only. Anything higher can create short pieces that stick out.
3) The placement
A perfect cut can still look fake if placement is wrong. Clip-ins that sit too low or too high can create a clear line. Placement should follow the head shape and the natural fall of hair. Side pieces should not be placed too far forward. That can create visible corners.
This table helps troubleshoot:
| What you see | Likely reason | What to do next |
|---|---|---|
| Hair looks like two layers | Ends too blunt | Point cut the perimeter |
| Bottom looks too heavy | Too much density at ends | Add loose waves, then reassess |
| Corners look obvious | Side pieces placed wrong | Move side wefts slightly back |
| Blend looks separated | Hair not styled together | Style natural hair and clip-ins as one |
The fastest blending trick is styling. Loose waves blend texture differences and hide minor cut lines. Straight styles need the cleanest cut and the best color match.
When is it better to take clip-ins to a stylist?
DIY trims are great for small clean-ups. A stylist is better when the goal is a haircut-level change.
A stylist is a better choice when you want full layers, face framing, or a major length change on clip-in extensions.**
Dive deeper
A stylist can cut clip-ins to match a specific haircut. That is the big advantage. If the natural hair is heavily layered, clip-ins need shape. Shape is harder to build at home because it requires balance across the whole head.
DIY works best when:
- You want a small trim
- You want to soften the ends
- You want a slight length match
A stylist is better when:
- You want a big length change
- You want layers that match a shag, butterfly cut, or strong face framing
- You want clip-ins to behave like installed hair
Use this decision guide:
| Your plan | DIY | Stylist |
|---|---|---|
| Dust 0.5–1 cm | Yes | Optional |
| Soften blunt ends | Yes | Optional |
| Shorten 2–3 cm | Yes | Optional |
| Create full layers | Risky | Yes |
| Correct a bad DIY cut | Hard | Yes |
If the clip-in set is expensive and you only have one, a stylist cut can be the safer investment.
How do you store and maintain clip-ins after trimming?
After trimming, the ends look cleaner. That is the moment to protect that result. Storage and brushing habits decide how long the cut stays nice.
Good storage, gentle brushing, and less product buildup keep clip-ins smooth after trimming and reduce tangling at the ends.**
Dive deeper
A fresh trim makes the ends look new. Ends still dry out over time, so daily habits matter.
Brushing
Start at the ends and move up. Hold the top band when brushing to reduce stress on the stitching. A soft brush or wide-tooth comb is usually easier on the hair.
Product control
Heavy oils and silicones can build up and make the hair feel coated. A light leave-in on mid-length to ends is often enough. Too much product attracts dust and causes tangling.
Washing schedule
Clip-ins do not need weekly washing. Many people wash only after many wears. The right timing depends on styling products and environment. If the hair feels sticky or looks dull, it is time.
Drying
Air drying is gentle. Blow drying is fine with heat control. Always dry the top band area fully so clips do not stay damp.
Here is a simple maintenance table:
| Habit | Best practice | Common mistake |
|---|---|---|
| Brush | Ends to roots, hold band | Pulling from top down |
| Product | Light on mid-length | Heavy oil at top |
| Wash | Only when needed | Washing too often |
| Storage | Flat or hanging, no tangles | Tossing into a drawer |
A clean trim plus good storage is what keeps clip-ins looking “new” for longer.
My opinion
Clip-ins are the most DIY-friendly extensions to cut, but the best results come from small steps and soft ends. A clean edge looks natural. A rushed chop looks like a curtain.
FAQ
Can clip-in hair extensions be cut to match a bob?
Yes. The safest way is to trim gradually, then soften the ends. For a sharp bob line, a stylist cut usually looks cleaner.
Can you cut clip-ins while wearing them?
Yes, but it is easier to make mistakes because mirror angles are tricky. Cutting off-head is safer.
Should clip-ins be cut wet or dry?
Dry is safer for DIY. Dry hair shows the real length and the real shape.
Can you use thinning shears on clip-ins?
Light use at the very ends can work, but thinning too high can create frizz and see-through ends.
Why do clip-ins look thick at the bottom after cutting?
A straight chop makes the ends blunt. Point cutting breaks up the line and helps blending.
Can you cut around the clips or the stitched band?
No. The stitched band and clip area should stay intact to prevent shedding and loose clips.
How often should clip-ins be trimmed?
Only when the ends look dry, split, or too blunt. Many people trim every few months, depending on heat styling.
What if you cut too much?
Stop cutting. Style the hair and reassess. Loose waves can hide small issues. A stylist can correct shape if needed.
Conclusion
Clip-ins can be cut at home. Use sharp shears, work on dry hair, cut in tiny steps, and keep the track untouched. Soft ends and a good blend are the whole point.