Have you heard of U tip extensions but never seen them up close? Curious how they differ from other strand methods before you spend money and time? Let’s break it down in clear language and keep things practical.
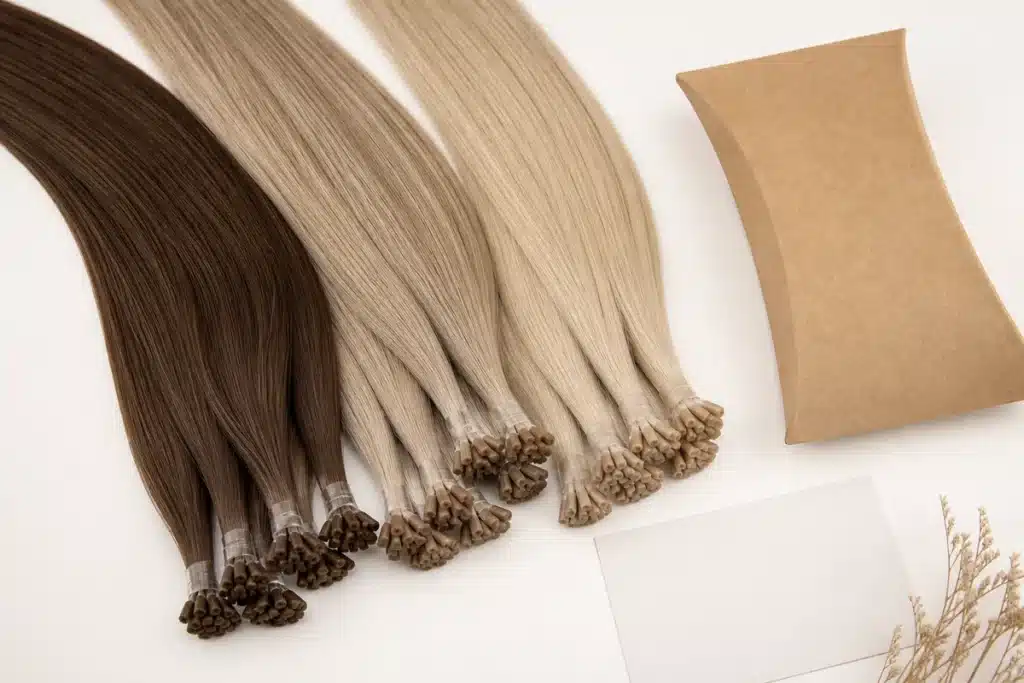
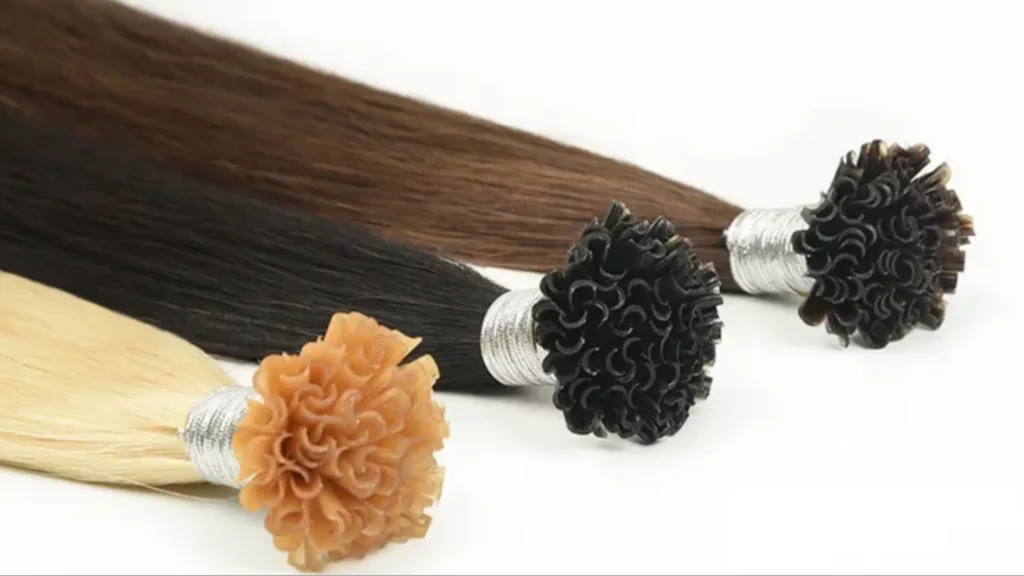
U tip hair extensions are individual strands with a pre-formed keratin “U” at the top. Heat softens the tip, it wraps a small section of natural hair, and then it sets into a neat, compact bond. When the hair quality is full cuticle and the technique is clean, the result looks natural, moves well, and wears for months.
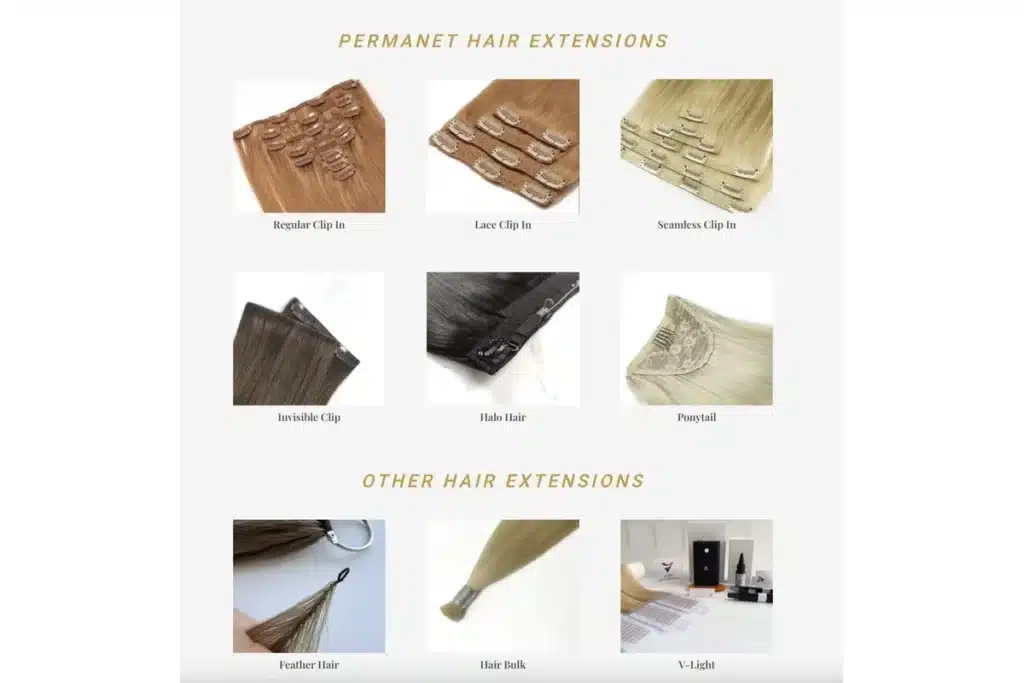
Here is the plan for this guide: what U tip means, realistic pros and cons, how it compares with I tip, step-by-step recommendations for installation and removal (including at home safety notes), and a simple tool list that keeps results consistent.
what are u tip extensions?
Many people hear “fusion,” “pre-bonded,” or “keratin tip” and think they are different systems. They refer to the same core idea.
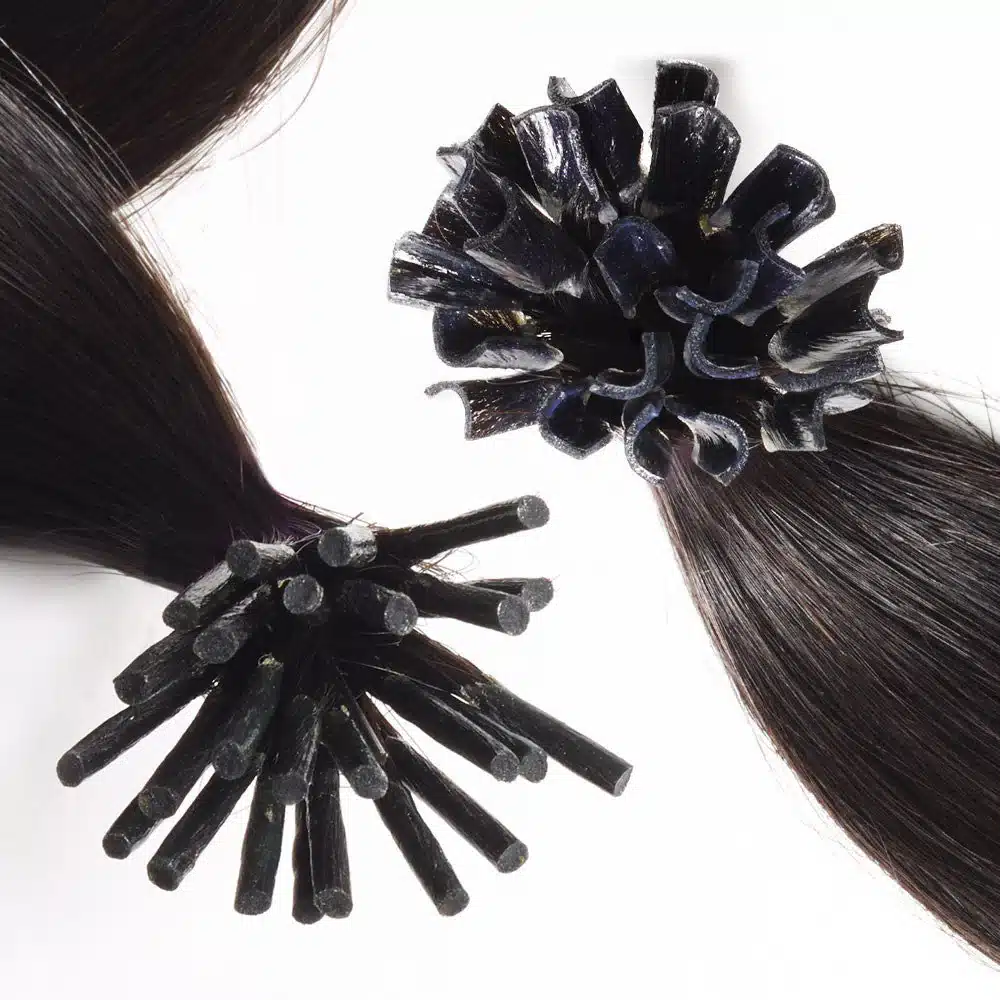
U tip extensions are single strands that carry a small U-shaped keratin bond. A fusion iron warms the bond, the softened keratin wraps the base hair, and a quick roll shapes it into a smooth cylinder close to the scalp.
Here is how I define a good U tip unit from a manufacturing view. Each strand weighs 0.5–1.0 g, and the keratin blend is cosmetic grade, stable under normal styling heat, and clean in removal when used with the right solvent. The “U” form helps the bond hug the natural hair evenly, so tension distributes along the cylinder instead of a sharp edge. I match bond firmness to climate and client routine. Softer blends feel flexible in cold weather but need correct install temperature to avoid slip. Firmer blends resist oil and heat better in hot, humid regions, though they need stronger rolling pressure to achieve a small shape. Color consistency also matters; I use full cuticle, aligned hair because intact cuticles reduce friction and tangles, especially at longer lengths. With aligned cuticles, the strand surface stays smooth, which means less matting in daily wear. All these details sound small, yet they decide how the set looks on week eight, not just day one.

u tip hair extensions pros and cons
No system is perfect. U tip earns its place for hold, comfort, and custom placement, and it asks for time and skill in return.
Main advantages include stable bonds, natural movement, precise density control, and long wear. Main drawbacks include heat use at install, longer chair time, and the need for correct removal tools.
Think about what happens at the root. A compact keratin cylinder sits flat, so the hair flows from the scalp without a flap or tape edge. That low profile helps ponytails and updos feel smooth after the first week. Strand-by-strand placement also gives fine control: add a few pieces for color work, or build coverage in zones that need extra density. A well-balanced bond resists sweat, daily brushing, and normal styling heat.
On the other side, the system needs patience. A full head may take two to four hours depending on strand count and head size. Heat control matters; too hot cooks the keratin and weakens hold, too cool leaves a gummy core that slips later. Maintenance is simple but steady: brush roots with a loop brush, avoid oils at the bonds, and book a move-up at three to four months. Removal must be professional or follow safe steps. Pulling breaks hair; solvent plus cracking pliers keep fiber integrity. Weigh the trade-offs against the client’s routine and schedule before choosing.
u tip vs i tip hair extensions
Both are strand systems and both can look seamless. The bond and maintenance feel different.
U tip uses heat-softened keratin that wraps and sets. I tip slides a rigid tip into a bead and tightens with pliers, no heat. Pick based on maintenance style, scalp sensitivity, and lifestyle.
I compare them on five points: root feel, tools, maintenance, sensitivity, and activity. Root feel first: many clients describe U tip bonds as smooth after the settling period because the cylinders are small and rounded. I tip bonds depend on bead size and lining; when sized well, they sit comfortably, but the bead is still a small ring that you can feel when you run fingers through the base. Tools next: fusion iron and rolling technique for U tip; bead threader and pliers for I tip. Maintenance: I tip allows fast strand swaps and easy micro-adjustments, which suits clients who prefer shorter service blocks. U tip favors longer cycles with less mid-cycle tinkering. Sensitivity: some people avoid heat during install, so they lean to I tip; others find beads noticeable on very fine hair and choose U tip for the low profile. Activity: high-sweat routines and frequent sauna use can loosen poorly sized beads; well-formed U tip bonds usually stay quiet if oils stay off roots. There is no single winner; match the method to the person, not the trend.
how to install u tip hair extensions
Clear process prevents slip and keeps bonds tiny and tidy. Share these steps with a stylist or use them to evaluate a service.
Wash with clarifying shampoo, dry fully, section cleanly, place bonds 5–8 mm off the scalp, heat to the keratin’s target range, roll, and brick-lay rows for even weight.
Preparation decides half the result. Start with a double clarify and blow dry to 100% dry. Skip conditioners or oils at the root. Map the head with a clean horseshoe. Begin low in the nape and move up. Each natural hair subsection should match the strand weight; too much hair starves the bond of keratin contact, too little hair stresses the follicle. Set the iron based on the keratin blend, commonly 180–220°C. Hold the softened bond near the base and roll for two to three seconds into a slim cylinder instead of a flat chip; cylinders move better and catch less. Stagger bonds in a brick-lay pattern to spread weight and hide lines. Keep safe margins along the parting and hairline. Once the set is complete, wait 24–48 hours before washing so bonds cure fully. Aftercare starts day one: a loop brush at roots morning and night, mid-length conditioner only, and no heavy oils near bonds. Small habits protect the install and lengthen the cycle.
how to remove u tip hair extensions
Removal is not guesswork. Use the right solvent, crack bonds gently, and slide them off without force.
Work dry, apply keratin remover, wait briefly, use bond-breaking pliers to crumble the keratin, then comb out residue and clarify.
Here is the salon flow I recommend for clean takedown. Clip the hair into four quadrants and work from bottom to top. Place a drop or two of keratin remover on the bond and give it 10–20 seconds to penetrate. Position bond-breaking pliers over the cylinder and squeeze with a light, repeated motion to turn the keratin brittle and powdery. Support the base hair with fingers while sliding the strand off. If a bond resists, add another tiny drop of remover and repeat the cracking motion; avoid twisting and never pull. After the row is clear, comb out flakes, then shampoo twice with a clarifying formula to remove residue. Check the scalp for redness. If the client plans a fresh install, avoid root conditioner and ensure the scalp feels calm. Proper removal protects cuticles on both the extension and the client’s hair, which is why it matters as much as the install.
how to remove u tip hair extensions at home
Home removal is not ideal, yet life happens. Safety must lead every step.
Use a real keratin remover, a bond-breaker plier, strong light, patience, and zero traction. If any bond refuses to move, stop and book a salon visit.
If you cannot reach a salon, set up a bright mirror and a stable chair. Work on fully dry hair. Clip sections so you can see each bond. Place one drop of keratin remover on a single bond and wait 15–20 seconds. Use a bond-breaker plier to compress the bond gently multiple times until it becomes crumbly. Support the base hair and slide the strand down. Do not tug. Move to the next bond only after the first comes away clean. Every few minutes, comb out keratin flakes. When all bonds are off, shampoo twice with clarifying shampoo. Apply conditioner from mid-length to ends, not on the roots. Let the hair rest 24–48 hours before any new install. Skip home hacks like cooking oil; those swell keratin, smear residue through the roots, and make professional removal harder later. If any area hurts or resists, stop and get help. The goal is intact natural hair, not speed.
u tip hair extension tool
Good tools make identical results repeatable across stylists and locations.
Aim for a digital fusion iron with stable temperature, silicone finger guards, sectioning clips, non-stick heat pad, rolling/clam pliers, acetone-free remover, a loop brush, and sanitizing supplies.
My kit list focuses on control and hygiene. A fusion iron with fast heat recovery keeps every bond consistent, and a digital readout stops guesswork. Silicone finger protectors prevent heat discomfort during rolling. A non-stick pad gives the iron a safe home between bonds. Long metal clips hold sections neatly. For shaping, a narrow plier rounds the keratin so the cylinder stays slim; wide pliers flatten and create snag points. A ridged bond-breaker plier speeds removal without biting the natural hair. Keep remover in a glass dropper for precise dosing, not a spray that floods the root. A loop brush protects bonds during daily root detangling. Add alcohol wipes for quick tool wipe-downs, barbicide for combs, and clean towels to keep keratin off hands. Finally, keep a fixed workstation layout so muscle memory takes over; the fewer searches for tools, the cleaner the installs.

My opinion
U tip shines when the client wants a low-profile root, controlled coverage, and long cycles. Use full cuticle, aligned hair and a stable keratin blend, keep heat and tension within range, and insist on careful removal. Do those things, and results stay fresh well past the first month.
FAQ
How long does one U tip install last?
Most sets wear comfortably for about 3–4 months before a move-up.
What hair quality should I buy?
Full cuticle, single-donor hair gives the best shine, strength, and longevity.
Can I swim or work out with U tip?
Yes. Braid before activity, rinse after chlorine or salt, and keep oils off the bonds.
Do U tip extensions damage hair?
Damage comes from poor technique. Correct section size, controlled heat, and proper removal keep the natural hair safe.
How many strands make a full head?
Many full looks use 100–150 strands at 0.8–1.0 g each; partial fills use fewer.
Conclusion
U tip hair extensions are keratin-bonded strands that deliver secure wear, soft roots, and precise placement. Pair quality hair with clean technique and careful removal, and the result looks natural and lasts for months.
Hibiscus Hair Manufacturer has been dedicated to producing high-quality U tip hair extensions for 25 years and is a recognized leader in the industry. If you are interested in finding a reliable hair extensions supplier and wholesale for your brand, please visit our website for more information: