Tight beads, itchy scalp, visible stitches—does that sound familiar? If your hand tied extensions sit on a beaded foundation, removal can be clean and calm with the right steps.
You can remove bead-installed hand tied rows by reversing the install: isolate the row, snip thread loops, open silicone-lined beads, slide them off, lift the weft, then detangle and cleanse the base hair. I will show tools, timing, costs, risks, and a detailed at-home method.

I focus only on beaded foundations here. There are no cornrow anchors and no hybrid tracks in this guide. Every step aims to protect natural hair and keep the hand tied wefts reusable for reinstall.
how to remove hand tied extensions?
Stress comes from not seeing where to start. A clear sequence solves that fear fast.
For bead-installed hand tied rows, work one row at a time. Clip away the hair above, identify the stitch path, snip the thread every few bites, open each bead with extension pliers, slide it down, lift the weft away, then detangle and cleanse the base hair before moving to the next row.
The exact order for bead-installed rows, and why it works
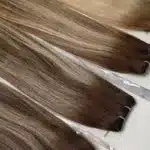
A beaded foundation holds small sections of natural hair inside silicone-lined micro beads. The stylist then stitches the hand tied weft to that beaded “track.” Removal works best in the reverse order of the install. Start by isolating the row with clean partings and firm clips. Find the thread bites that pass over the weft top and around the beaded foundation. Use blunt-tip scissors or a seam ripper to cut a stitch every two to three bites rather than trying to slice a long run. Short cuts lower the chance of nicking the weft top or catching a hair.
Once the row is free of thread, open the beads. Place the flat faces of extension pliers across the seam of each bead and squeeze gently to open the cylinder. Do not yank. Twist slightly as you slide the bead down the strand to release it without scraping the cuticle. When all beads are off a section, lift the weft away. If it resists, stop and check for a missed stitch. After the weft is out, mist a slip agent—detangling spray or diluted conditioner—over the anchor hair. Hold the hair above any knot to reduce tension, then brush from ends upward with a loop brush. Finish with a gentle scalp cleanse and a light, acidic conditioner through mids and ends.
| Step | Tool | Goal | Common mistake | Fix |
|---|---|---|---|---|
| Isolate row | Tail comb, clips | Clear view | Cutting blind through hair | Create a clean part above stitches |
| Snip thread | Blunt scissors or seam ripper | Free the weft | Long cuts that nick weft | Cut every 2–3 stitches only |
| Open beads | Extension pliers | Release anchors | Pulling beads straight down | Open, then twist-and-slide |
| Lift weft | Hands, clips | Remove hairpiece | Forcing through missed stitch | Stop, locate, snip the missed stitch |
| Detangle base | Loop brush, slip agent | Smooth foundation hair | Brushing from roots first | Brush ends → mid → root |
This order keeps stress low on the natural hair and protects the hand-sewn top of the weft. It also keeps the weft ready for a fresh reinstall.

how much does it cost to remove hand tied extensions?
People expect a flat fee. Bead-installed rows still vary in time and care.
Removal for two to three beaded rows usually costs $80–$250 in most markets. Price changes with row count, stitch density, product buildup, and whether you want the wefts cleaned and prepped for reinstall.
What sets the price for beaded-row removals
A beaded install often removes faster than a dense braid-and-stitch. Still, costs scale with the real work at the chair. The first driver is row count. More rows mean more stitches and more beads to open. The second driver is stitch pattern. Some stylists run a single pass; others double-stitch for extra security. Double-stitch lines require more cuts to free the weft, and that adds minutes quickly. The third driver is condition. Hard water minerals, sunscreen, dry shampoo, and hairspray can “glue” hair at the base and slow detangling. A careful stylist will pre-soak the row with a chelating or detangling mist before brushing, which adds time but saves hair.
From a factory view, preserving high-value hand tied wefts is worth a small premium. If you plan to reuse the hair, ask for weft prep in the quote: clarify the weft hair, condition mids and ends, air-dry flat, and measure for the reinstall. Clear menus help everyone:
| Service | Time | Typical Fee |
|---|---|---|
| Remove 2 beaded rows, light residue | 30–45 min | $80–$140 |
| Remove 3 beaded rows, double-stitch | 45–75 min | $140–$220 |
| Add: chelate + detangle base | +15–25 min | +$20–$40 |
| Add: clean + prep wefts for reinstall | +20–30 min | +$30–$60 |
Send photos before booking. A quick look at stitch density and residue makes quotes accurate and avoids “surprise” charges on the day.
how long does it take to remove hand tied extensions?
Beads speed things up, but the real time depends on care between services.
Most beaded hand tied removals take 30–75 minutes for two to three rows. Clean stitches, open beads, minimal residue—expect the fast end. Double-stitch lines, crushed beads, and base knots push toward the long end.
Timing bands for beaded foundations and how to finish faster safely
We see three clear bands:
- Fast (30–45 min): Two rows, single stitch per bead segment, weekly brushing, light products, no hard-water scale.
- Standard (45–60 min): Two to three rows, mixed single and double stitches, moderate product film near ears and nape.
- Extended (60–75+ min): Three rows, double-stitched ends, some crushed beads, visible mineral film, or sheltering knots from sweat and friction.
Speed comes from visibility. Work under strong light and mirror angles so you can see the loop of thread as it passes over the weft and around the beaded section. Cut short. Do not chase long runs. Once the thread is out, use proper pliers. Open the seam of the bead, then twist as you slide. If a bead grips a tangle, add slip and brush the ends first. Keep a small towel to hold sections steady. The last pass should be scalp care: a short cleanse to remove residue at the base, then a light, pH-balancing conditioner on mids and ends. This final step helps the hair settle and keeps it ready for the reinstall consult.
Can I remove my handtied hair extensions myself?
DIY is possible with beaded rows, but only with good light, the right tools, and patience.
You can remove beaded hand tied extensions at home when stitches are visible, beads are not crushed, and there is no matting. You need blunt-tip scissors or a seam ripper, extension pliers, a tail comb, clips, detangler, and a loop brush.
DIY green lights, red flags, and the minimum tool list
DIY makes sense if you can part cleanly, see each stitch, and access every bead with pliers. A helper is very useful. They can hold sections while you snip and confirm you are under thread, not hair. DIY is not wise if you feel solid knots at the base, see crushed beads, or cannot separate the stitch path from neighboring hair. In those cases, a stylist will break the job into tiny sections and save more hair than a rushed home attempt.
Minimum tools: blunt-tip scissors or seam ripper, extension pliers, duckbill clips, tail comb, detangling spray or diluted conditioner, loop brush, bright mirror setup. Wear a dark cape or towel to spot threads easily. If anything pulls or you lose the stitch path, stop. Book a removal. The cost of fixing a cut weft or a broken anchor section is higher than a one-hour visit.
| Okay to DIY | Book a pro |
|---|---|
| Visible single stitches, clean beads | Double-stitched dense rows you can’t track |
| No base matting | Solid knots or mineral “crust” at base |
| You have a helper and good light | You work alone and cannot see the stitch path |
| You accept a slow, careful pace | You feel you must rush |

how to remove hand tied extensions at home
This is the careful, bead-only method readers ask for most. Go slow and protect the hair.
At home, part above the row, snip stitches in short intervals, open beads with pliers, twist and slide them off, lift the weft, then detangle and cleanse the base. Prep the wefts for storage or reinstall.
Step-by-step with safeguards and a reuse checklist (beads only)
Tools: blunt-tip scissors or seam ripper, extension pliers, duckbill clips, tail comb, detangling spray or aloe gel, loop brush, microfiber towel, gentle shampoo, light conditioner, two mirrors, good light.
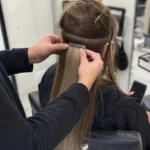
1) Prep and section. Wash and fully dry the hair first. Clean hair shows stitches better. Part just above the first row and clip the crown away.
2) Map the stitch path. Find a single thread bite. Slide the seam ripper under the loop of thread that lies between the weft top and the beaded section. Confirm you are under thread only.
3) Snip short and often. Cut every 2–3 stitches across the row. Avoid long cuts. If the thread is double-passed, you will see two lines; free both.
4) Open beads. Place pliers across the seam of each bead. Squeeze gently to open. Twist and slide the bead down the hair. Do not pull straight through a tangle.
5) Lift the weft. Support the weft with one hand and lift away slowly. If it sticks, you missed a stitch. Stop, locate, snip, then continue.
6) Detangle the base. Mist detangler on the anchor hair. Hold the section above any knot. Brush from ends to mids to roots with a loop brush.
7) Scalp care. Shampoo the scalp lightly. Rinse. Apply a light, acidic conditioner to mids and ends only. Rinse cool. Blot dry with a microfiber towel.
8) Weft care. Rinse the weft hair, condition mids/ends, and air-dry flat. Store in a silk bag for the reinstall.
| Do | Don’t |
|---|---|
| Work in bright light with mirrors | Cut blind behind the row |
| Cut stitches in short intervals | Slice across the weft top |
| Open beads, then twist-and-slide | Yank beads straight down |
| Brush ends → mids → roots | Rip through base knots |
Stop and call a pro if beads feel fused, if the thread path disappears, or if you feel strong resistance. Saving the anchor hair is the priority.
My opinion
Beads make hand tied removal cleaner when the sequence is right. Short cuts, opened beads, patient detangling—these three habits protect the natural hair and keep premium wefts in rotation. That saves time and money at the reinstall.
FAQ
Are all hand tied removals the same?
No. This guide covers beaded foundations only. Other anchor methods need different steps.
Which pliers should I use?
Use extension pliers with flat, smooth jaws. Teeth can nick beads and catch hair.
Can I reuse my hand tied wefts after removal?
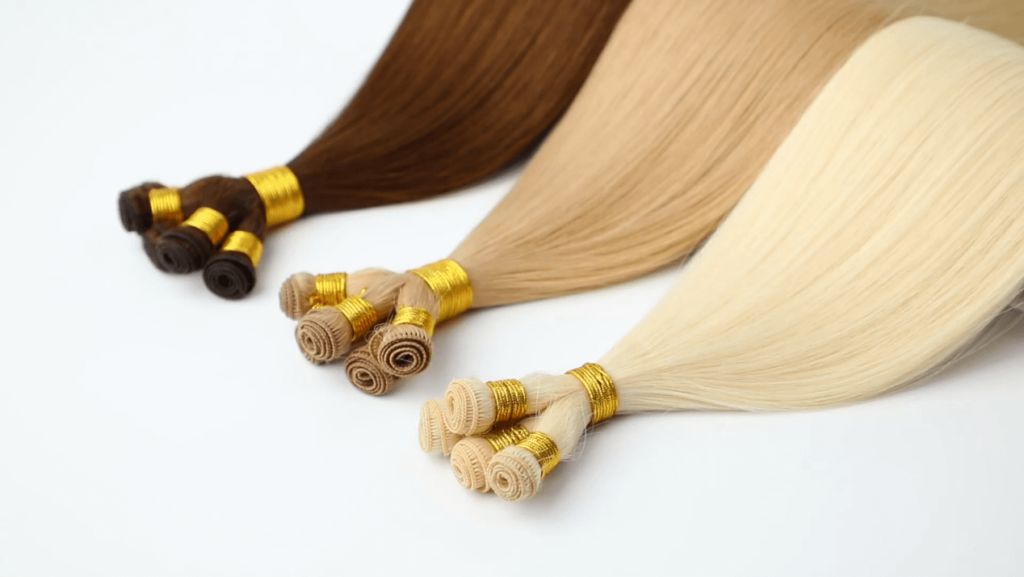
Yes, if you do not cut the weft top and the hair remains healthy. Clarify, condition, dry flat, and store well.
What if a bead is crushed?
Try opening across the seam. If it will not open, a stylist can replace it safely without breaking hair.
Why does the base feel stiff or sticky?
Hard water, sunscreen, and heavy product build film at the base. Use a gentle chelating mist before detangling.
How soon can I reinstall?
As soon as the scalp is clean and calm, usually the same week. Many stylists remove, refresh color or cut, and reinstall in separate visits.
Conclusion
Bead-installed hand tied extensions come out clean when you reverse the install in small, visible steps. Cut thread, open beads, lift wefts, then detangle and cleanse. Go slow, protect the hair, and keep your wefts ready for the next look.