A great install can still look unnatural if the ends look heavy or uneven. A wrong trim can also expose tapes, beads, or weft seams and create shedding and tangling.
Trimming hair extensions is safe when the hair is fitted first, styled to the final finish, and trimmed in small steps with end-softening techniques like point cutting. The goal is a smooth blend and clean movement, not aggressive thinning.
This article explains what trimming means for different extension types, how to avoid common damage, and how to keep the cut looking natural for weeks.
Why do hair extensions need trimming at all?
Many people think extensions arrive “ready to wear.” Some do. Still, trimming often makes the difference between “nice hair” and “hair that looks like it grew there.”
Extensions need trimming because the client’s haircut has a shape, and the extension hair must follow that shape. Trimming also removes harsh lines at the ends and improves blending at the sides.
Dive deeper
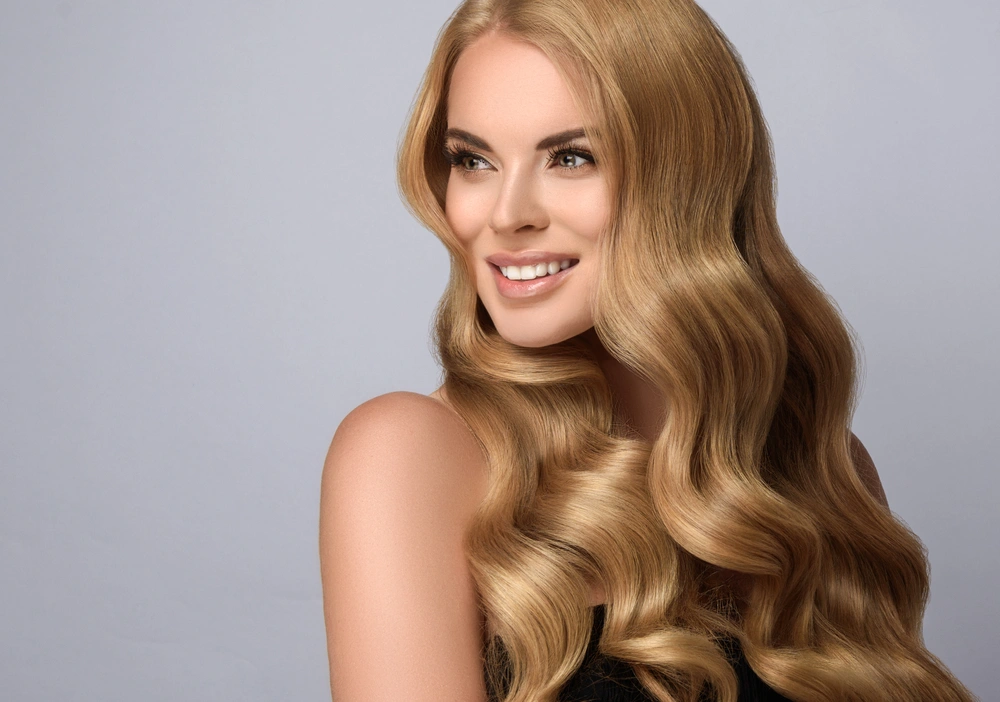
Trimming is not only about making extensions shorter. Trimming is a blending tool. Natural hair usually has a taper at the ends. Natural hair also has small variations in length that create movement. Extension hair can look too “perfect” at the perimeter. When the perimeter is too straight, the eye catches it fast.
There is also a practical reason. Extension hair goes through packing and shipping. Some bundles can arrive with ends that are slightly uneven. Some clients also choose a longer length and then decide to cut it to their daily look. That is normal.
Trimming can also protect the install. If the extensions are too long for the client’s lifestyle, the ends rub on clothing, seat belts, and bags. That friction dries the ends. Dry ends tangle. Tangling leads to pulling. Pulling stresses the attachment area.
For salon owners, trimming is also a control point for client satisfaction. Many complaints about “extensions look fake” are actually “the perimeter is too blunt.” A simple end-softening trim often solves it without changing the install.
| Reason for trimming | What it fixes | What it does not fix |
|---|---|---|
| match the haircut shape | blending and flow | poor color match |
| remove a blunt line | natural perimeter | wrong placement |
| correct uneven ends | clean finish | low-quality attachment |
| reduce friction issues | less dryness | incorrect aftercare |

What should be trimmed: the extension hair, the client’s hair, or both?
People ask this because it feels risky. The answer depends on the haircut and the method used.
In most cases, the trim touches both the client’s hair and the extension hair together. That is how the blend becomes one shape. Still, the “no-touch zone” near attachments must stay protected.
Dive deeper
A natural blend usually requires “cutting as one head.” That means the stylist releases the hair, lets it fall naturally, and trims the perimeter and the transition so the natural hair and extension hair connect.
But there is a clear safety rule: the closer the cut is to the attachment, the higher the risk. That is true for tape-ins, micro links, sew-ins, halos, and clip-ins. If too much density is removed near the top, the attachment becomes easier to see.
This is why trimming should focus on:
- the perimeter line (the bottom edge)
- the side blend zones (around the face and above the shoulders)
- the last 1–2 inches of the ends for softness
If the natural hair is very short, blending becomes harder. Some stylists will add more layers to hide the short hair. That can work, but it can also make the extension set look thin at the bottom. In those cases, the better solution can be a different extension method, a shorter extension length, or a more suitable density.
For wholesale buyers, this section matters because correct density selection reduces risky cutting. If the set is too dense, many stylists try to remove weight with thinning. That can create gaps and visibility. A density-matched set needs less cutting and looks cleaner.
| Item being trimmed | When it makes sense | Main caution |
|---|---|---|
| extension hair only | small length adjustment | keep perimeter soft |
| natural hair + extension hair together | blending into one shape | avoid cutting near bonds |
| heavy internal thinning | rare, special cases | high risk of exposure |
When is the best time to trim hair extensions?
Timing affects accuracy. A trim done at the wrong time can look good for one day and uneven after the first wash.
The best time to trim is after the extensions are fitted and the hair is fully dry and styled to the finish the client will wear most.
Dive deeper
Hair behaves differently when wet. Wet hair stretches. Dry hair shows the true fall. Extension hair can also hold coating from packaging. That coating can change how the hair sits. After the first wash, the hair may sit a little differently. This is why a final trim on dry hair is the safest.
A common professional approach is:
- do a small rough trim if needed
- dry and style fully
- do the detail trim and blending
Another timing factor is maintenance visits. If the client wears sew-ins, tape-ins, or micro links, the hair moves up as the natural hair grows. When the placement changes, the blend can also change. A “refresh trim” during a move-up can restore the natural look without changing length much.
Clients also change their styling habits. A client who starts wearing hair straight after months of waves may notice lines more. Straight hair shows bluntness more than curls. In that case, a small end softening is often enough.
For B2B readers, this is also a training point. A salon team that makes dry finishing a standard step will reduce refunds and redo work.
| Timing option | Good for | Risk |
|---|---|---|
| wet-only trimming | basic leveling | uneven after dry |
| dry trimming | precision blending | takes more time |
| hybrid approach | most cases | requires patience |
| maintenance trim | move-up refresh | do not over-cut |
What tools and techniques create a natural-looking trim?
A natural trim is not one big cut. It is small steps with the right technique.
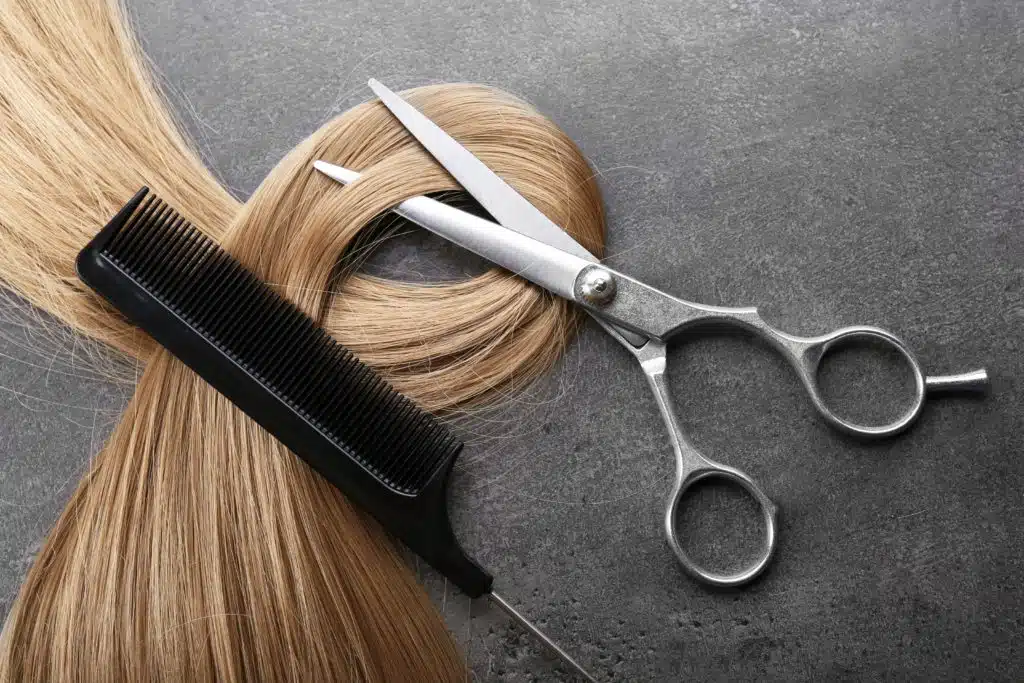
The most reliable techniques are perimeter trimming in small increments, point cutting to soften the edge, and light texturizing at the ends only.
Dive deeper
The tool choice changes the result. Sharp shears create clean ends. Dull scissors crush hair and make frizz. Razors can create soft texture, but they can also create fuzzy ends and tangling if the hair is not suited for razor work. In many cases, shears with controlled point cutting are safer.
Key techniques:
- Perimeter trim: This sets the length and shape. It should be done slowly. A few millimeters at a time is better than centimeters.
- Point cutting: The scissors tip enters the ends to break the straight line. The goal is not a choppy look. The goal is a soft edge that moves naturally.
- Slide cutting (light): This can soften mid-length transitions, but it should be done carefully and not near attachments.
- Texturizing at the ends only: This reduces “blocky” feeling. It should stay within the last 1–2 inches.
What should be avoided:
- aggressive thinning near the top
- heavy removal of density from the mid-lengths
- cutting extensions off the head and expecting it to fit the head shape
For salons, the best system is a “check and adjust” routine. Release hair. Check the mirror. Move the head left and right. Check the swing. Then cut again only if needed.
| Technique | What it achieves | Where to use it | Where not to use it |
|---|---|---|---|
| perimeter trim | sets length line | bottom edge | near attachment |
| point cutting | softens ends | last 1–2 inches | high-density thinning |
| slide cutting | blends transitions | mid-lengths lightly | around bonds |
| thinning shears | reduces bulk | ends only, minimal | near roots |
How does trimming change with different extension methods?
Not all methods tolerate the same cutting approach. The attachment structure changes the safe zones.
Trimming rules stay similar across methods, but the risk zone shifts based on where tapes, beads, thread, or tracks sit.
Dive deeper
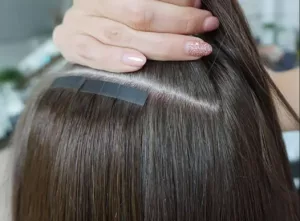
Tape-ins: The attachment is flat but close to the scalp. Trimming should stay low and focus on perimeter softness. Heavy internal thinning can make tape edges easier to see, especially on fine hair.
Micro links: Beads sit close to the root. Short layers near the top can expose beads. Trimming should focus on ends and the outer shape.
Sew-ins: The weft line sits on a braid base. Cutting close to the weft line can create see-through hair that shows the track. Trim the perimeter and do controlled blending at the ends.
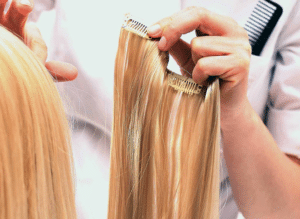
Clip-ins: Clips add weight and a track edge. Cutting can be done like a normal extension trim, but the fit matters. The clip-in should be worn and positioned before shaping, because the head curve changes the fall.
Halo: The halo sits on a wire with a weft base. Cutting is safe, but the halo must be worn correctly first. A halo that sits too low can separate from the natural hair and look like a shelf.
For buyers, this section helps reduce misunderstandings. Some clients assume “one cutting method fits all.” A supplier who explains safe zones per method can reduce damage and returns.
| Method | Attachment type | Biggest cutting risk | Safe trimming focus |
|---|---|---|---|
| tape-in | adhesive panels | tape visibility | ends and perimeter |
| micro link | bead/ring | bead exposure | ends, low blending |
| sew-in | weft on braid | track exposure | perimeter, soft ends |
| clip-in | clips on track | track edge showing | shape after fitting |
| halo | weft on wire | shelf effect | perimeter softness |

How often should hair extensions be trimmed?
People worry that trimming will shorten the hair too fast. The real issue is the condition of the ends.
Most clients do not need frequent trims. Small “dusting” trims are useful when ends feel dry, split, or start to snag.
Dive deeper
Extension hair has no natural scalp oils. So the ends dry out faster than natural hair. The rate depends on styling habits, climate, and product use. A client who uses high heat daily will need a trim sooner. A client who air dries and uses low heat will keep ends longer.
A practical trimming schedule is condition-based:
- If the ends snag when brushing, a micro-trim helps.
- If the ends look transparent and thin, the hair may need more than a trim. It may need replacement or a different density next time.
- If the client is doing a move-up, a light re-blend can keep everything natural.
For salon owners, it is useful to separate “shape trims” from “maintenance trims.” Shape trims happen when the client changes the haircut. Maintenance trims are tiny and protect the look.
For wholesale buyers, hair quality matters. Full cuticle hair usually holds a crisp cut longer. The cuticle alignment reduces tangling, so the ends do not break as fast. That is one reason premium hair often looks better for longer.
| End condition | What it means | Trimming suggestion |
|---|---|---|
| smooth ends | good condition | no trim needed |
| slight dryness | early wear | dusting trim |
| snagging ends | tangles forming | small trim + care reset |
| transparent ends | heavy wear | consider replacement plan |
What mistakes ruin the trim and make extensions look obvious?
Most “bad trims” come from fast choices, not bad intentions.
Common mistakes are blunt bottom lines, over-thinning, cutting before fitting, and removing too much weight near attachments.
Dive deeper
Mistake 1: One straight cut across the bottom. That creates a shelf. A shelf shows in movement. A better approach is a controlled perimeter trim and then end softening.
Mistake 2: Treating thinning as blending. Thinning removes density inside the hair. It can quickly expose tracks or beads. Real blending often needs only end work.
Mistake 3: Cutting the extension hair alone. Hair falls differently on the head. Off-head cutting can create a shape that does not match the client’s head curve.
Mistake 4: Cutting too much in one session. Extensions can always be cut shorter later. They cannot be put back. Small steps protect the result.
Mistake 5: Using wrong tools. Dull scissors or poor blades can fray ends. Frayed ends tangle and look dry.
A useful safety rule is to keep “structure above, softness below.” Structure means density near the attachment area. Softness means the last inches of the ends.
| Mistake | Result | Better approach |
|---|---|---|
| blunt cut line | shelf effect | soften with point cutting |
| heavy thinning | exposure risk | keep top dense |
| off-head cutting | wrong shape | fit first, then trim |
| big cuts | irreversible | small steps |
| dull tools | frayed ends | sharp shears |
How should aftercare support a fresh trim?
A good trim can fail if aftercare is harsh. The ends are the most fragile area.
Aftercare should protect ends from heat and friction, keep products away from attachment zones, and prevent tangling with correct brushing and night routine.
Dive deeper
Aftercare is the second half of trimming. The trim creates a clean perimeter. Aftercare keeps it clean.
Key habits:
- Brush from ends upward. This prevents yanking and reduces shedding.
- Use heat protectant when using hot tools. Heat dries ends and makes bluntness show more.
- Keep conditioner and oils on mid-lengths and ends. Products near roots can weaken tape adhesive or increase slippage for beads.
- Sleep with hair controlled. A loose braid or low ponytail reduces tangling. Satin pillowcases reduce friction.
Wash routine matters too. Rubbing ends hard makes them rough. A gentle squeeze method is better. Then hair should be dried well. Wet sleeping increases tangles and matting.
For salons and wholesalers, a clear aftercare sheet reduces returns. Many clients blame hair quality when the real issue is friction and heat. A correct routine protects the look and lifespan.
| Aftercare step | Why it matters | Simple tip |
|---|---|---|
| gentle brushing | prevents tangles | start at the ends |
| heat control | keeps ends smooth | lower temperature |
| product placement | protects bonds | avoid roots |
| sleep routine | less friction | braid loosely |
| dry fully | prevents matting | no wet sleep |
My opinion
A natural trim is a controlled process, not a dramatic haircut. The safest results come from small perimeter edits, soft ends, and respect for attachment zones.
FAQ
Is trimming hair extensions the same as cutting a normal haircut?
Trimming extensions is similar in shape work, but it has safety limits around attachments. The blending goal is also higher.
Can trimming cause shedding?
Trimming does not cause shedding. Rough cutting, dull tools, or cutting too close to seams can increase breakage and tangling, which feels like shedding.
Should thinning shears be used on extensions?
They can be used lightly at the ends. They should not be used near attachment zones or aggressively through mid-lengths.
Can clip-ins and halos be trimmed too?
Yes. They should be worn and positioned first, then shaped to the head and haircut.
How can a salon avoid the “shelf” look?
A shelf look is usually a blunt perimeter. Point cutting and end softening fix it in most cases.
How can a buyer reduce cutting complaints from clients?
Density matching and method education reduce risky thinning and over-layering. Premium full cuticle hair also holds a clean cut longer.
Conclusion
Trimming hair extensions works best when the hair is fitted, finished dry, trimmed slowly, and softened at the ends while keeping attachment zones protected.