Struggling with sticky tape and leftover residue? Improper removal can pull out your natural hair or cause scalp pain.
The best way to remove tape-in extensions at home is to follow a step-by-step process using the right tools, tape bond removers, and care. Avoid rushing. Do it right.
Knowing how to remove tape-in extensions yourself can save time, money, and frustration—if done right. Let’s dive into every detail U need.
What is the easiest way to remove tape in extensions?
If U want zero stress and 100% safety, this option is still unbeatable.
Going to a professional salon is the easiest and safest way to remove tape-in extensions. Trained stylists use medical-grade removers and techniques to ensure no hair damage or pain.
For beginners or those unsure, starting with salon removal is a smart choice. Learn from the pros before trying it at home.
Can I remove my own tape extensions?
Yes, but do not rush it. One wrong step can cause hair breakage.
Yes, U can remove your own tape-in extensions. But U must use proper techniques and products. Never pull or force the tapes. Patience is key.
Tips for Self-Removal:
- Always use a proper tape-in extension remover.
- Never use force or yank out the extensions.
- Section your hair clearly to work in small areas.
- Keep remover on the tapes long enough to dissolve glue.
- Comb gently after removal.
Self-removal is possible. But U must respect the process. If unsure, contact your supplier or stylist.
How to Remove Tape-in Hair Extensions at Home?
Want to do it yourself and avoid mistakes? Follow this proven process.
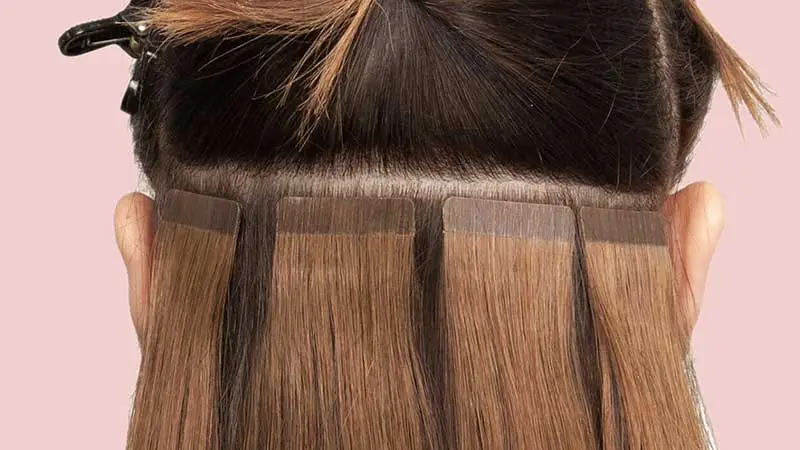
To remove tape-in extensions at home, section the hair, apply tape remover, allow enough processing time, gently peel off the tapes, and clean up the residue using adhesive-safe products.
Step-by-Step Guide
Step 1: Prepare Your Tools
- Tape-in hair extension remover (alcohol-based or oil-based)
- Tail comb or sectioning clip
- Fine-tooth comb
- Soft towel
- Clarifying shampoo
- Hair conditioner
Step 2: Section Your Hair
Use a tail comb to divide your hair into small sections. Start at the nape of the neck and move upward. Secure the rest of the hair with clips.
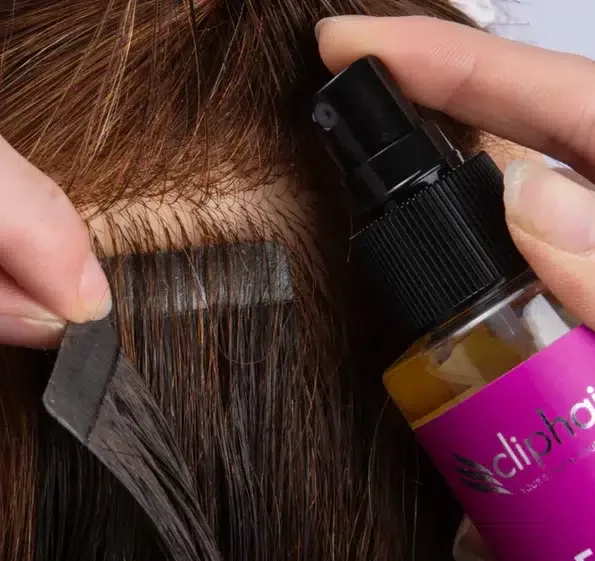
Step 3: Apply Remover
Spray or apply remover directly onto the tape area. Soak the tape completely. Let it sit for 30–60 seconds.

Step 4: Peel Gently
Use your fingers or the edge of a tail comb to separate the wefts. Do not pull hard. If resistance is strong, apply more remover and wait.
Step 5: Remove Residue
Once the extensions are out, there will be sticky residue left. Spray more remover on the area and use a fine-tooth comb to scrape gently.
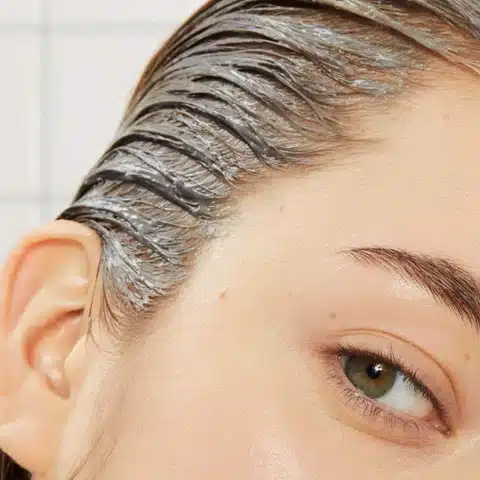
Step 6: Wash and Condition
Wash your hair with clarifying shampoo to remove leftover chemicals or oils. Rinse thoroughly. Use a deep conditioner to rehydrate.
Done right, the process is clean, painless, and safe.
Mistakes to Avoid
Removing tape-ins at home? These common errors can ruin your natural hair.
Never rush the process or skip proper removal tools. Never pull the tape when it’s still sticky. Never use harsh oils not made for hair extensions.
Top Mistakes and Their Risks
| Mistake | Risk |
|---|---|
| Using kitchen oil or random products | Breakage and sticky buildup |
| Yanking or forcing extensions | Hair loss, scalp irritation |
| Skipping post-care | Dry, tangled, or brittle hair |
| Incomplete residue removal | New tapes won’t bond properly |
Use only trusted products. Respect your natural hair. Never cut corners.
Tape Hair Removal After Care
Your job is not done after removal. What U do next affects hair health.
After removing tape-in extensions, always wash your hair with clarifying shampoo, deep condition the strands, trim ends if needed, and let hair rest before any reinstall.
Recovery and Repair
- Clarify: Clean the scalp and roots. Remove all residue.
- Hydrate: Use a repairing mask or deep conditioner. Leave it in for 10–15 mins.
- Trim (Optional): If ends are dry, trim them.
- Let Hair Rest: Wait at least 3–5 days before reinstalling new extensions.
- Use Light Products: Avoid heavy oils or butters. Use lightweight serums to nourish the strands.
Healthy natural hair is the best foundation for long-term extensions.
Will baby oil remove tape in extensions?
Not ideal. Not designed for extensions.
Yes, baby oil can dissolve some of the adhesive, but it’s slow and often leaves greasy buildup. It’s not recommended for professional-grade tape.
Why It’s Not the Best
Baby oil was never designed for hair adhesives. It can make the process longer and messier. It may also clog follicles or make hair slippery and hard to clean.
Can rubbing alcohol remove tape in extensions?
Yes, but use with care.
Rubbing alcohol can help break down the tape bond. But it must be applied carefully and rinsed properly to avoid drying the scalp and strands.
How to Use Alcohol Properly
- Use 70% isopropyl alcohol.
- Apply only on the tape area.
- Let it sit for 30 seconds.
- Gently peel off the extension.
- Wash your hair afterward.
Too much alcohol can dry the scalp. Always follow with conditioner.
My Opinion
I’ve worked with thousands of professional stylists and salon owners around the world. Most of them eventually learn to remove tape-ins at home—not because they want to, but because clients need fast service. The key isn’t where U do it. It’s how U do it. Use salon-grade products. Don’t cut corners. Respect the hair. The best stylists know that extension work is not about speed. It’s about precision.
FAQ
Q: Can I reuse the same tape-in extensions after removal?
A: Yes, if U remove them properly and clean both the wefts and your natural hair. Retape with fresh adhesive.
Q: How many times can tape-in extensions be reused?
A: With high-quality hair like ours, 3–4 reuses are common.
Q: What’s the best remover type—oil or alcohol?
A: Alcohol-based removers work faster. Oil-based removers are gentler but slower. Professionals often use a mix.
Q: How long should I wait before reinstalling extensions?
A: Ideally, 3–5 days to let the scalp rest.
Q: Can I sleep with tape-in extensions?
A: Yes, but tie them in a loose braid and use a silk pillowcase to avoid tangling.
Q: What happens if tape glue is still stuck?
A: Apply more remover, comb it out gently, or use clarifying shampoo.
Q: Will tape-in extensions damage my real hair?
A: Only if U remove them wrong. Done properly, tape-in extensions are safe.
Conclusion
Tape-in hair extensions can be removed at home—but only with care, patience, and proper products.