Tape-ins feel “easy” until removal day. You want them out fast. You also want to keep your natural hair full. That is where most DIY removals go wrong.
You can remove tape in extensions DIY if you work slowly, protect the root area, and use the right product to break down adhesive. A tape remover is best. Oils can help with residue, but they are not a true adhesive dissolver. The goal is always zero pulling.

If you are doing this at home, you need a clear plan. You need the right order. You also need to know when to stop and book a pro removal. This guide walks you through all of it.
Can you remove tape in extensions yourself?
A lot of people ask this after they feel tightness, see shedding, or notice sticky build-up. The short answer is yes, but only when the hair is not matted and the tape pairs are still easy to find.
You can remove tape in extensions yourself if your tape-ins are maintained on time, your hair is detangled, and you can separate each tape pair without force. If you feel pain, see stringy glue, or feel hair “stuck” inside the tape, you should stop and switch to professional help.
Dive deeper
DIY removal is not only about the product. DIY removal is about tension control and patience. Tape-ins hold shed hair for weeks. That shed hair looks scary at removal. But it is often normal. The real danger is pulling healthy hair when adhesive is still strong.
A safe self-check before you start
You should check four things:
- Your hair is fully detangled from ends to roots.
- You can clearly locate each tape pair.
- Your tape-ins are not overdue by many weeks.
- You have enough time. Rushing causes damage.
When DIY removal is usually OK
DIY removal is often fine if:
- the tape-ins are 6–8 weeks old and not heavily grown out
- there is low product build-up near the tape
- there is no matting at the root zone
- you can see what you are doing with mirrors or a helper
When DIY removal becomes risky
DIY removal becomes risky if:
- you feel sharp pulling at the scalp
- you see tangles trapped between tape pairs
- adhesive turns into sticky strings and smears
- you cannot access the back of your head well
Quick decision table
| Situation | What you see or feel | Best move |
|---|---|---|
| clean tape pairs | neat, easy to find | DIY is possible |
| heavy grow-out | tapes sit far down | consider salon |
| matting | clumps near roots | stop and book pro |
| sticky smearing | glue strings | use remover, not force |
| scalp pain | strong tension | stop immediately |
DIY is fine when the process stays gentle. DIY is a problem when you try to “win” against the tape.
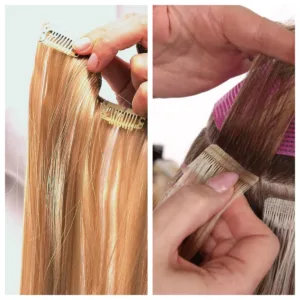
How to remove tape in extensions DIY?
Most DIY damage comes from one mistake. People try to peel before the bond is broken. The right approach is to soften the adhesive first, then separate slowly, then clean residue last.
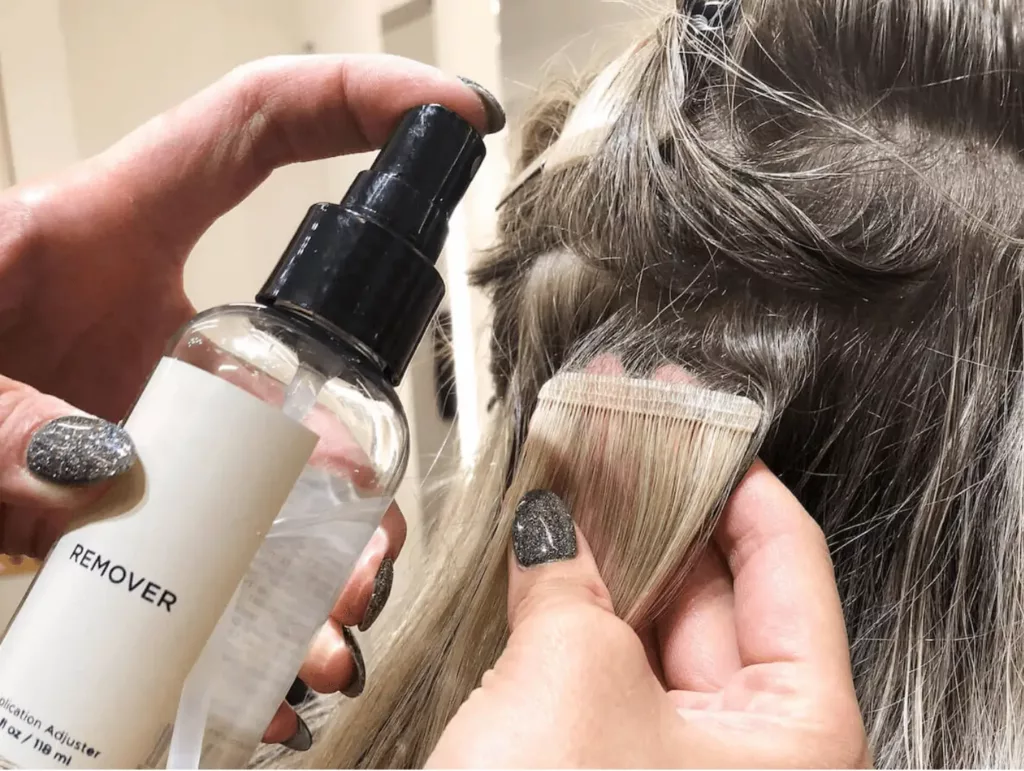
To remove tape in extensions DIY, you should work on dry, detangled hair, section the head, apply a tape remover to each tape pair, wait a few minutes, then split the tapes with controlled pressure. You should never yank a tape down from the hair.
Dive deeper
This is a step-by-step method that keeps things simple and safe.
Step 1: Prepare your setup
- You need a tail comb, clips, a spray bottle, paper towels, and a tape remover.
- You should also have a fine-tooth comb for residue.
- You should wear a shirt you do not care about. Remover can stain.
Step 2: Detangle the hair first
You should detangle from ends to mid-lengths. Then you should detangle near the root area last. If you start at the roots, you will push tangles tighter into the tape zone.
Step 3: Section your hair
You should section into 4 zones:
- left back
- right back
- left front
- right front
You should clip everything up and only work one row at a time.
Step 4: Work on dry hair
Dry hair gives more control. Wet hair stretches easier. Stretching increases breakage risk.
Step 5: Apply remover correctly
- You should lift one tape pair.
- You should spray or apply remover directly on the tape seam.
- You should wait 2–5 minutes.
- You should reapply if needed.
Step 6: Split, do not rip
You should use your fingers to start at one corner. You should “peel apart” like opening a sticker. You should support the hair above the tape with your other hand.
Step 7: Slide the extension off
When the tape splits, the extension should slide out with a gentle roll motion. If it does not slide, the bond is not ready. You should apply more remover and wait again.
Step 8: Repeat, then clean residue last
You should remove all tape pieces first. Then you should clean residue section by section. If you clean too early, you can spread adhesive and create more tangles.
Common DIY mistakes table
| Mistake | Why it happens | What it causes | Better move |
|---|---|---|---|
| peeling too soon | impatience | pulling + breakage | wait longer |
| working on wet hair | feels “slippery” | stretching hair | stay dry |
| skipping sections | hard to see | tangles | clip zones |
| using force | tape feels stuck | broken hairs | reapply remover |
| cleaning residue aggressively | sticky mess | matting | targeted clean-up |
A good DIY removal feels boring. That is a good sign. You want slow and controlled.
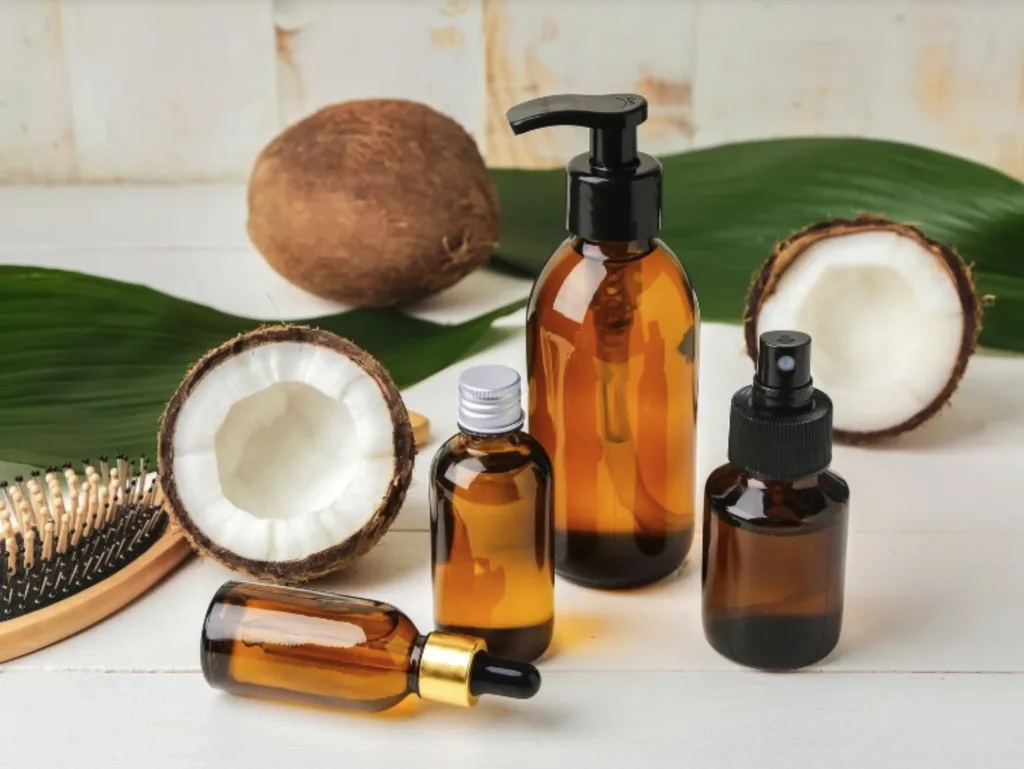
What oil is best for removing tape-in extensions?
People love oils because they feel gentle. Oils can help loosen sticky residue on the hair shaft. Oils can also help you comb out leftover adhesive after the tapes are already separated.
The best oils for tape-in residue are light oils that spread evenly and do not harden, like mineral oil or baby oil. Coconut oil can work, but it can also solidify in cooler rooms and feel heavy. Oils help with residue more than they help with tape separation.
Dive deeper
You should think of oils as a “clean-up tool,” not a “removal tool.” Tape adhesive is designed to resist water and daily products. Many tapes will not release fully with oil alone. If you only use oil, you can end up rubbing adhesive deeper into the hair.
Oil options and what they do
| Oil type | Best use | Upside | Downside |
|---|---|---|---|
| mineral oil / baby oil | residue clean-up | stable, consistent | can feel greasy |
| olive oil | residue clean-up | easy to find | heavy, slow rinse |
| coconut oil | residue clean-up | good slip | can solidify, build-up |
| argan oil | light residue | lightweight | expensive for heavy residue |
How to use oil the safe way
- You should remove the extensions first with a remover method.
- You should apply oil only where residue exists.
- You should wait 2–3 minutes.
- You should comb with short strokes, starting below the residue and moving upward.
- You should wipe the comb often.
- You should shampoo twice after.
What you should not do with oil
- You should not soak the whole head in oil and rub.
- You should not twist the hair while oil is on adhesive.
- You should not brush aggressively at the root.
A practical residue plan
A simple plan works best:
- remover to split tapes
- oil to loosen residue
- gentle combing
- double wash
- full dry
This order protects the hair and avoids sticky spreading.
How to remove tape without pulling hair?
Pulling happens when adhesive is still strong or when shed hair is trapped between tape pairs. The fix is not “more strength.” The fix is “less tension and more separation time.”
To remove tape without pulling hair, you should support the root area, split the tape slowly from a corner, and only peel when the adhesive is softened. You should also detangle before removal and never work through matting with force.
Dive deeper
If you want a single rule, use this one: if you feel pulling, the bond is not ready. You should stop and reset.
The root support technique
You should place one hand above the tape, close to the scalp. That hand becomes a “shield.” When you peel with the other hand, the scalp feels less tension. This step reduces pain and prevents traction breakage.
The corner-start method
You should always start at a corner of the tape. Corners release first. Middle sections hold the strongest. If you pry in the middle, you will pull hair.
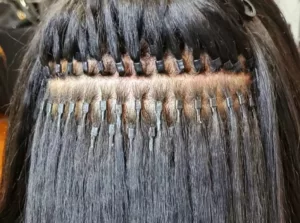
The trapped shed hair problem
Tape-ins trap shed hair. That is normal. The problem starts when:
- the tapes are overdue
- the hair is not brushed well near the root
- product build-up creates tangles
If you see a “web” of hairs between tapes, you should use remover, then separate slowly, then detangle the shed hair once the tapes are open.
Pulling prevention checklist
- You should detangle before you start.
- You should work on dry hair.
- You should isolate one tape pair only.
- You should wait after applying remover.
- You should peel apart, not pull down.
- You should stop at pain.
Pulling prevention table
| What you feel | What it means | What you do |
|---|---|---|
| mild resistance | adhesive softening | keep slow peel |
| strong resistance | adhesive still active | wait + reapply remover |
| sharp pain | traction on root | stop immediately |
| sticky strings | adhesive smearing | wipe, reapply, do not rub |
| knotting | trapped shed hair | open tape first, then detangle |
If you follow this, your removal will take longer. Your hair will also look better after.
When should you NOT do DIY and go to a salon?
DIY is not for every head. Some situations need professional hands and tools, especially if the hair is fine, the tapes are overdue, or the client has matting.
You should go to a salon if you cannot see your tape placement, if you have matting near the roots, or if the adhesive is smearing badly. You should also go if you feel repeated pain or see short broken hairs.
Dive deeper
A salon removal is not only “faster.” A salon removal is “more controlled.” A stylist can isolate each tape pair fast and keep tension low. That matters if you want to keep your hair healthy for the next install.
High-risk cases for DIY
- very fine or fragile natural hair
- postpartum shedding or thinning
- tape-ins worn far beyond maintenance timing
- heavy matting at the root
- back-of-head rows only and no helper
Why a pro removal protects the hair
A pro can:
- use the correct remover amount without soaking
- separate tape pairs without chasing tangles
- detangle trapped shed hair safely
- remove residue without spreading adhesive
A simple “stop” rule
If you tried two rounds of remover and a tape still does not split, you should stop. If you keep going, you will pull hair.
DIY should be a safe option, not a stressful fight. If it feels like a fight, it is time for a salon.
My opinion
DIY removal can be safe, but only if the approach stays slow, dry, and controlled. A tape remover is the main tool. Oils are for residue. If pulling starts, stopping is the smartest move.
FAQ
Can you use only oil to remove tape-in extensions?
Oil can help with residue, but many tapes will not release cleanly with oil alone. A proper tape remover usually reduces pulling.
What is the safest DIY remover option?
A tape remover made for extensions is the safest option for most people. It targets adhesive and reduces traction on the hair.
How long does DIY removal take?
It often takes 45–120 minutes, depending on how many tapes you have and how much residue exists.
Is shedding normal during tape removal?
Yes, long shed hairs are normal because they were trapped in the tape for weeks. Short broken hairs suggest pulling damage.
Can you reuse tape-in extensions after DIY removal?
You can reuse them if the tabs stay intact and residue is cleaned fully. Clean tabs and dry hair matter before re-taping.
What if the tape feels stuck even after remover?
You should reapply remover, wait longer, and try again. If it still will not split, you should stop and book a salon removal.
Conclusion
DIY tape removal can work, but the safe method is slow separation with a real remover, then oil-based residue clean-up. If you feel pulling, stop and protect your hair.