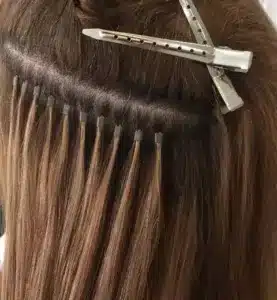
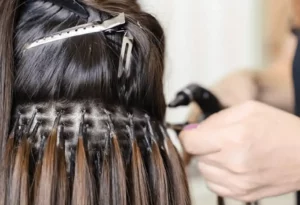
Removing nano ring hair extensions doesn’t have to be a hassle if you know the right steps. Whether you’re a salon owner or just someone looking to do it yourself, I’m here to walk you through the process.
To remove nano ring hair extensions, use pliers to gently pinch the beads in the opposite direction they were installed. Be sure to work slowly and carefully to avoid damaging your natural hair. Once the beads are removed, follow up with some gentle detangling to ensure no knots are left.
But wait—there’s more to it than just removing the beads. Keep reading to learn how to properly detangle and ensure your hair stays healthy throughout the process.

Step-by-Step Guide: how to remove nano hair extensions
Removing nano ring extensions is pretty straightforward, but it does require some attention to detail. Here’s the breakdown:
Step 1: Prep Your Tools
Before you start, you’ll need a few essential tools:
Nano ring pliers: These are specially designed to open the small beads without damaging the hair.
A soft brush or comb: For detangling afterward.
A bowl: To collect the beads as you remove them.
A friend (optional): Having an extra pair of hands can make the process smoother.
Step 2: Open the Nano Rings
Start by using your nano ring pliers to squeeze each bead in the opposite direction of how it was initially secured. Nano rings are small, so be gentle but firm to avoid slipping or pinching your natural hair. If you feel resistance, don’t force it—reposition the pliers and try again.
Step 3: Remove the Beads
Once the bead is open, slide it off the strand of hair. It’s helpful to have a bowl nearby to drop the beads into. Be sure to keep track of them—they’re small and easy to lose! Continue working through your hair in sections, removing the beads carefully.
Step 4: Detangle Your Hair
After all the beads are removed, it’s time to detangle any loose hair or knots. Start by gently teasing out any tangles with your fingers. Once the big knots are gone, use a soft comb or brush to smooth everything out. Don’t rush this step, as pulling on knots could cause breakage.
Step 5: Clean Up
Once your hair is fully detangled, you can give it a good wash and conditioning treatment to restore moisture. Nano ring extensions are usually quite light on the hair, but it’s still a good idea to treat your natural strands with care after the removal.
Why It’s Important to Use the Right Tools
Using the correct tools—like nano ring pliers—is crucial for the longevity of your hair. These pliers are designed to carefully compress and open the rings without causing damage. Regular pliers or forceful techniques can damage the hair or cause breakage. So, always make sure to use the proper equipment!
Aftercare Tips for Healthy Hair
Once your nano ring extensions are out, it’s a great time to focus on aftercare. Here are a few tips to keep your hair looking its best:
Condition regularly: Your natural hair might feel dry after extension removal, so deep conditioning treatments can help replenish moisture.
Give your hair a break: If you’re planning to reapply extensions, consider giving your natural hair a rest for a week or two.
Avoid heat styling: If possible, let your hair air-dry and avoid hot tools to minimize stress on your natural strands.

Conclusion
Removing nano ring hair extensions doesn’t have to be a daunting task. With the right tools and a bit of patience, your natural hair will stay healthy and intact. Whether you’re a pro or a DIYer, following these steps will ensure a smooth and damage-free extension removal process.
Hibiscus Hair Manufacturer has been dedicated to producing high-quality I tip hair extensions for 25 years and is a recognized leader in the industry. If you are interested in finding a reliable hair extensions supplier and wholesale for your brand, please visit our website for more information:


