Have U ever looked at a client’s grown-out microlinks and thought, “If this removal goes wrong, the hair will break”? Do U want a clean removal plan before U start touching the beads?
To remove micro link extensions, a stylist opens each bead or ring with the correct pliers, slides the bead away from the natural hair, then releases the extension strand without pulling. Safe removal depends on the right tool angle, full opening of the bead, and careful detangling before and after.

I do not remove microlinks on clients. I write from a manufacturer view, so I focus on what causes damage during removal and how salons can reduce risk and complaints.
What are micro link extensions?
Have U heard micro links called micro rings, micro beads, or micro links, and still felt unsure if they are the same thing? The terms change, but the core method stays stable.
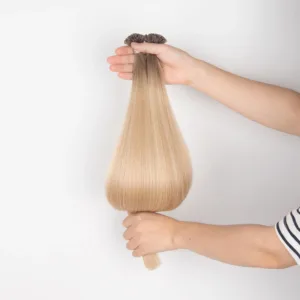
Micro link extensions are strand extensions attached using a small bead or ring that clamps around a small section of natural hair and the extension tip. The bond is mechanical. It uses pressure, not glue, and not melted keratin.
Dive deeper
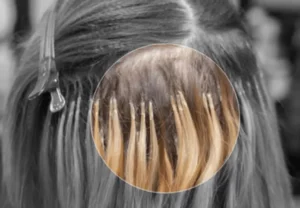
Micro link extensions work like a clamp system. The bead holds because it squeezes hair inside a small space. This is why the method can feel “clean” compared to adhesive systems. Still, the same design also explains why removal needs discipline. If a bead is not fully opened, any pulling will transfer force into natural hair.
A micro link bond normally includes:
- a ring or bead (often aluminum with or without silicone lining)
- an extension strand (often I tip hair, sometimes other strand tips)
- a section of natural hair that acts as the anchor
The bead is closed during installation with pliers. The pliers shape and pressure decide how easy the bead will open later. A bead that is crushed too flat can create sharp corners. Sharp corners can catch hair and create breakage during removal. A bead that is not closed evenly may slip during wear, but it may also distort and become hard to open cleanly.
From a product view, I also pay attention to bead finish. A smooth bead edge reduces snagging in daily brushing. It also reduces snagging during removal. Silicone-lined beads can increase grip during wear, yet they can also hold shed hairs more tightly. That means detangling matters more before opening beads.
If U want smooth removal, the method must be treated as a system. The right bead, the right tip, and the right clamp shape all reduce risk when the time comes to open and release.
| Item | What it is | Why it matters for removal |
|---|---|---|
| Bead / ring | clamp hardware | determines how easy it opens |
| Lining (optional) | silicone inside bead | increases grip but can trap shed hair |
| Strand tip | the part inside the bead | tip size affects how stuck it feels |
| Clamp shape | how the bead was closed | over-crush can create sharp edges |
| Growth + tangles | hair wrapping near the bead | increases pulling risk during removal |
How to install micro link extensions?
Have U seen removal problems that actually started on installation day? Many “hard removal” cases come from wrong closure and wrong section sizing.
Micro link installation usually includes sectioning the hair, placing the bead on a small natural hair section, inserting the extension tip, and clamping the bead closed with micro link pliers. A stable install uses consistent sections and controlled clamp pressure.
Dive deeper
Even though this article focuses on removal, installation choices decide how hard removal will be later. I suggest salons treat installation as “future removal planning.” That mindset prevents breakage and reduces client fear.
Key installation details that affect removal:
1) Section size consistency
If sections are too thick, beads can close unevenly. Uneven closure can warp the bead. Warped beads are harder to open cleanly later. If sections are too small, beads can pinch hair and create stress. Stress can cause breakage during wear and removal.
2) Bead selection
Bead size must match the tip size and the section size. If the bead is too small, the tip and section pack tightly, and opening becomes difficult. If the bead is too large, the bead may need extra crushing to hold, and extra crushing often creates sharp edges.
3) Clamp pressure and angle
A bead should be closed firmly, but not crushed flat. Many technicians close beads too aggressively because they fear slipping. That can deform the bead and make opening difficult. Controlled pressure makes removal easier.
4) Placement planning
Bonds should avoid fragile edges and over-stressed zones. When bonds sit in weak zones, clients feel discomfort and touch the bonds more. Extra touching increases tangles and makes removal harder.
If a salon wants better retention and safer removals, the salon should use a simple internal chart for bead size, tip type, and section sizing. That chart also helps new technicians avoid the most common mistakes.
| Install choice | What it improves | What it prevents |
|---|---|---|
| Even section sizing | stable closure | warped beads and slipping |
| Correct bead size | balanced grip | crushed beads and hard opening |
| Controlled clamping | clean bond shape | sharp pressure points |
| Proper placement | comfort and blending | stress on fragile zones |
| Scheduled move-ups | lower tangles | painful removals |
How to remove micro link extensions?
Have U ever watched a client try to pull microlinks out at home? That is how breakage starts. Removal must be an “open and release” process, not a “pull and rip” process.
To remove micro link extensions, a stylist detangles first, then uses micro link removal pliers to open the bead in the correct direction, slides the bead down, and releases the extension tip. After that, the stylist combs out trapped shed hair and cleans the hair before the next service.
Dive deeper
I describe safe removal as a checklist. This reduces mistakes when the salon is busy.
Step 1: prepare and detangle
The stylist should brush the hair gently first. The goal is to remove loose tangles and separate hair around each bond. If the root area is matted, removal should start with slow detangling. Opening beads on a matted base can trap hair and create tearing.
Step 2: locate the bead and identify closure direction
Beads are usually clamped in one direction. The bead should be opened in the opposite direction of that closure. If the bead was closed flat left-to-right, the pliers should open it by pressing front-to-back, or the correct opening groove should be used. The exact motion depends on the pliers design.
Step 3: open fully before moving anything
A half-open bead is the biggest danger. If the bead is not fully opened, sliding it will drag hair. Dragging hair creates breakage. The bead should feel loose before it moves.
Step 4: slide the bead down, then release the extension
The bead should be moved away from the scalp and away from the natural hair section. The extension tip can then be pulled out gently with almost no resistance. If there is resistance, the bead is not open enough or there is tangling inside the bead.
Step 5: remove trapped shed hair
Many clients think they are “losing hair” during removal. Often it is shed hair that stayed trapped inside the bead area for weeks. The stylist should comb out shed hair slowly. This prevents panic and protects the client’s trust.
Step 6: clean and reset
After removal, the scalp and hair should be cleansed to remove residue. Residue can affect the next install. A clean base also lets the stylist assess natural hair condition.
I suggest salons use a simple risk control rule: if a bead cannot open cleanly, do not pull harder. The stylist should re-position the pliers, open the bead more, then release again.
| Removal step | What the stylist does | Main risk if skipped |
|---|---|---|
| Detangle first | separate hair near bonds | pulling and breakage |
| Open in correct direction | use pliers angle correctly | bead warping and snagging |
| Open fully | bead feels loose | dragging hair inside bead |
| Slide then release | bead moves away from section | tip tearing and pain |
| Comb out shed hair | remove trapped shed hair | client thinks hair is falling out |
| Clean base | wash residue | next install slips faster |
How to care micro link extensions?
Have U seen clients with perfect installs but messy root tangles by week six? That is usually a care and schedule problem, not a hair problem.
Micro link care focuses on keeping roots clean, reducing product build-up near beads, brushing gently, drying the root zone fully, and booking move-ups before tangling begins. This care routine also makes later removal safer.
Dive deeper
Good care protects two things at the same time: bond stability and safe removal later. When care is poor, tangling grows. When tangling grows, removal becomes stressful.
I suggest a simple care structure:
Daily brushing habits
The client should brush from ends upward. The client should slow down near the roots. The client should avoid ripping through knots around the beads. A gentle approach reduces bond stress.
Root product rules
Heavy oils, scalp serums, and thick conditioners near the beads can reduce friction and increase slipping. They can also trap residue. I suggest keeping heavy products on mid-lengths and ends.
Washing and drying
The client can wash normally, but rinsing must be thorough. Leftover product increases residue. After washing, the client should dry the root area well. Damp roots increase tangles and odor.
Sleep control
A loose braid or low ponytail reduces friction while sleeping. Less friction reduces tangling around bonds.
Maintenance schedule
Move-ups usually happen around 6 to 10 weeks depending on hair growth. If a client waits too long, bonds drop and swing more. Swinging increases tangles. Those tangles make removal harder.
For salon owners, I suggest a short aftercare sheet and a fixed next-visit booking. For wholesalers, I suggest including care notes with hair shipments because end users often blame the hair when the real issue is routine.
| Care habit | What it protects | What it reduces |
|---|---|---|
| Gentle brushing | natural hair near bond | breakage and pain |
| Clean roots | bead grip | slipping |
| Avoid oils at roots | friction level | sliding and residue |
| Dry roots fully | root base | tangles and odor |
| Sleep control | bond area | matting |
| On-time move-ups | placement and neatness | hard removal cases |
When should micro links be removed instead of moved up?
Have U wondered if a client should keep reusing the same hair, or if it is time to remove everything and reset? This decision affects safety and results.
Micro links should be fully removed when the client has heavy matting, scalp irritation, visible breakage near bonds, distorted beads, or a major change planned like a full color correction. A full removal also makes sense when hair needs deep cleaning and reassessment.
Dive deeper
Some clients treat microlinks as “forever hair.” That mindset creates the worst cases. I suggest salons explain that a full removal and reset is sometimes the safest option.
Here are practical triggers:
Heavy matting near roots
Matting means the root area is locked. A move-up on a matted base increases pulling. A careful removal and detangle is safer.
Scalp irritation or sensitivity
If the scalp is irritated, the client needs a reset. Keeping bonds in place can keep the scalp inflamed.
Bead distortion
Beads can deform from over-clamping or repeated handling. Distorted beads are harder to open and can snag hair. Removal and replacement of beads is safer.
Breakage signs
If short hairs appear around bonds, tension may be too high or maintenance may be delayed. A reset lets the stylist adjust strand weight, placement, and section sizing.
Major chemical services
A big color service, bleaching, or chemical texture work can change hair strength and friction. Removal can help protect hair during that process.
This topic matters for wholesalers too. When buyers understand the reset rule, they position the method more honestly. Honest positioning reduces returns and reduces negative reviews.
| Situation | Better choice | Why |
|---|---|---|
| Light grow-out, low tangles | move-up | keeps system stable |
| Heavy matting | full removal | reduces pulling risk |
| Irritated scalp | full removal | allows scalp recovery |
| Distorted beads | remove and replace | prevents snagging |
| Breakage signs | full reset | adjust load and plan |
| Major color work | remove first | lowers chemical stress risks |

My opinion
I think micro link removal should never be rushed. The safest removal is always “open first, then release.” Any method that uses pulling is not a removal method. It is a damage method.
I also think salons should teach clients that trapped shed hair is normal. Many clients panic during removal because they see hair coming out. Clear explanation reduces fear and builds trust.
FAQ
Can clients remove micro link extensions at home?
Home removal is risky because wrong tools and wrong angles cause pulling and breakage. A professional removal is safer.
What tool is used to remove micro links?
Removal usually uses micro link pliers designed to open the bead. The pliers must open the bead fully without crushing it.
Why does removal sometimes hurt?
Pain usually means the bead is not fully opened or the root area is tangled and pulling. Slow detangling and full opening reduce pain.
Do micro links cause shedding during removal?
Clients often see trapped shed hair. That hair was already shed during wear but stayed caught near the bead area.
Should hair be washed after removal?
A wash helps remove residue and lets the stylist assess the natural hair before the next service.
Can the same extension hair be reused after removal?
Hair can be reused when the hair grade is high and the tips remain stable. Reuse also depends on how much tangling and pulling happened during wear.
Conclusion
Safe micro link removal is a controlled open-and-release process. Clean tools, full bead opening, gentle detangling, and clear aftercare make removal smoother and protect natural hair.