You love how your micro beads look when your hair is down. Then you try a ponytail. You feel a little bump. You worry someone will notice. You start overthinking every hair tie.
You can put your hair up with micro bead extensions by keeping tension gentle, choosing the right ponytail height, and using simple cover tricks that hide the bead line. Low ponytails, low buns, and braids are the easiest. High sleek styles can work sometimes, but they need extra care.

If you want a clear plan you can use every day, this guide will help. I will explain what micro beads are, the common micro bead types you may see in salons, why beads show in some upstyles, and how to make ponytails and buns look smooth without pulling too tight.
What are micro bead extensions?
Micro beads sound simple until you touch them for the first time. Then you wonder what that tiny “dot” is and how it is even holding hair.
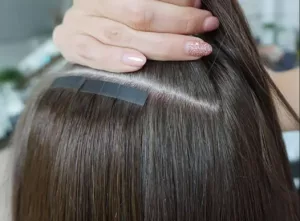
Micro bead extensions are a no-heat method where small beads (tiny rings) clamp extension hair to your natural hair. They do not use glue. They are moved up during maintenance as your hair grows.
Dive deeper
When I explain micro bead extensions to someone new, I keep it simple. A micro bead is a tiny connector. It holds your natural hair and the extension hair together after it gets clamped with a tool.
Many people choose micro beads because they want a damage-reducing option. They like that there is no glue and no heat. They also like that the hair can be moved up and reused during maintenance, as long as the hair quality stays good.
But micro beads have one thing you should know before you style. The bead is still a physical object near your root. That is why upstyles can feel different compared to tape-ins or wefts. If you pull hair very tight, the bead line can “print” through the surface. If you go for a very sleek look, small bumps can stand out more.
This is not a reason to avoid micro beads. It is just a reason to style smarter. A softer ponytail and a little texture can hide beads far better than a tight, glossy ponytail.
Common types of micro bead methods you may see
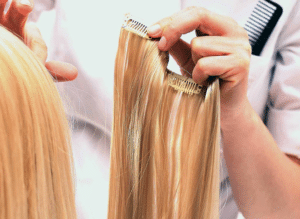
Salons use “micro beads” as a general category, but the top design on the extension strand can be different. These are three common types that still use a bead or ring to clamp onto your hair.
1) I Tip hair (stick tip)
I Tip hair extensions are also called stick tip extensions. This method uses a no-heat setup and many people like it because it avoids glue. Each strand has a strong keratin tip shaped like an “I.” Your stylist inserts that tip into a micro ring or bead along with your natural hair, and then clamps it.
This gives natural movement and it blends well when the sectioning is clean. It also allows good flexibility in styling because each strand moves on its own.

2) Nano ring hair
Nano ring extensions are known for a more discreet look. The “nano ring” is much smaller than a standard micro ring, so the attachment can feel lighter and look more hidden.
Your stylist inserts the nano tip into the nano ring and clamps it onto your natural hair. Because the ring is smaller, many clients feel it is more comfortable and less visible, especially on finer hair.

3) F tip hair extensions
F tip extensions are another bead-based option. The top is made to work with small micro beads so the attachment looks discreet. The strand is inserted into the micro bead and then clamped onto your natural hair.

Many clients choose this option when they want a small, comfortable bond and they prefer a clean, low-profile attachment.
| Micro bead type | What it looks like at the top | Why people choose it | Best fit |
|---|---|---|---|
| I Tip hair | Keratin “I” shaped stick tip | Natural movement, no heat, strand-by-strand | Medium to thick hair, flexible styling |
| Nano ring hair | Nano tip + very small ring | Smaller bond, more hidden | Fine to medium hair, discreet finish |
| F tip hair | Small tip designed for micro beads | Low profile feel and look | Fine hair or anyone wanting smaller bonds |
If you are not sure which one you have, you can ask your stylist one question: “Is it I Tip, Nano ring, or F tip?” That answer helps you pick the best upstyle plan.
Can you wearing hair up with micro bead extensions?
You want to wear your hair up because it is normal life. You work out. You get hot. You need hair off your neck. But you also do not want beads showing.
Yes, you can wear hair up with micro bead extensions. The easiest styles are low ponytails, low buns, and braids because they use less lift at the crown and they keep the bead line covered. High sleek ponytails are the hardest because they show bumps more easily.
Dive deeper
I like to think about micro bead upstyles in one simple way: the tighter and higher you go, the more you expose the bead line. That does not mean you can never do a high ponytail. It just means you need to choose it carefully.
Here is why. When you pull your hair into a high ponytail, you lift hair up from the crown and sides. That lift can separate the top layer of hair from the hair underneath. If beads sit under that top layer, the separation can make bumps visible. Also, the more sleek and flat the top looks, the more any small bump stands out.
Low styles work better because they pull hair back with less lift. Your cover hair stays closer to the scalp. That makes it easier to hide beads. Braids are also great because a braid creates texture and structure. Texture makes tiny bumps harder to notice.
Comfort matters too. If a style hurts, you will touch it. You will adjust it. And the more you touch the base, the more likely you are to expose beads. A comfortable ponytail almost always looks better for longer.
I usually guide clients with a “safe menu”:
- Daily safe: low ponytail, low bun, low braid
- Pretty but still safe: textured mid ponytail, messy bun, braided ponytail
- High sleek: only if your hair density and bead placement support it
| Style | How hidden beads usually are | How it usually feels |
|---|---|---|
| Low braid | Very hidden | Very comfortable |
| Low bun | Very hidden | Comfortable |
| Low ponytail | Hidden | Comfortable |
| Mid ponytail (textured) | Depends | Medium |
| High sleek ponytail | More visible | Can feel tight |
If you want the easiest win, start low and add a little texture. That alone solves most “beads showing” problems.
How to put your hair up with micro bead extensions
You do not need ten different tricks. You need one routine you can repeat fast. That routine should hide beads and also protect your natural hair.
To put your hair up with micro bead extensions, use a low or mid base, leave a small top cover section, tie your ponytail gently, then lay the cover hair over the bead area and finish with a wrap or soft texture.
Dive deeper
This is the routine I recommend when you want your ponytail to look clean without stress.
Step 1: Pick the height first
Choose low or mid. If you go high, you raise the risk of bead bumps showing. If you feel unsure, choose low. Low looks classy and it is safer.
Step 2: Leave a small cover section
Take a thin layer of hair from the top and crown. Clip it out of the way. This is your “cover hair.” It is the hair that will hide the bead line after you tie your ponytail.
Step 3: Gather the rest with your hands
Use your hands first. Hands are gentler near the roots. A hard brush at the roots can catch beads and lift the surface hair. If you need a brush, brush the surface only.
Step 4: Tie the ponytail with gentle tension
Use a soft elastic. Tie it firm enough so it stays, but not so tight that your scalp feels pulled. If you feel pressure points, loosen it.
Step 5: Lay the cover hair over the base
Now release the top cover section. Lay it over the ponytail base and smooth lightly. This hides bead outlines and also makes the top look nicer.
Step 6: Finish the base
Take a small strand from the ponytail and wrap it around the elastic. Pin it underneath. This makes the ponytail look “done,” and it keeps eyes away from the attachment area.
Step 7: Do a quick check
Turn your head side to side. Look down. Check in bright light. A phone photo from the back is even better.
| Step | What it helps with | What to avoid |
|---|---|---|
| Low/mid height | Less crown lift | High tight ponytail every day |
| Cover section | Hides bead line | Pulling everything tight at once |
| Gentle tie | Comfort + less bump | Headache-tight elastics |
| Wrap finish | Hides elastic + looks polished | Leaving base exposed |
Once you do this routine a few times, it becomes automatic.

Best hairstyles that hide micro bead extensions
You want options. You do not want one boring ponytail forever. You also want styles that do not make you nervous.
The best hairstyles for hiding micro bead extensions are low braids, low buns, and textured ponytails. These styles create natural texture that makes bead bumps harder to see, and they keep tension away from the sides and crown.
Dive deeper
When beads show, it is usually because the style is too sleek or too tight. So the best styles do the opposite. They add texture and keep tension soft.
Here are three strong choices.
1) Low braid
A low braid is one of the easiest “invisible” styles for micro beads. It keeps hair controlled and it hides unevenness by design. It also reduces movement, which helps comfort.
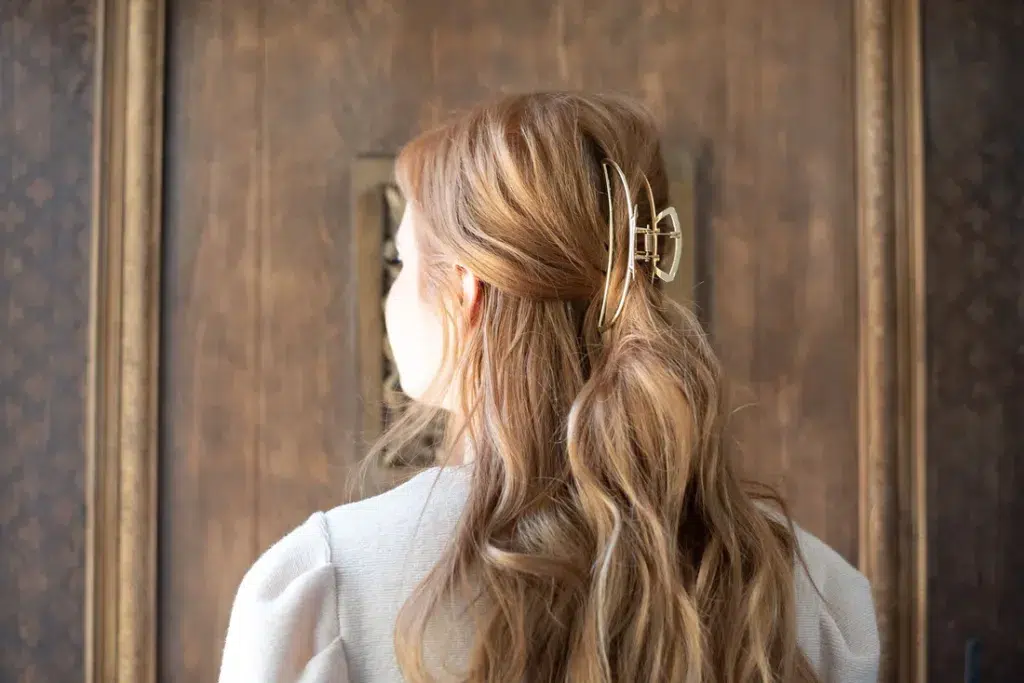
2) Low bun with soft crown
A low bun hides the base area. If you keep the crown slightly relaxed, the bead line stays covered. A bun also works for formal events because it looks clean without being too tight.
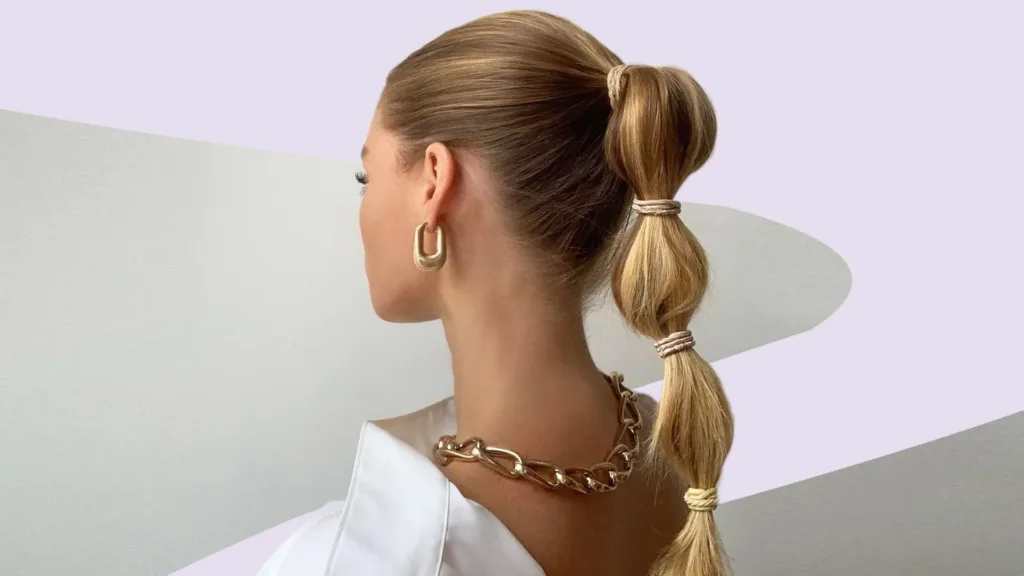
3) Textured ponytail
A textured ponytail means you add a soft wave or bend. It does not mean messy. A little texture breaks up the surface, so tiny bumps do not stand out.
If you love sleek looks, you can still do them sometimes. But I would treat sleek high styles like “special occasion hair,” not everyday hair. Your scalp will usually feel better, and your install will usually stay neater.
| Style | Why it hides beads | Best for |
|---|---|---|
| Low braid | Texture + control | Gym, travel, daily wear |
| Low bun | Covers base + low tension | Work, events, neat looks |
| Textured ponytail | Breaks up bumps | Dinner, casual, photos |
| Sleek high ponytail | Shows bumps easier | Only sometimes |
If you want a quick rule, pick a style that has texture and sits lower on the head.
High ponytail with micro beads: when it works and when it fails
A high ponytail is a favorite look. It also makes many micro bead clients nervous. Both feelings are fair.
A high ponytail can work with micro bead extensions when your bead placement is not close to the perimeter, your top hair is dense enough for coverage, and your ponytail is not painfully tight. It often fails when the sides are thin or the top is pulled too flat.
Dive deeper
A high ponytail is basically a “stress test” for micro beads. It pulls hair up, and it makes the top surface smooth. That combination can reveal bumps.
So I like to use a simple pass/fail check before committing:
Pass signs
- Your sides (temples) have enough natural hair to cover.
- Your beads are not placed right at the hairline.
- Your ponytail can be tied firm, but not painful.
- You are okay with a slightly softer finish instead of super sleek.
Fail signs
- Your sides are fine or sparse and show scalp easily.
- You feel beads quickly when you pull hair up.
- Your ponytail needs to be very tight to look “snatched.”
- Your hair is in late grow-out and feels more mobile at the root.
If you still want the high look, you can make it easier by changing the finish. Instead of a super sleek top, try a high ponytail with soft texture, or a half-up high ponytail. Both keep the vibe but reduce exposure.
A small detail also helps: do not brush aggressively over the bead area. Aggressive brushing can separate cover hair from the bead line. Smooth the surface hair lightly, then stop. Overworking the top is what often makes the beads show.
| High ponytail version | Bead visibility | Who it fits |
|---|---|---|
| High sleek ponytail | Highest risk | Thick top hair, safe placement |
| High ponytail with soft texture | Medium risk | Most clients who want height |
| Half-up high ponytail | Lower risk | Fine sides, needs more cover |
High ponytails are possible. They just need the right version for your hair and your bead map.
Quick fixes when micro beads show in an upstyle
Sometimes you do your ponytail and then you catch a bead in the mirror. You do not want to start over from zero.
If micro beads show, the fastest fixes are lowering the ponytail, adding a cover section, adding texture, or changing the part line. Small changes often hide the bead line without redoing the whole style.
Dive deeper
I like quick fixes because real life is busy. Here are the fixes that work most often.
Fix 1: Drop the base
If beads show in a high ponytail, drop to a mid ponytail or low ponytail. This reduces crown lift right away. It often solves the problem instantly.
Fix 2: Add a cover strand
Take a small top section, lay it over the bead area, and pin it lightly. If you do not have pins, you can use a wrap section from the ponytail to cover the base.
Fix 3: Add texture
Run your fingers through the ponytail and add a soft bend. You can also lightly pull a few pieces at the crown for softness. This makes bumps less obvious.
Fix 4: Change the direction
Sometimes the bead shows because hair is pulled in a way that opens a gap. Try shifting the ponytail slightly lower or slightly more centered. Even a small change can hide a corner.
Fix 5: Choose a braid finish
If the ponytail still looks tricky, braid the ponytail. The braid adds structure and hides uneven blending.
| Problem you see | Fast fix | Why it works |
|---|---|---|
| Beads show at crown | Lower ponytail | Less lift |
| Beads show at sides | Add cover hair + soften tension | More coverage |
| Bumps look obvious | Add texture | Breaks up surface |
| Style feels painful | Retie looser | Comfort improves look |
These fixes help you get out the door without panic.
My opinion
Micro bead extensions can look amazing in upstyles, but they like a soft approach. When I keep the style lower and less tight, I get a cleaner look and I feel more comfortable. When I chase a super sleek finish, I usually create more problems than I solve.
If you want one habit that helps the most, it is this: leave a small cover section, tie gently, then cover and wrap. It makes ponytails and buns feel much safer.
FAQ
Can you wear your hair up with micro bead extensions every day?
Yes, and low styles are best for daily wear. Low braids and low buns usually feel the easiest.
Why do micro beads show more in high ponytails?
High ponytails lift the crown and pull the sides tight. That makes bead bumps more visible, especially on fine hair.
What is the easiest upstyle for micro beads?
A low braid is often the easiest because it hides texture changes and stays comfortable.
How do you hide micro beads in a ponytail quickly?
Lower the ponytail, use a cover section, and wrap hair around the elastic. Add soft texture if needed.
Should an upstyle feel tight with micro beads?
No. A painful style is usually too tight. A gentler tie often looks better and protects your natural hair.
Conclusion
You can put your hair up with micro bead extensions by keeping styles soft, choosing lower bases, and using cover hair and texture to hide the bead line.