
how to install clip in hair extensions?
You want instant length, volume, and shape. Your client needs speed, comfort, and clean roots. Wrong placement shows. Right placement disappears.
Clip-in hair installs start with section maps, clean anchors, and correct piece order. Prepare the base, place from nape to crown, blend, and finish. Short hair and thin hair need special mapping. A 7-piece set follows a fixed layout.

I will define clip-ins, list pros and cons, then teach the full install process. You will get maps for short hair and thin hair, a 7-piece plan, blending rules, and care. Use this as a salon SOP for repeatable results.
what are clip in hair extensions?
Many clients think clip-ins are “party hair.” They are not. They are modular tools for fast transformations and low-commit looks.
Clip-in hair installs start with section maps, clean anchors, and correct piece order. Prepare the base, place from nape to crown, blend, and finish. Short hair and thin hair need special mapping. A 7-piece set follows a fixed layout.
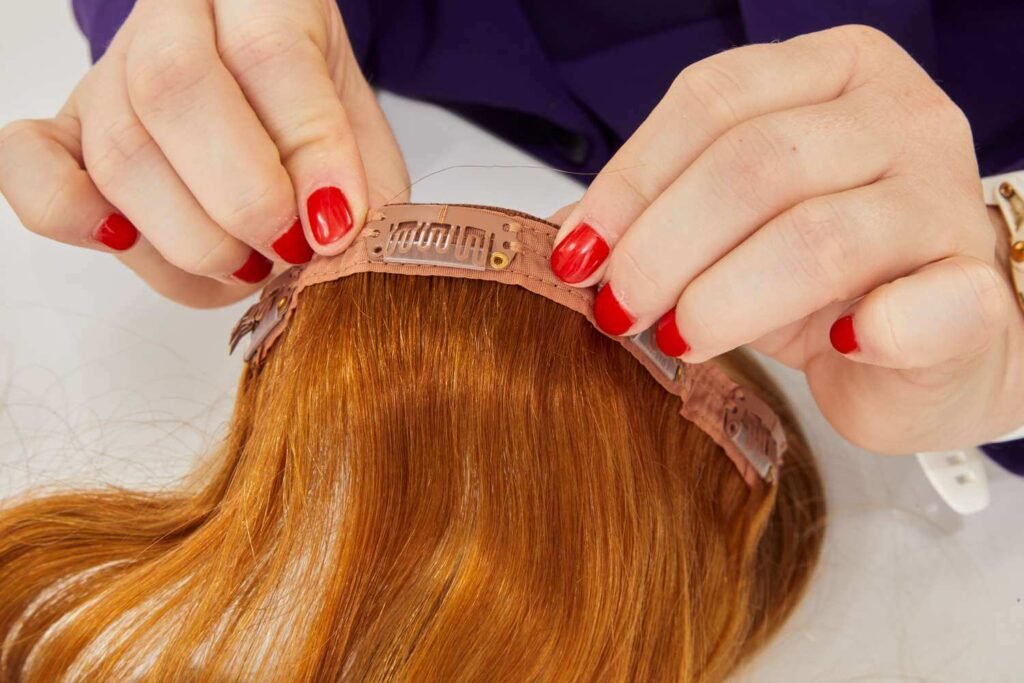
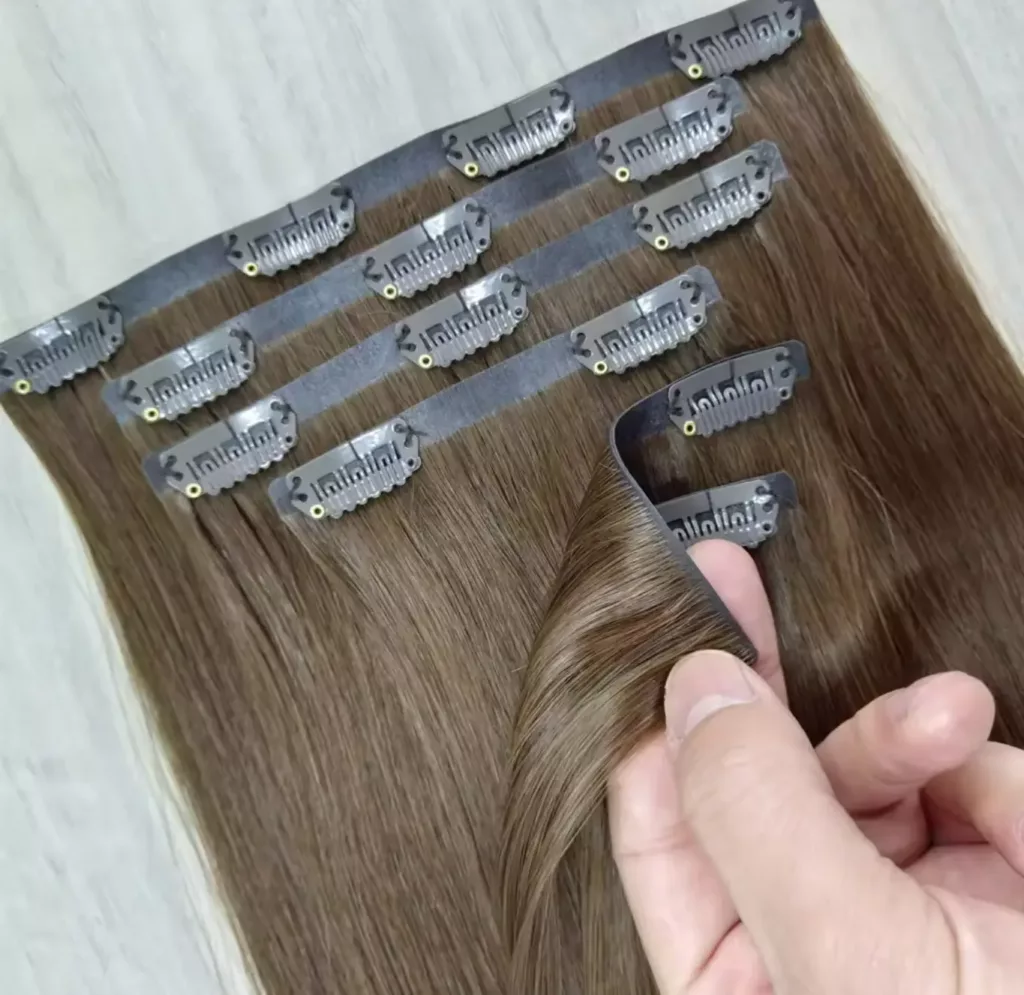
Clip-in hair extensions are pre-made wefts with pressure-sensitive clips sewn along the top. You attach them to the natural hair for day wear and remove them at night. Pros use single-donor, full cuticle human hair for realism and long life. Seamless bases sit flatter than fabric tops.
Dive deeper
Definition. Each weft is a strip of hair attached to a flexible base with small metal clips. The clips open and close with light pressure. The weft widths vary. Wider wefts cover the back. Narrow wefts fill the sides and face frame. High-end options use silicone-injected seamless tops that lie very flat. Fabric or lace tops give more flexibility when curving around the head.
Advantages. You install in minutes. You remove before sleep, swim, and heavy workouts. You avoid adhesive and heat. You control grams per zone. You reuse for 6–12 months or more with full cuticle hair. You color-match offline and swap tones by set. You stage several pre-styled sets for a tour or shoot.
Limitations. Clip-ins are not 24/7 wear. Clients must remove daily. Poor anchors slip. Heavy sets cause tension on fine hair. Cheap hair looks shiny and tangles. Wrong mapping shows tracks on wind or movement. Short hair needs smart stacking to hide the perimeter line.
Use cases. Red carpet blowouts. Bridal trials. E-comm shoots. Press days. First-timer length tests before tapes or keratin. Retail add-on for salon revenue.
Base types quick view
| Base/Tech | Look | When to choose |
|---|---|---|
| Seamless (PU/silicone) | Ultra-flat, invisible edge | Fine hair, sleek looks |
| Lace/fabric | Flexible curve, breathable | Round head shapes, wavy styles |
| Invisible(injection tech) | The most invisible appearance | Very fine, density-sensitive clients |
how to install clip in hair extensions
Your install succeeds or fails in the first two sections. Clean anchors matter. Width order matters. Blending finishes the illusion.
Clip-in installs follow five phases: prep, section map, anchor build, weft order, and blend. Start at the nape. Work upward. Keep weight balanced. Keep clips off very short baby hairs and off the highest crown.
Dive deeper
Tools. Rat-tail comb, section clips, soft teasing brush, light texture powder or spray, loop brush, flat iron or 1″ iron, heat protectant, fine shears or texturizing scissors (for micro-dusting only).
Prep. Hair must be clean and dry. No heavy oils. Light blowout with root direction smoothed down. Mist a heat protectant mid-lengths to ends. Have the set brushed and detangled.
Section map and anchors.
1) Nape line. Part horizontally 1–1.5 inches above the hairline. Clip the rest up.
2) Anchor cushion. Spray a small amount of texture spray or dust a little powder along the part line. Lightly backcomb at the root where clips will sit. Do not over-tease. You want a cushion, not a knot.
3) Test clip contact. Place a clip, click it shut, tug gently. If it slides, add a little more cushion or move 2–3 mm higher.

Weft order (generic set with 1×8″, 1×7″, 1×6″, 2×4″, 2×1.5″):
- Row 1 (nape): 6–7″ weft (choose the narrower one if the head is petite).
- Row 2 (mid-occipital): 8″ weft. Keep 1–1.5 inches between rows.
- Row 3 (upper occipital): 7″ weft if available, or the second widest.
- Sides/temples: 4″ wefts on each side, placed below the parietal ridge.
- Face frame: 1.5″ singles just behind the hairline for symmetry.
Placement rules.
- Curve wide wefts into a soft “U.” Do not place flat straight across.
- Keep at least a finger width away from the hairline and the top crown to avoid exposure.
- Stagger side pieces so clips do not stack on the same vertical line.
- Always close clips with hair pulled taut. This prevents bubbles.

Blend and finish.
- Curl natural hair and extensions together in alternating directions for a lived-in blend.
- Polish ends with a quick micro-dust if needed (1–2 mm only).
- Add a light, water-based finishing cream to mids/ends. Avoid roots.
- Check from all angles under bright light and in daylight. Move the head, shake, and bend forward. Adjust any exposed edges.

Common mistakes and fixes
| Issue | Cause | Fix |
|---|---|---|
| Weft shows at crown | Row placed too high | Drop last row 1–2 cm |
| Slipping clips | No anchor cushion | Add powder + light tease |
| Heavy feel | Too many grams per zone | Remove one weft or split density |
| Shelf line on short hair | No perimeter buffer | Add micro weft at nape, stack singles |
| Color looks flat | Single-tone set | Add lowlight mix or root shadow set |
how to put in hair extensions in short hair
Short hair exposes everything. You need a soft perimeter, a hidden nape, and broken lines. The map changes.
For short hair, create buffers at the nape, stack wefts strategically, and shape with bends. You hide the bob line by layering density and by curving pieces around corners.
Dive deeper
Perimeter buffer. Most short cuts have a blunt baseline that peeks through. Solve this first. Part 0.5–1 inch above the nape. Place one narrow single or a very thin custom micro-weft. This softens the hard line. Above it, place your first wider weft. The buffer prevents natural ends from punching through the length like spikes.
Stacking strategy. Use shorter wefts and more rows. Keep spacing tight (0.75–1 inch). Stagger clip locations so no two clips sit vertically aligned. For very short sides, skip heavy 4″ wefts and use two 1.5″ singles per side. Curve them back from the temple into the crown to disguise the angle of the bob.
Color and texture. Choose a set with a root shadow and multi-tone blend. Short natural roots contrast against one-tone extensions. Add soft bevels with a flat iron. A slight C-bend at the ends hides step lines. Avoid pin-straight finishes; movement hides transitions.
Face frame control. Short hair often has strong pieces at the jaw. Place a single behind the hairline to extend those points, then slide cut 1–2 mm off extension ends for a feathered veil. Keep weight light to avoid that “chunky add-on” look.
Wind and motion test. Have the client shake, flip, and tuck. If the nape flashes, add another micro single deeper inside. If the temple pops, rotate the side singles further back and raise the front natural hair coverage.
how to put in clip in extensions for thin hair
Thin hair needs light tension, flat bases, and smart anchors. Comfort and camouflage beat maximum grams.
For thin hair, choose seamless bases, reduce piece weight, and build soft anchor cushions. Place lower and wider, avoid top crown, and focus on volume zones rather than chasing dramatic length.
Dive deeper
Set selection. Use seamless or injection-bonded clip-ins. They lie flatter than fabric tops. Pick a lighter gram set (100–140 g) and shorter length (14–18″) so the ratio between natural hair and extensions stays believable.
Anchor building. Thin hair often lacks grip. Create a micro cushion with texture powder at each clip site. Backcomb 3–5 gentle strokes only. Over-teasing creates visible knots. Keep anchors at least 1 cm from the scalp to avoid scalp peek-through when the clip opens.
Placement map. Start lower than usual. Two back rows often suffice: one at the nape (6–7″) and one at mid-occipital (7–8″), both curved well. Use single or double singles at sides instead of heavy 4″ pieces. Leave the top crown free for natural coverage.
Volume targeting. Ask, “Where do you want lift?” If the client says “sides,” load singles in a V-shape around the parietal dip. If they want “back fullness,” shift grams to the mid-back row and skip extra sides. Less is more on thin hair.
Comfort audit. After placement, have the client smile, chew, and raise brows. If any clip bites, move it. Thin scalps feel pressure quickly. Remove one piece if needed. A comfortable set gets worn. A heavy set stays in a drawer.
how to put in clip in hair extensions 7 pieces
Most retail kits come as seven pieces. The layout matters. Use a fixed order so results repeat.
A classic 7-piece set installs nape to crown with two side fillers. Follow this exact map, adjust widths to the head, and check the crown coverage.
Dive deeper
Typical contents. 1×8″ (4 clips), 2×6–7″ (3–4 clips), 2×4″ (2 clips), 2×1.5″ (1 clip). Some brands vary by 0.5″. Lay pieces on a towel in order.
Order of install.
1) Row 1 (nape): 6″ weft. Curve into U.
2) Row 2 (mid-occipital): 8″ weft. This is your main density row.
3) Row 3 (upper occipital): 7″ weft. Keep 1–1.5 inches under the crown.
4) Sides: 4″ weft per side, placed below parietal ridge.
5) Face frame: 1.5″ singles as needed.
Rules that prevent exposure.
- Do not place any weft within the top 1.5 inches of the crown.
- Keep clips at least one finger behind the hairline at temples.
- If the head is small, skip one side filler or use singles only.
- If the head is wide, split the widest weft into two overlapping curves instead of forcing it straight.
Blend program. After placement, curl in alternating directions. Comb out with a wide tooth and finish with a light cream. If the ends read too blunt, remove 1–2 mm with point cuts. Do not layer heavily; you want set reusability.
how to blend and style clip in hair extensions
Blending sells the illusion. You match movement, not only color. Heat control and cut control matter.
Blend by matching curl pattern and by softening edges. Style with low heat, light tension, and final grooming that keeps roots clean.
Heat rules. Stay at or below 350°F/180°C on premium human hair. Always use a heat protectant. Curl the natural hair and the extension hair together in each section so the bonds between fibers form at the same angle. Hold the curl for two seconds in hand to set. Release without pulling.
Cut rules. Clip-ins are modular. Avoid heavy layer cuts that shorten the set’s life. Use micro-dusting and point cutting to break the line only where needed—usually the front veil and the last 2–3 inches. Keep face-frame soft and slightly shorter than the back to encourage forward movement.

Texture choices.
- Beach waves: Alternate directions, leave 1–2 inches straight at the ends.
- S-waves: Use a flat iron, rock forward and back for a ribbon effect.
- Sleek: One-pass polish, then a tiny bevel on the last inch to remove the shelf.
Anti-flash control. Use water-based creams or silicone-balanced serums on mids/ends only. Avoid oils at the root; oils travel into clip seams and attract dust.
Final checks. Hair flip, pony test, wind test with a fan. If anything shows, drop one row, re-curve, or add a micro single just behind the problem area.
how to care for clip in hair extensions
Good care doubles lifespan. Clients remember simple rules. Keep it short and clear.
Care means gentle washing, smart drying, correct storage, and safe products. Roots stay clean. Ends stay hydrated. Clips stay tight.
Wash routine. Every 10–20 wears or when product builds up. Detangle before washing. Use lukewarm water. Apply sulfate-free shampoo from top to ends in a downward motion. Rinse long. Apply a light conditioner mids to ends only. Rinse. Do not scrub bases.
Drying. Blot with microfiber. Lay flat on a towel. Air-dry 80%. Finish with a cool blow-dry if needed. Keep clips closed so bases keep shape. Do not twist bases while wet.
Styling. Always use heat protectant. Style at or below 350°F/180°C. Store pre-styled in a hanger bag or box to save time at the next install. Avoid hairspray at clip seams.
Storage. When dry, brush gently and store in a breathable pouch. Keep away from heat and sun. Label sets by color and length.
Product rules. No heavy oils near bases. Choose water-based creams. Use chelating shampoo monthly if the client uses lots of dry shampoo or swims often. For blondes, maintain tone with a diluted purple mask as needed (off the bases).

My opinion
I run installs like a production line: map, anchor, order, blend, check. Clip-ins can look as clean as tapes when the map is right and the grams are balanced. Premium, full cuticle hair gives the finish that sells. Seamless bases solve thin-hair visibility. Short hair needs a buffer and stacking. I never chase maximum density; I chase believable movement and comfort. That keeps clients wearing the set, not hiding it.
FAQ
How long does it take to install clip-ins?
5–10 minutes for pros. Short hair or precision face frames add a few minutes.
How many pieces should I use?
Most heads use 5–7 pieces. Thin hair uses fewer, with singles at the sides.
Do clip-ins damage hair?
Not when placed on anchor cushions, worn daytime only, and brushed correctly.
Can clients sleep in clip-ins?
No. Remove nightly to prevent matting and traction.
What length should I buy?
Match within 2–4 inches of target length. Extreme jumps look unnatural without heavy styling.
Can I color clip-ins?
Yes, if they are 100% human hair. Tone and gloss are safest. Keep chemistry off clip seams.
Why do my clips slip?
No anchor cushion or too much oil at the roots. Add texture powder and a light backcomb.
How do I hide a blunt bob line?
Add a nape buffer single, stack rows tighter, and add soft bevels to ends.
Are seamless bases better for thin hair?
Yes. They sit flatter and show less. Keep grams low and rows lower.
Can I heat-style before installing?
Yes. Pre-style sets to save time. Refresh bends after install for final blend.

Conclusion
Clip-ins succeed with clean anchors, correct order, and smart blending. Map the head, place low and curved, and finish with subtle texture for an invisible, comfortable, and repeatable result.
where to buy clip in hair extensions
Hibiscus Hair Manufacturer has been dedicated to producing high-quality clip in hair extensions for 25 years and is a recognized leader in the industry. If you are interested in finding a reliable hair extensions supplier and wholesale for your brand, please visit our website for more information:


