
Micro bead extensions can look perfect in the chair, then show beads after the first wash or a windy day. That problem hurts trust fast. I fix it by treating bead visibility as a planning problem, not a styling problem.
Micro bead extensions stay hidden when I match bead size to the hair density, place rows in the safe zone, keep sections clean and flat, and use smart blending through haircut, spacing, and daily styling habits.

Most bead show-through has a simple reason. The placement is too high, the beads are too big, the density is too light, or the cut is not supporting the blend. I will break each part down so I can control the result.
What Are Micro Bead Extensions?
Micro bead extensions are hair extension methods that use small beads or rings to secure the extension to natural hair. I group them into strand methods and weft methods. That split helps me choose the right hiding strategy from the start.
Micro bead extensions are easiest to hide when I first define the type, then choose the bead size, tip size, and row layout based on hair density, haircut shape, and the client’s daily styling habits.
Dive deeper
I always start by naming the category. That step prevents bad mixing of techniques. I use two core groups.
1) Micro bead strands
I treat micro bead strands as single-strand attachments. I use them when I need detail work. I also use them when I need movement in a small zone.
- I tip strands: I tip hair uses a small straight tip. I slide the client hair and the tip into a micro bead. Then I clamp.
- Nano tip strands: nano tips are smaller at the top. I pair them with nano beads. That combo helps when the client has fine hair, but only if the placement is careful.
Strand methods hide well when I respect the scalp map. I do not place them too close to the perimeter. I also avoid placing them where the client parts daily.
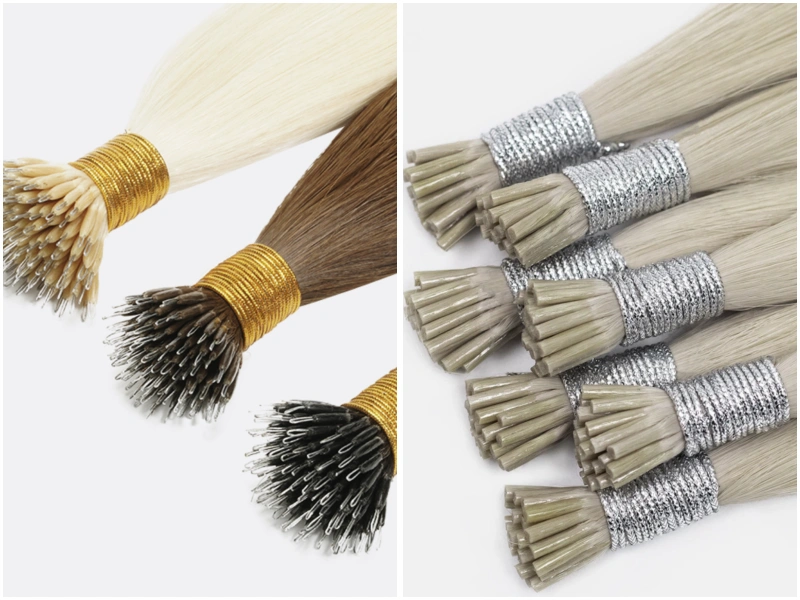
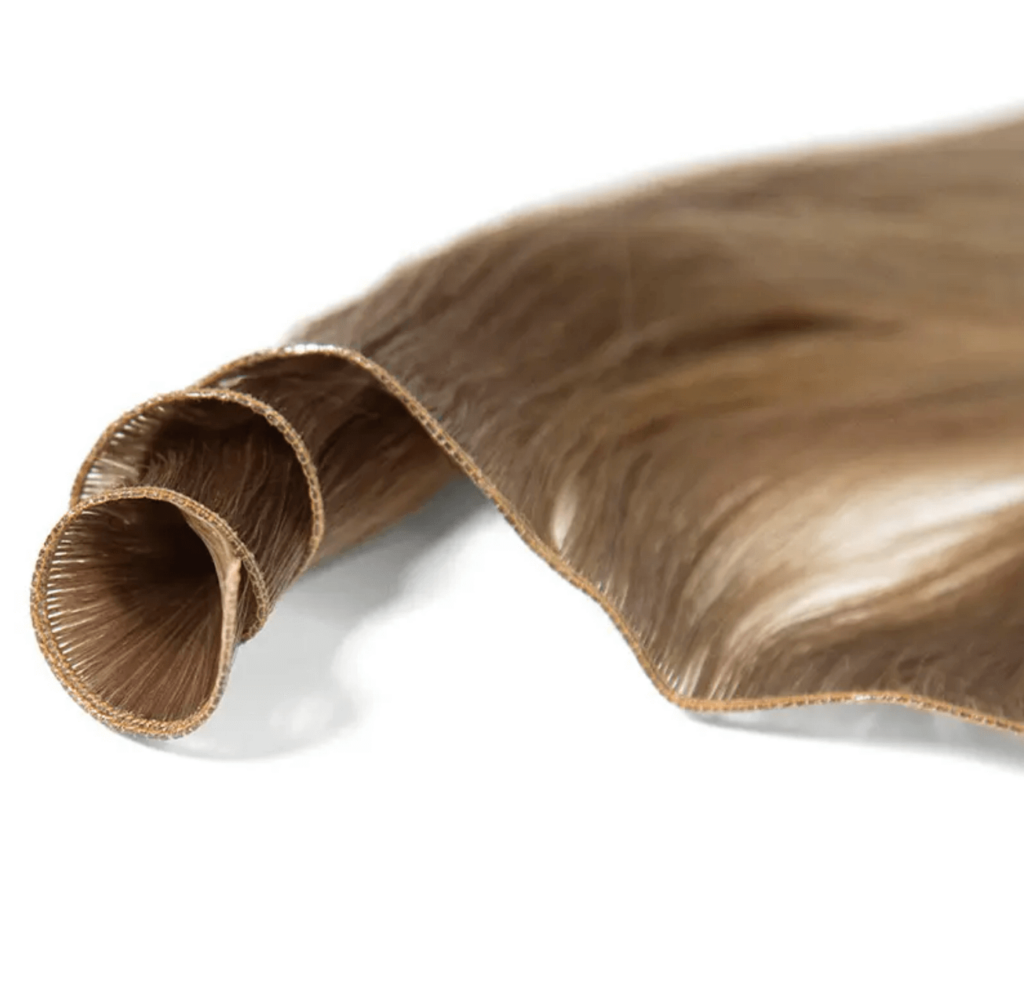
2) Micro beads wefts
I treat micro beads wefts as rows. I use them for speed and volume. I also use them when I want a soft result with less point tension.
- Hand tied weft: thin and flexible. It hides well in many hair types, but it needs clean beading and correct tension.
- Genius weft and other thin wefts: these can be very flat. They can hide well, but I still need correct spacing.
I decide between strands and wefts using a simple check. I look at hair density at the crown and the sides. I also look at how high the client wears ponytails. Then I pick the method that needs the least “cover hair” to stay invisible.
Here is the quick way I explain it to myself:
| Goal | Better choice | Why it hides better |
|---|---|---|
| Fill small gaps | Micro bead strands | I can place detail pieces between natural sections |
| Build fast volume | Micro beads wefts | I can spread weight across a row and keep it flat |
| Fine hair and sensitive scalp | Nano tip with nano beads or very flat weft row | Smaller hardware can reduce bulk if placement is low and clean |
| High ponytails often | Lower rows or different method | Perimeter zones show hardware first |
When I follow this logic, I prevent most visibility issues before the install begins.
How to Hide Micro Bead Extensions?
I hide micro bead extensions by controlling the safe zone, bead size, section thickness, row spacing, and blend haircut. I also build a daily styling plan that matches how the client parts and moves hair.
Dive deeper
I treat “hiding” as a system. I use seven steps. Each step removes one common reason that beads show.
1) I map the safe zone first
I draw an invisible map in my head. I avoid the perimeter. I avoid the crown swirl. I avoid the natural part line. I keep rows lower than most clients expect. When I place too high, the client’s top hair separates and the beads flash.
I use a simple rule. If the client can feel wind on that spot, the beads will show there. That rule keeps me honest.
2) I match bead size to hair density
Large beads create corners and shadows. Those edges show. Fine hair needs small beads, but small beads still show if the top hair is too thin.
I pick bead size after I check the client’s root density. I also check the hair strand thickness. If the hair is fine, I go smaller. If the hair is medium, I still avoid oversized beads unless the client has strong density.
3) I control section thickness
Many installs fail here. If I take too much hair into one bead, the bead sits high and pushes up. If I take too little hair, the bead slips and rotates. Both problems increase visibility.
I keep sections even. I make them clean and straight. I make them match the bead width. I also avoid fuzzy sections. Clean partings make the row flat. Flat rows hide.
4) I use correct row spacing
If rows sit too close, the top hair cannot fall between rows. Then the client sees “steps.” Steps create separation and show beads. I leave enough space so natural hair can drape.
I check spacing with a simple test. I drop the top hair. I shake it. If it does not cover the row in motion, I adjust before I continue.
5) I blend with haircut support
If the client has a blunt cut and I add length, the ends will separate. That separation makes the top hair lift. Then beads show. I fix this with cutting and shaping.
I do not over-thin. I do not make the ends wispy. I create a controlled blend. I add internal movement where needed. I keep the top hair strong so it covers hardware.
6) I control direction and tension
If I clamp beads at the wrong angle, the bead points outward. That angle shows. If I clamp too tight, the bead bites and can flip later. If I clamp too loose, the bead slides.
I keep tension firm but calm. I keep direction consistent. I keep beads aligned. Alignment makes the row sit like a clean track.
7) I plan the part line and daily style
Some clients switch parts daily. Some clients always part on one side. I ask early. Then I place rows away from that line. If the client loves center parts, I keep hardware out of the center part zone.
I also give simple style rules. I teach the client to use a light root spray, a small teasing brush at the crown, and a smooth top layer. I keep it practical. A plan that the client uses is better than a perfect plan that the client ignores.
Why Do Micro Bead Extensions Show?
Micro bead extensions show when the top hair is too thin, the row sits too high, the beads are too large, or the beads rotate from slipping. They also show when the haircut shape does not support blending.
Dive deeper
I diagnose bead visibility like a checklist. That makes the fix faster. I also avoid blaming “hair type” too early. Most issues come from setup choices.
1) The placement is too high
High placement looks good on day one. Then the client washes hair. The root lifts. The beads sit closer to the surface. The hair parts and the beads appear.
I fix this by moving rows down. I also stop placing rows near the crown swirl. That area separates on its own. It will expose hardware.
2) The top hair density is too light
Some clients have fine density at the crown but medium density at the back. If I treat the whole head the same, the crown shows beads. I fix this by using fewer rows and lower placement. I also consider strand details only in stronger zones.
I also make sure the client understands a key point. Fine density needs realistic styling habits. A strong center part with zero volume is not a friend of bead methods.
3) The bead size is wrong
Big beads create bulk. Bulk creates a ridge. Ridges catch light. Light makes hardware visible. If a supplier offers many bead sizes, I keep options ready. That flexibility helps.
4) The sectioning is messy
A messy part line creates crossing hairs inside the bead. Those hairs pull in different directions. Then the bead twists. A twisted bead points outward and shows. Clean sectioning prevents that.
5) Product buildup changes the root behavior
Heavy oils, silicone sprays, and thick conditioners near the root can make beads slip. Slipping leads to rotation. Rotation leads to visibility.
I set clear product rules. I keep oils mid-length to ends. I keep root products light. I also explain that “hydrating” at the root often means “slippery.” Slippery and beads do not mix.
Here is the fast diagnosis table I use:
| What I see | Likely cause | First fix |
|---|---|---|
| Beads show at crown | Placement too high or crown swirl | Move row lower, reduce crown coverage |
| Beads show on sides | Too close to perimeter | Pull in safe zone, add cover hair |
| Beads show after 2 weeks | Slipping from product or weak clamp | Cleanse buildup, adjust clamp, check section size |
| Beads feel bumpy | Beads too big or sections too thick | Use smaller beads, refine sectioning |
This approach keeps results consistent across many installs.

How to Choose the Right Beads and Tips for an Invisible Result?
I choose beads and tips by matching size to hair thickness, matching bead color to root color, and using the smallest hardware that still holds securely. I also avoid mixing systems that create extra bulk.
Dive deeper
I treat hardware selection as a balance between hold and stealth. If I chase only stealth, the hair slips. If I chase only hold, the beads look heavy. I keep the balance with four checks.
1) Size match
I keep the bead small enough to sit flat. I still need enough internal space for the natural hair and the extension tip. If the bead is too tight, it pinches and sits high. If the bead is too wide, it creates a bump.
For nano tip strands, I use nano beads. I do not force nano tips into micro beads. That mix can twist and show.
2) Color match
I match bead color to the client’s root, not the mid-length. Many clients have darker roots. A bead that matches the mid-length can flash at the root line.
I keep basic colors ready. I keep black, dark brown, medium brown, light brown, and blonde. I also consider matte finishes because shine can reveal beads.
3) Material feel and grip
Some beads have silicone lining. That lining can add grip. It can also add bulk. I use it when I need slip control. I avoid it when the client has very fine density and any bulk shows.

4) Tip shape and finish
A clean tip sits better. A rough or oversized tip creates a bump inside the bead. That bump pushes the bead outward. Outward beads show.
I check tips before install. If I see uneven keratin or oversized plastic at the top, I sort it out early. That step saves time later.
I also remind myself that invisibility is not only hardware. It is hardware plus placement plus haircut. If one part is weak, the other parts must work harder.
How to Hide Micro Bead Weft Rows in Fine or Thin Hair?
I hide micro bead weft rows in fine hair by keeping rows low, using fewer rows, using flatter wefts, and building a stronger cover layer with a smart haircut. I also avoid heavy density that forces the top hair to separate.
Dive deeper
Fine hair clients are the real test. Many stylists think fine hair means “no beads.” I do not think that is always true. I think fine hair means “less hardware, lower placement, better planning.”
1) I reduce the number of rows
More rows create more lines. More lines create more chances to show. I use the minimum rows that meet the goal. I also avoid stacking rows too close.
2) I keep rows in the lower safe zone
Fine hair at the crown cannot cover much. I keep rows lower so the strongest hair does the covering. I also avoid placing rows too wide toward the temples.
3) I choose flatter wefts
Hand tied weft can be very thin. Genius weft can also be thin. I choose the option that sits flat for that client. A flat track hides better.
I also avoid thick return hair on bulky wefts when the client has thin density. That bulk creates shadows.
4) I focus on blend and shape
I use a haircut plan that supports coverage. I add soft layers that help hair fall over the row. I avoid sharp lines that split and expose tracks.
5) I set aftercare rules that protect coverage
Fine hair gets oily faster for many clients. Oils cause slipping. Slipping causes rotation. Rotation causes show-through.
I recommend a simple wash plan. I recommend keeping conditioner away from the bead area. I recommend brushing in a controlled way. I also suggest sleeping with a loose braid to reduce tangles that pull on beads.
Here is the fine-hair planning table I use:
| Fine hair situation | Risk | What I change |
|---|---|---|
| Fine crown density | Beads show on top | Lower placement, fewer rows |
| Oily scalp | Beads slip and rotate | Clarifying routine, light products |
| Short top layers | Not enough cover hair | Adjust haircut plan, avoid high rows |
| High ponytail habit | Perimeter shows | Keep rows narrower and lower |
When I respect these limits, micro bead wefts can still look clean and premium.
How Can I Hide Micro Bead Extensions With a Better Blend and Styling Plan?
I hide micro bead extensions with blending that starts at the install, then continues with a simple styling routine. I use root direction control, soft volume at the crown, and strategic parting so the top hair always covers the attachment zones.
Dive deeper
I see many installs that are technically “correct” but still look obvious. The reason is usually blending. Blending is not only cutting. It is also how the hair moves in real life.
1) I set the fall direction during install
Hair follows the track it sits on. If I set beads with random direction, the hair separates. If I align direction, the hair falls as one sheet. A sheet hides hardware.
I brush sections down as I work. I check how the top hair drops. I adjust before I finish.
2) I use controlled volume, not heavy teasing
Some clients tease hard to hide beads. That can cause tangles and stress at the root. I prefer controlled volume. I use light root lift products. I use a round brush. I use a clean blowout.
A clean blowout creates a top layer that stays together. That top layer hides beads.
3) I teach parting habits
If the client parts hair right on top of a row, beads will show. I show the client a safe part line. I also show how to shift the part slightly to refresh the look without exposing the row.
4) I plan updos honestly
Micro bead methods are not the best match for tight high ponytails for many clients. I explain this early. I offer alternative styles like low ponytails, half-up styles, and soft clips.
5) I keep maintenance on schedule
When beads grow out, they sit differently. They can flip. They can show. I set the maintenance plan based on growth rate and hair texture. Then I keep it consistent.
I also explain a simple truth. An invisible install on day one needs invisible maintenance too. If a client delays maintenance, the blend will suffer.
If I need a fast “event fix,” I use these quick moves:
- I change the part line slightly.
- I add soft waves to break straight lines.
- I add a light root powder for grip and lift.
- I keep the top layer smooth and connected.
Those steps are simple, but they work because they target separation, and separation is the real enemy.

My opinion
I learned that “how to hide micro bead extensions” is mostly about choices made before I clamp the first bead. I used to think styling could save a visible install. I was wrong. I saw that the safest path is low placement, correct bead size, clean sectioning, and a blend haircut that supports coverage. I also saw that luxury results need strict consistency. I tell clients the truth about parts, ponytails, and maintenance. That honesty protects my results and the client’s trust.
FAQ
How long do micro bead extensions stay hidden before maintenance?
Most clients keep a clean, hidden look for several weeks, but visibility often increases as the beads grow out. I schedule maintenance based on growth rate, usually before the beads start to flip or sit high.
Can I hide micro bead extensions on very fine hair?
I can often hide them, but I use fewer rows, lower placement, and smaller hardware. I also set realistic styling habits. Fine hair needs a stronger cover layer and softer parting.
Why do beads show more after washing?
Washing can remove styling grip at the root. It can also change how hair separates. If beads show after washing, I check placement height, section size, and the client’s blow-dry routine.
Do nano tip and nano beads hide better than micro beads?
Nano systems can hide better because the hardware is smaller. But the install still needs correct placement and clean sectioning. Small hardware does not fix high placement.
How do I stop beads from rotating?
I stop rotation by using correct section thickness, correct clamp pressure, and product control near the roots. I also check that the bead size matches the tip size.
What products should clients avoid to keep beads hidden?
I ask clients to avoid heavy oils and conditioners near the roots. Those products can cause slipping. Slipping can cause rotation, and rotation can cause visibility.
Are micro bead wefts easier to hide than micro bead strands?
It depends on the client. Wefts can hide well because they sit flat in rows. Strands can hide well because I can place them with detail. I choose based on density and styling habits.
What haircut helps hide micro bead extensions best?
A haircut that supports a smooth fall line helps the most. I use controlled layers for blending. I avoid harsh blunt lines when I add length and volume.
Can clients wear high ponytails with micro bead extensions?
Some can, but many will see beads at the perimeter. I guide clients toward low ponytails and half-up styles if they want the most invisible result.
What is the fastest way to hide visible beads for a quick fix?
I shift the part line, add soft waves, and create light root lift. Those steps reduce separation and help the top hair cover the bead line.
Conclusion
I keep micro bead extensions hidden by using the right type, low safe-zone placement, correct bead sizing, clean sectioning, and a blend plan that clients can maintain every day.


