
A perfect extension install can still look fake after a bad cut. A blunt line, heavy ends, or wrong layers can expose every track and ruin the blend.
The best way for how to cut hair extensions to look natural is to fit first, style to the final finish, trim the perimeter in small steps, and blend with light point cutting. Matching density and movement matters as much as matching length.
This guide breaks down the exact cutting logic that creates a soft, invisible finish across popular methods, without over-thinning or exposing attachment points.
What makes hair extensions look natural after cutting?
Some hair looks “installed” even when the color match is good. The cut is often the reason. A natural look is not only about length. It is about shape, movement, and weight balance.
Hair extensions look natural when the ends are softened, the layers match the client’s haircut, and the weight is reduced in the right zones instead of everywhere.
Dive deeper
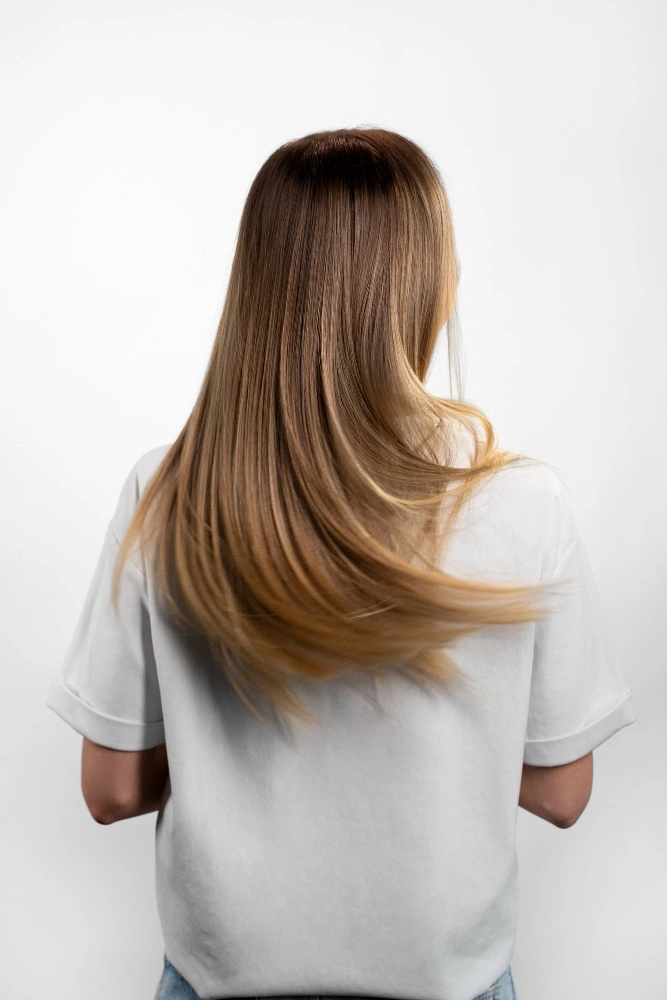
A natural blend happens when the viewer cannot see a “start line.” That start line is usually at the perimeter. It can also show at the sides where the hair swings. If the ends are blunt, the extension panel moves like one sheet. Natural hair does not move like that. Natural hair breaks into small, soft groups.
A clean cut for extensions has three targets:
- The perimeter should be soft, not straight like a ruler.
- The layer pattern should follow the natural haircut.
- The density should taper from top to bottom.
Many people try to fix heaviness by thinning. That is risky. Thinning in the wrong zone can expose beads, tapes, seams, or braids. It can also create flyaways that are hard to control. A safer approach is to keep the top structure intact and reduce weight only at the very ends.
Hair type also changes the rule. Straight hair shows lines more. Curly hair hides lines better. Fine natural hair needs lighter density extensions. Thick natural hair can take more weight. So the most “natural” cut is not one universal shape. It is a matched shape.
A simple visual check helps: ask if the ends look like they belong to one head of hair. If the ends look like a separate curtain, the cut needs more softness at the perimeter, not more layers near the top.
| Natural look factor | What it means | What goes wrong | Practical fix |
|---|---|---|---|
| end softness | no hard line | blunt bottom edge | point cut lightly |
| movement match | same swing | panel effect | add micro texture at ends |
| density taper | lighter ends | heavy block | remove weight at ends only |
| layer harmony | matches haircut | mismatch shape | follow the natural guide |
How should the hair be prepared before cutting extensions?
Cutting on unstyled hair is guessing. Cutting on a poor fit is also guessing. Preparation makes the cut predictable.
The safest prep is to install or fit the extensions, then wash and dry if needed, then style to the final finish before trimming and blending.

Dive deeper
Preparation starts with fit and placement. If the extensions sit too high, layers can expose the attachment. If the sides sit too low, the perimeter can separate and show. A correct fit reduces how much “fixing” the cut needs.
Next is the finish style. Many clients wear waves. Some wear straight hair. The cut should match the wear habit. If the final look is wavy, a straight-only cut can look choppy once curled. If the final look is sleek, a heavy razor cut can create fuzzy ends and frizz.
Clean hair matters too. Some extension hair carries a coating from packaging. That coating can change how the hair falls. If the hair is slippery, the cut can shift after the first wash. A quick wash and full dry can stabilize the behavior.
The sectioning matters. Extensions should be cut with clean sections, but the final blending should be checked with hair released. That is because hair does not live in perfect sections. Hair moves.
For buyers and salon owners, this preparation step reduces complaints. Many “extensions look fake” cases are not quality issues. They are cutting on a poor setup. A good setup makes even a simple cut look high level.
| Prep step | Why it matters | Common mistake | Better habit |
|---|---|---|---|
| fit and placement | protects bonds | cutting before fitting | fit first, then cut |
| style to final look | shows true fall | cutting wet only | finish check dry |
| clean and dry | stable behavior | cutting coated hair | wash once if needed |
| section smart | control + realism | only cutting in clips | release and check |
How to cut hair extensions to look natural step by step?
Most bad results come from one fast cut. A natural result comes from several small edits with repeated checks.
A reliable method is: create a center guide, trim the perimeter little by little, then blend the transition with point cutting and light texturizing only at the ends.
Dive deeper
A step-by-step approach prevents over-cutting:
1) Create a guide at the center back. The guide should match the target length.
2) Trim the bottom perimeter across the extension hair and natural hair together. The first trim should be small. A 0.5–1 cm trim is safer than 3 cm.
3) Release the hair and check in a mirror. The cut should look even on both sides.
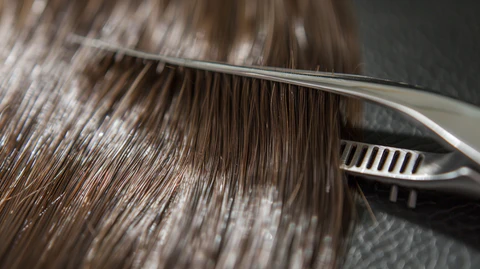
4) Soften the perimeter. Point cutting is the safest method. The scissors point goes into the ends at a shallow angle. The goal is not “choppy.” The goal is “broken line.”
5) Add minimal texture at the ends if needed. This is only for the last 1–2 inches. The top should stay stable to protect the attachment area.
6) Match the layer line. If the natural hair has long layers, the extension hair can receive long layers too. If the natural hair is blunt, keep the extension cut cleaner and focus on end softness.
7) Re-style and re-check. Heat styling can change the fall. A final check after styling protects the result.
This is where many people confuse layers and blending. Layers change shape. Blending removes the visible line. For extensions, blending is the main job. Too many layers can create holes and show bonds.
| Step | Action | Purpose | Risk if skipped |
|---|---|---|---|
| guide length | center back guide | symmetry | uneven sides |
| perimeter trim | small cuts | match length | too short result |
| point cutting | soften line | invisible ends | blunt “shelf” |
| limited texture | ends only | reduce block | bond exposure |
| final check | styled hair | true finish | surprise after curl |
Should extensions be cut wet or dry for the most natural look?
Many stylists prefer dry for precision. Wet can work for a basic trim, but the final blend usually needs dry checks.
Dry cutting is usually better for a natural blend because it shows the real fall and exposes any hard lines. Wet trimming can be used first, but the finishing should be done dry.
Dive deeper
Wet hair stretches. Dry hair shrinks back. That is a simple reason dry finishing is safer. Extensions also do not get scalp oils, so the texture can feel different from natural hair. That difference shows more when the hair is dry.
A hybrid method is practical:
- Do a light wet trim if the ends are very uneven.
- Dry the hair fully.
- Finish the shape and blend dry.
Dry finishing is also better for checking bulk. Bulk is what makes extensions look separate. If the ends are heavy, the hair moves as one unit. Dry hair shows that unit effect clearly.
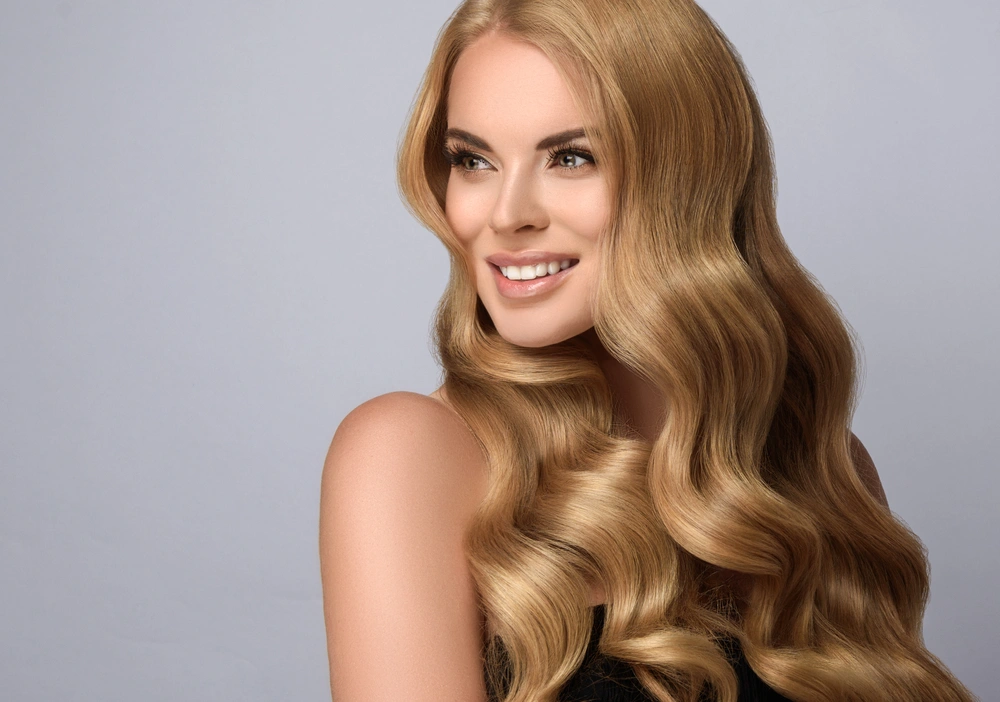
Texture also matters. For wavy or curly hair, cutting in the natural curl pattern can help. Still, the check should include the final wear style. A client who wears a blowout should not have only a curl-based cut.
For salon owners, the easiest policy is: do not finalize a cut on wet hair. Make a dry check a standard step. That one habit reduces redo work.
| Method | Good for | Main issue | Best use |
|---|---|---|---|
| wet trim | basic leveling | shrinkage risk | first rough trim only |
| dry cut | blending + detail | takes longer | final shaping |
| hybrid | most clients | needs patience | best control |
How to blend extensions without exposing tapes, beads, or weft seams?
A natural look is not worth it if the bonds become visible. The safest blending respects the “no-cut zone” near attachments.
The safest rule is to keep blending work low on the hair and avoid heavy thinning near the root area where the attachment sits.
Dive deeper
Each method has a different attachment location:
- Tape-ins sit near the root with a flat panel.
- Micro links sit near the root with a bead.
- Sew-ins sit on a braided base with thread and weft folds.
- Halo and clip-ins sit higher with tracks and clips.
Still, the cutting logic is similar. The top 2–4 inches above the attachment is the high-risk zone. Heavy thinning there can create see-through hair. That see-through hair shows hardware.
Blending should focus on the mid-lengths to ends. If the natural hair is short, a different extension method might be better. Long extensions on very short hair often require aggressive blending. That increases exposure risk. It is better to match the method to the haircut.
Another point is density choice. Many bond exposure problems are density problems. If the extension hair is too dense for the natural hair, the stylist tries to remove weight with thinning. That often fails. A better plan is to choose a lighter set and do minimal blending.
For wholesale buyers, this is a product education point. Helping clients choose correct density reduces how much cutting they need. That keeps the install cleaner and protects retention.
| Extension method | Attachment risk | Cutting focus | Avoid |
|---|---|---|---|
| tape-in | tape edge visibility | ends + perimeter | thinning near tape |
| micro link | bead visibility | ends | cutting short layers near bead |
| sew-in | weft fold visibility | ends | thinning into weft line |
| clip-in/halo | track edge visibility | perimeter + sides | layers close to track |
What are the most common cutting mistakes that make extensions look fake?
Extensions often look fake for simple reasons. Most are avoidable.
The biggest mistakes are blunt ends, too much thinning, too many layers, and cutting the extension hair separately from the natural hair.
Dive deeper
Mistake 1: A blunt shelf at the bottom. A blunt shelf is a straight line where the natural hair ends but the extension hair continues. That shelf shows when the hair moves. A small amount of point cutting solves it.
Mistake 2: Over-thinning. Many people think thinning equals blending. Thinning removes internal density. If it is done close to the top, it exposes bonds. If it is done too much, it creates flyaways and tangles. Extensions already lack scalp oil, so flyaways show more.
Mistake 3: Over-layering. Layers are not always needed. Many cuts only need perimeter softness. Too many layers can create holes and make the extension look separated.
Mistake 4: Cutting extensions off the head. Cutting a weft or a clip-in bundle in the air can create an unnatural shape when worn. The head shape changes how hair falls. The best cut is checked on the wearer.
Mistake 5: Using a razor on low or medium quality hair. Razor cuts can make ends fuzzy. Fuzzy ends tangle. That makes the hair look dry and cheap fast.
A simple rule keeps the result clean: cut less than expected, check more than expected.
| Mistake | What it causes | Better move |
|---|---|---|
| blunt ends | visible line | point cut ends |
| heavy thinning | bond exposure | keep top dense |
| too many layers | holes | layer only if needed |
| off-head cutting | wrong fall | check on wearer |
| razor on hair | frizz | use sharp shears |
How to keep the cut looking natural over time?
A natural cut can look great on day one and rough on day thirty if the ends dry out. Ends take the most friction and heat.
A natural-looking cut lasts longer with low heat, gentle brushing, and trimming only when the ends start to split or feel stiff.
Dive deeper
Extension hair does not renew. Natural hair grows and gets trimmed. Extension hair stays the same length until it is cut. That means the ends take repeated damage from brushing, styling, and friction from clothing.
Maintenance steps that protect the cut:
- Brush from ends upward. This reduces pulling at the attachment.
- Use heat only when needed. Heat can dry the ends and make the cut line look sharper.
- Apply conditioner to mid-lengths and ends only. Heavy product near the root can affect tapes or cause beads to slip.
- Trim small amounts over time. A micro-trim keeps the perimeter soft and avoids a big re-cut.
For salons, this is also a service opportunity. A quick blend check and micro-trim at maintenance visits keeps clients happy. For wholesale buyers, it reduces “hair got dry” complaints because the ends stay cleaner.
A final note is hair quality. Full cuticle hair stays smoother longer. It also holds a clean cut better because the cuticle alignment reduces tangling. That is why premium hair often looks natural for longer even with the same cutting method.
| Maintenance action | Frequency | Why it helps the cut |
|---|---|---|
| gentle brushing | daily wear | keeps ends aligned |
| low heat routine | ongoing | reduces end dryness |
| end-only conditioning | each wash | keeps perimeter soft |
| micro-trim | as needed | prevents blunt look |
My opinion
A natural result comes from a smart perimeter and controlled density. A heavy layer plan often creates more problems than it solves. A slow blend usually beats an aggressive cut.
FAQ
Can hair extensions be cut at home to look natural?
Home cuts can work for small trims and end softening. A full blend is safer with a stylist, because placement and density checks are easier.
What is the safest way to soften the ends?
Point cutting is the safest. It breaks the straight line without removing too much weight.
Do extensions need layers to look real?
Not always. Many installs only need perimeter softening. Layers should follow the natural haircut only when needed.
Can thinning shears make extensions look more natural?
Thinning shears can help at the ends, but heavy thinning near the top can expose attachments. Use them lightly and low.
Why do my extensions look like a separate piece after cutting?
A separate look is usually blunt ends, density mismatch, or a side blend issue. End softness and correct density choice fix most cases.
How often should extension ends be trimmed?
Trim when the ends feel dry, split, or start to tangle. Small trims keep the blend natural longer.
Conclusion
A natural extension cut comes from fitting first, trimming in small steps, and blending the perimeter without thinning into the attachment zone.


