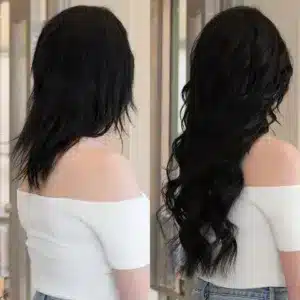
A perfect install can still look wrong if the ends feel thick or the blend line shows. A fast haircut can also expose bonds, tapes, or tracks and turn a premium set into a refund.
Yes, you can cut hair extensions. The safest way is to fit the hair first, style it dry, and cut in small steps while staying away from attachment zones. The goal is a natural outline and soft ends, not heavy thinning.
Most people search this topic because they want a simple answer, but the real win is doing it without shortening too much, without frizzing the ends, and without making the attachment visible. The sections below map a clean method that salon teams can repeat and wholesale buyers can use as a training guide.
Can you cut hair extensions?
People ask this because they fear ruining expensive hair. The short answer is yes, but the cut needs a different mindset than a normal haircut.
You can cut hair extensions as long as the hair is worn in the correct placement and the cutting stays focused on the perimeter and end softness. You should avoid cutting close to tapes, beads, or weft seams.

Dive deeper
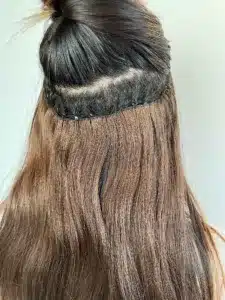
A haircut on natural hair has one job. It shapes the client’s own hair. A cut on extensions has two jobs. It shapes the look and it hides the structure. That structure can be tape panels, micro beads, stitched wefts, clips, or a halo wire base. When a cut removes too much support near the top, the structure starts to show.
A safe cut starts by deciding what the client really needs:
- a small length adjustment
- a softer perimeter
- a better blend around the face
- a correction for uneven ends
Most “bad extension cuts” happen because the person cutting tries to solve blending by thinning the internal density. Internal thinning can create see-through areas. See-through areas make tapes and tracks more visible. It can also reduce the overall fullness, so the bottom looks stringy.
A better approach is “shape first, texture last.” Shape means the overall line and flow. Texture means softening the last one to two inches of the ends. For professional salons, this is also a consistency issue. If every stylist follows the same safe zones, the salon reduces risk.
Here is a simple risk map that helps teams cut with control.
| Area | What it is | Safe to cut? | Why |
|---|---|---|---|
| perimeter ends | bottom outline | yes | it controls shape |
| mid-length blend zone | between natural hair and extensions | sometimes | light softening only |
| near attachment | tape/bead/weft area | no | risk of exposure |
| internal bulk | density inside hair | rarely | can create see-through gaps |
How to cut hair extensions?
People want steps they can follow. A clean process reduces mistakes and makes results repeatable across different stylists.
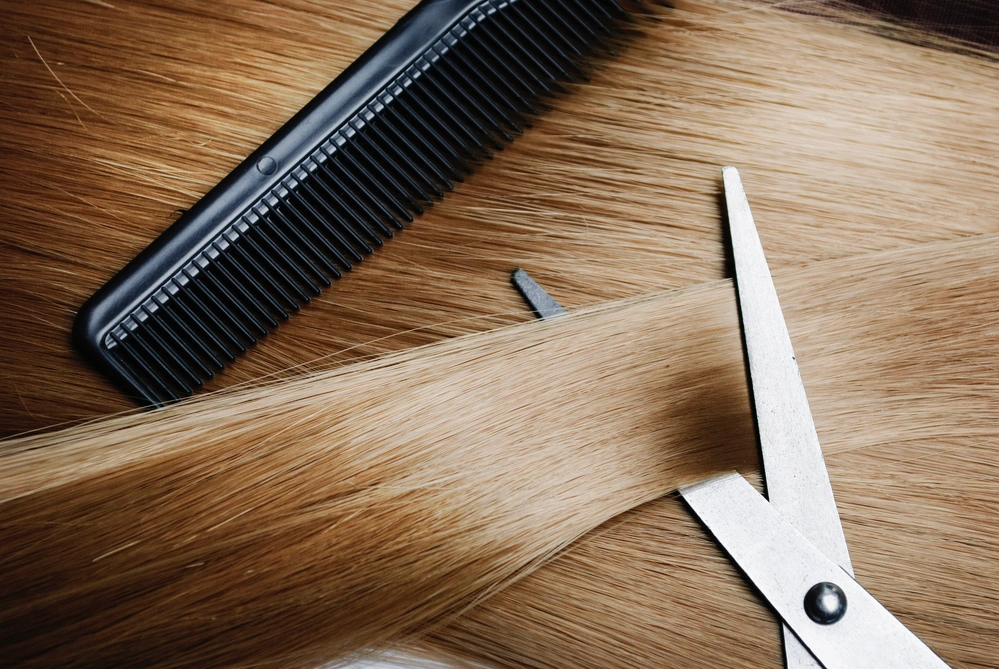
The correct way to cut hair extensions is to install and position first, wash if needed, dry fully, style to the final finish, then cut in small increments using point cutting to soften the edge.
Dive deeper
A reliable cutting routine is the difference between “looks good today” and “still looks good after the next wash.” Hair stretches when wet. Hair also sits differently after blow-dry or flat iron. So the final trim should happen on dry styled hair whenever possible.
A practical workflow that salon teams use:
Step 1: Fit first, then evaluate the shape
The hair must be clipped, taped, beaded, or sewn in the correct position. If the set sits too low or too high, any cut will look wrong later.
Step 2: Make sure the hair is dry and styled
Straight hair shows lines. Wavy hair hides lines. So the stylist should cut based on how the client wears it most. If the client wears it straight, the cut should be checked straight.
Step 3: Section simply
Clean sections control the result. A simple center part and two side panels is often enough. Small sections protect the blend.
Step 4: Set the perimeter with minimal removal
The stylist should remove a little at a time. Extensions cannot be “un-cut.” A slow approach is safer.
Step 5: Soften the ends
Point cutting is usually safer than aggressive thinning. Point cutting breaks the straight line without removing too much weight.
Step 6: Recheck movement and symmetry
The stylist should check both sides in the mirror. The stylist should also ask the client to turn the head left and right. The edge should move naturally.
This method also helps wholesalers guide their salon clients. When salons do “small-step cutting,” they protect the hair quality and increase re-order trust.
| Cutting step | Purpose | Common mistake |
|---|---|---|
| fit and check placement | correct fall | cutting before fitting |
| dry and style | true length | wet cutting only |
| section cleanly | control | cutting random loose hair |
| perimeter trim | shape | cutting too much at once |
| end softening | natural finish | heavy thinning near top |
Is it better to cut hair extensions wet or dry?
This question matters because the result can change after the hair dries. Many people cut wet because it feels easier, but it often creates surprises later.
Dry cutting is usually better for hair extensions because it shows the true fall and true density. Wet cutting can work for rough leveling, but the final blending should happen after the hair is fully dry.
Dive deeper
Wet hair is stretched hair. When it dries, it contracts. That means a wet cut can end up shorter than expected. On extensions, this effect can feel stronger because some extension textures are processed to hold smoothness. The hair can also behave differently after the first wash because coating from packaging is removed.
Dry cutting has three clear benefits:
- the stylist sees the real perimeter
- the stylist sees where the blend line shows
- the stylist can cut for the final finish style
Wet cutting still has a place. Some stylists do a light wet trim just to remove obvious uneven ends, then they do the final detail cut dry. This hybrid approach is safe if the wet trim is very small.
There is also a texture factor. Curly or wavy extensions can look longer when wet. When dry, they spring up. So a wet cut on wavy hair can become too short when dry. For that reason, many professionals prefer dry trimming for waves and curls.
For salons, a good policy is simple:
- use wet cutting only for rough leveling
- always do final blending on dry hair
| Method | Best use | Main risk |
|---|---|---|
| wet cut | rough leveling | shorter after dry |
| dry cut | blending and finish | takes more time |
| hybrid | many salon cases | needs discipline |
What should you avoid when cutting hair extensions?
A good cut is not only about what to do. It is also about what not to do. Many problems come from one risky move.
You should avoid cutting close to attachments, avoid aggressive thinning through the mid-lengths, avoid razoring hair that is not suited to razors, and avoid cutting extensions off the head before fitting.
Dive deeper
Extension hair is a system. The system includes the attachment and the hair fiber. Cutting too close to the attachment changes the system balance.
Common avoid points:
Avoid point 1: Cutting into the top structure
Tape panels rely on coverage above the tape. Micro beads rely on hair that falls over the bead. Sew-ins rely on a veil of hair that hides the track line. If cutting removes that veil, the install becomes visible.
Avoid point 2: Over-thinning to “blend”
Thinning can feel like blending, but it often creates a see-through look. It can also increase tangling because short internal hairs catch and knot. A safer option is controlled end softening.
Avoid point 3: Using poor tools
Dull scissors crush ends. Crushed ends look dry fast. Dry ends tangle and split. So tool quality matters.
Avoid point 4: Making the cut before the client decides the wear style
A client who wears hair straight needs a different finish than a client who always curls. A cut done for curls can look blunt when straightened later.
For wholesale buyers, this section can be turned into a training checklist for salon clients. It protects the hair and protects the brand.
| Risk action | What happens | Better option |
|---|---|---|
| cut near attachment | visible tape/bead/track | keep a safe buffer zone |
| heavy thinning | thin ends and gaps | point cut the ends |
| razor on wrong hair | frizz and tangles | sharp shears |
| cut before styling choice | mismatch look | style first, then cut |
How to make cut hair extensions look natural?
Many people cut the length and still feel it looks “separate.” The natural look comes from blending and end texture, not only length.
To make hair extensions look natural, the cut should soften the perimeter, create a gradual transition around the face, and keep enough density to hide the attachment area. Small point cuts and light face framing are often more effective than thinning.
Dive deeper
A natural finish has three elements: outline, transition, and movement.
Outline
The outline is the bottom line. Many extension sets look fake because the outline is too straight. A natural outline usually has a soft curve that matches the client’s haircut shape.
Transition
The transition is where natural hair meets extension hair. This is often around the sides, near the shoulders, and around the face. If the client has shorter layers, the transition needs careful blending. The stylist should blend with minimal removal. The stylist should aim to “connect” the shapes, not “remove weight.”
Movement
Movement comes from end softness and correct density. Too much density removal kills movement because ends become thin and stringy. Too little end softness creates a block line. This is why point cutting at the ends works well. It adds movement while keeping fullness.
A simple natural-look test is the “mirror swing test.” The hair should swing as one piece. If the bottom swings as a separate heavy panel, the ends need softening. If the bottom looks thin and see-through, the hair was over-thinned.
| Natural look factor | What to check | Quick fix |
|---|---|---|
| outline | harsh straight line | soften perimeter |
| transition | visible step line | light blending at sides |
| movement | ends look heavy | point cut ends |
| coverage | tapes/beads show | reduce thinning near top |

How to prevent damage while cutting hair extensions?
Some clients worry that cutting causes damage. Cutting itself is not the real damage. Poor technique and poor tools are the real damage.
To prevent damage, you should use sharp shears, cut with minimal tension, keep the cut away from seams and bonds, and avoid repeated cutting passes that chew the ends.
Dive deeper
Damage control starts before the scissors touch the hair.
First, the hair must be detangled. If the stylist cuts hair that is tangled, the cut becomes uneven. The stylist then recuts. Recutting repeatedly can roughen ends and shorten life.
Second, the tool must be sharp. Hair extensions are often processed to be smooth. A dull blade breaks that smoothness.
Third, the stylist should avoid pulling the hair hard when cutting. High tension changes length. When released, the cut line can bounce and look uneven.
Fourth, the stylist should avoid cutting into the seam or bond area. For tape-ins, cutting into the tape edge can weaken the panel coverage. For clip-ins, cutting too close to the track can expose the stitching. For wefts, cutting into the seam can cause shedding.
For professional salons, it helps to keep a “extensions-only” scissor. That scissor stays sharp and is not used on paper, foil, or other tasks.
| Protection action | Why it matters | Simple rule |
|---|---|---|
| detangle first | prevents recutting | brush ends to roots |
| sharp shears | clean ends | no dull scissors |
| low tension | accurate length | do not pull hair tight |
| avoid seams | reduces shedding | keep distance from base |
Which hair extension types are easiest to cut and shape?
Different systems behave differently in a cut. This is useful for salons choosing a method for a client who wants frequent style changes.
Clip-ins and halo hair are usually easiest to cut because they can be positioned, checked, and adjusted without long-term attachment risk. Tape-ins, micro links, and sew-ins can also be cut, but the safe zones must be respected more strictly.
Dive deeper
Ease of cutting is about access and risk.
Clip-ins: The stylist can place, check, remove, and reshape. The risk is mainly cutting too close to the clip track. The stylist should keep the top dense.
Halo: The hair sits on a wire base. The stylist can adjust the position easily. The main risk is creating a shelf look if the halo sits too low. Cutting should be done with the halo worn correctly.
Tape-ins: The hair is bonded near the root. Cutting is safe at the ends. The risk is making the tape edges visible by removing too much coverage hair above the tape.
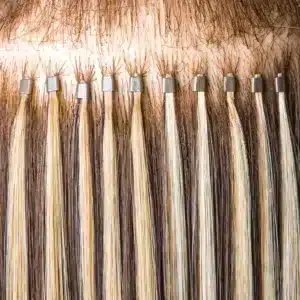
Micro links: The beads can be exposed if the stylist over-layers the top. End-focused trimming is safer.
Sew-ins: Cutting is safe at the ends. The risk is exposing the track line if internal density is removed too close to the weft.
This section can help wholesalers guide salons on product selection. A client who changes style often may prefer a method that allows easy shaping with low risk.
| Type | Cutting flexibility | Main caution |
|---|---|---|
| clip-in | very high | avoid cutting near track |
| halo | high | avoid shelf look from wrong placement |
| tape-in | medium | protect coverage above tape |
| micro link | medium | avoid exposing beads |
| sew-in | medium | avoid exposing track line |

My opinion
A natural cut on extensions comes from patience and control. A small, clean, end-focused trim protects the install, protects the hair, and protects the salon’s reputation.
FAQ
Can hair extensions be cut at home?
Home cutting is possible, but it is risky because blending and safe zones are hard to judge. A salon cut is safer, especially for tape-ins, micro links, and sew-ins.
Will cutting extensions make them tangle more?
A clean cut will not increase tangling. Rough cutting, razoring, or dull tools can create fuzzy ends, and fuzzy ends tangle faster.
Can you layer hair extensions?
Layers are possible, but short layers near the top can expose attachments. End layers and face framing are safer than heavy layering.
Should you cut extensions before or after coloring?
In many cases, the final detail cut is best after the hair is colored and styled, because the hair will sit in its final condition.
How much should be cut off at one time?
A small step method is safer. Many professionals remove a little, recheck, then adjust again.
What if the ends look thin after cutting?
Thin ends often come from over-thinning or cutting too much length. The best fix is a new perimeter line and better density planning next time.
Conclusion
Hair extensions can be cut safely when the hair is fitted, dry-styled, trimmed in small steps, and softened at the ends while keeping attachment zones protected.