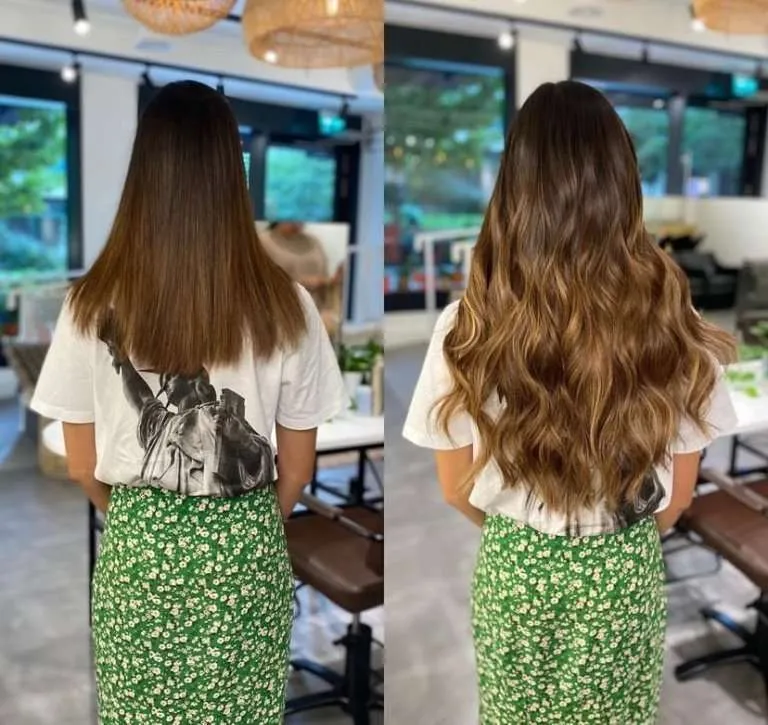
You want longer, fuller hair now. Salon slots are full or pricey. A clear DIY plan removes stress and saves time.
Yes, you can apply tape-in extensions yourself with patience, clean prep, and precise sectioning. Work on oil-free hair, use thin slices, “sandwich” accurately, press firmly, and follow strict aftercare. This guide gives step-by-step instructions, pro tricks, and safety checks.

You will learn if DIY is right for you, exactly how to install tape-ins at home, the do’s and don’ts, how to fix problems, how many packs to buy, and how to care for your new hair so it lasts.
Can I put in tape in extensions by myself?
You worry about slipping, sticky roots, or crooked rows. You also want salon-level results at home.
You can install tape-in extensions yourself if you prepare correctly, work slowly, and follow a map. Clean hair, thin sections, firm pressure, and smart placement make the result secure and natural.
Dive deeper
What makes DIY succeed
- Clean base: Wash twice with clarifying shampoo. No conditioner at the roots. Dry hair 100%. Oils cause slips.
- Tools ready: Rat-tail comb, section clips, mirror setup (front + handheld for the back), flat iron (optional, low heat), alcohol pads, extension brush, and your tape-ins.
- Row plan: Start at the nape and move upward in clean horizontals. Keep at least two fingers above the hairline and below the part to hide tabs.
- Thin slices: Each “sandwich” needs a see-through slice of your own hair. Thick slices block adhesive.
- Firm press: Press edges for 8–10 seconds. Corners are the weak point.
- Patience: Work small zones. Reposition before tape touches hair if alignment looks off.
Who should skip DIY
- You have very oily scalp or heavy workout/sweat daily.
- Your natural hair is very fragile or you have recent shedding.
- You cannot section clean lines or you rush.
If any of these apply, book a professional for the install and do your own maintenance later.

Installing tape in extensions yourself?
You need exact steps. Guesswork leads to slips and visible tabs. A clear sequence gives salon-level results.
You will prep, map rows, place lower tape, lay a thin slice, add the top tape to “sandwich,” press firmly, repeat in a brick-lay pattern, and blend. Follow the steps below and do not skip the tests.
Dive deeper
1) Prep and setup
- Wash: Use clarifying shampoo twice. Rinse well. Do not use conditioner at roots.
- Dry: Blow-dry to 100% dry. Any moisture weakens the bond.
- Tools: Place a large mirror in front and a handheld mirror behind. Lay out comb, clips, alcohol pads, and extensions.
- Check tapes: Ensure each tab is clean and tacky. If a tab feels dusty, wipe your fingertips with alcohol and handle the edges only.
2) Section and mapping
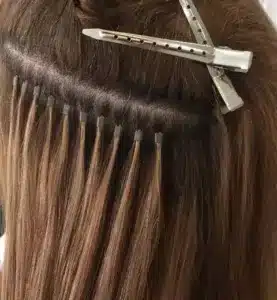
- Row 1 (Nape): Create a horizontal part about two fingers above your hairline. Clip the rest up.
- Row width: Leave at least 1–1.5 cm from side edges to avoid peek-through.
- Slice thickness: Take a paper-thin slice (you can see through it). If you cannot, it is too thick. This is the most important rule.
- Spacing: Leave 0.5 cm between each sandwich for movement.
3) Placement (the sandwich)
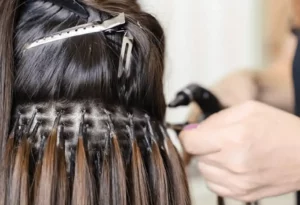
- Lower tape: Remove the backing and hold the tab under your thin slice, adhesive up. Keep it level.
- Lay slice: Drop your thin slice onto the lower tape. Smooth it straight down. No cross hairs.
- Upper tape: Place the top tab adhesive down to complete the sandwich. Align edges perfectly.
- Press: Pinch with your fingers for 8–10 seconds, working from center to corners.
- Optional micro-seal: Brief pass with a flat iron on low heat through a comb, never directly on the adhesive. One second only.
4) Pattern (brick-lay)
- Row 2: Part a new horizontal line 1–1.5 cm above row 1. Start with a tab centered over the gap between two below (brick-lay).
- Crown safety: Stop two fingers below your natural part. This keeps tabs hidden when hair moves.
- Sides: Avoid going too close to the face. Leave space so tabs do not show in ponytails.
5) Blend and finish
- Brush gently from mid-lengths to ends.
- If you have shears, lightly point-cut only the ends for a soft blend.
- Style with a round brush or curl both your hair and the extensions together for a unified pattern.
6) Quality checks
- Tug test: Gently tug each sandwich. If edges lift, press again.
- Comfort test: Turn left and right, look up and down. Tabs should move with your head, not pull.
- Visibility test: Lift top layers. If a tab shows, remove and reinstall slightly lower or deeper.
Time guide: First-time DIY takes 90–150 minutes. Your second install will be faster. Slow is smooth; smooth is fast.
Do and don’ts for tape in extensions?
Bad habits shorten wear time. Good habits make installs last. Keep the rules simple and strict.
Do start with clean, dry, oil-free hair, brush daily, and wait 48 hours before washing. Don’t apply oils near roots, don’t use heavy conditioners on the tabs, and don’t sleep with wet hair.
Dive deeper
Do
- Do clarify before install and dry 100%.
- Do use thin slices and brick-lay rows.
- Do press seams, especially corners.
- Do brush from ends up twice daily with an extension brush.
- Do sleep with hair in a low braid or silk scrunchie.
- Do schedule move-ups every 6–8 weeks.
Don’t
- Don’t use oils, serums, or heavy masks near roots. Keep them mid-lengths to ends.
- Don’t wash within 48 hours.
- Don’t air-dry roots frequently. Blow-dry roots on cool/medium to dry bonds.
- Don’t place tabs too close to the scalp. Leave 0.5–1 cm for movement.
- Don’t pick or peel tabs. Removal needs a remover spray.
| Category | Do | Don’t |
|---|---|---|
| Prep | Clarify, dry 100% | Condition roots, install on damp hair |
| Placement | Thin slices, firm press | Thick slices, crooked alignment |
| Products | Sulfate-free shampoo, light leave-in | Oils/ silicones at roots, dry oils on seams |
| Aftercare | 48h no-wash, braid for sleep | Wet sleeping, skipping brush routine |
How many packs do I need for a full head?
You need enough hair to blend. Too few packs show gaps. Too many feel heavy.
Most DIY users need 40–60 pieces (20–30 sandwiches) for volume and length. Fine hair may use 30–40 pieces. Thick hair or big length jumps may need 60–80 pieces.

Dive deeper
Volume only (same length, just fuller): 20–30 sandwiches.
Length + volume (shoulder to mid-back): 25–35 sandwiches.
Major transformation (bob to long): 35–40+ sandwiches plus careful layering.
Choose weight and length that match your density. If your natural hair is very fine, choose lighter grams and 18–20 inches. If your hair is thick, choose higher grams and 20–22 inches. The goal is a believable perimeter, not maximum hair at all costs.
| Natural Density | Goal | Sandwiches (pairs) | Notes |
|---|---|---|---|
| Fine | Volume only | 20–25 | Invisible tabs near part lines |
| Fine–Medium | Length + volume | 25–30 | Keep slices extra thin |
| Medium–Thick | Length + volume | 30–35 | Add more low rows for coverage |
| Thick | Major length change | 35–40+ | Expect extra blending and styling |
How to fix slipping, sticky tabs, or crooked rows?
Mistakes happen. Fast fixes save the install. Do not press bad tabs harder; reset them.
You fix slips by removing oil, re-sectioning thinner, and pressing corners again. You fix stickiness by cleaning hands and hair, then replacing tapes. You fix crooked rows by peeling and reapplying before full contact.
Dive deeper
Slipping
- Cause: Oils, thick slice, weak edge pressure.
- Fix: Wipe roots with a little alcohol on a cotton pad, dry, take a thinner slice, reinstall, press edges 10 seconds.
Sticky/dirty tabs
- Cause: Touching adhesive with oily fingers or applying over residue.
- Fix: Clean hands with alcohol. If adhesive is contaminated, replace tape strips with fresh ones.
Crooked rows
- Cause: Rushing or poor mirror angle.
- Fix: Use clips to mark the row line. If a tab sits crooked, peel immediately and reapply before pressing.
Tabs showing
- Cause: Too high, too close to face, or too little veil hair.
- Fix: Drop the row 1 cm. Move back from face by one finger. Add a zig-zag part for better veil coverage.
How to wash and style tape in extensions after DIY?
You need clean, light roots and soft, glossy ends. Heavy products break bonds.
Wash 2–3 times per week. Use sulfate-free shampoo. Keep conditioner and masks from ear level down. Blow-dry roots to 100% dry. Use heat protectant on mid-lengths and ends before hot tools.
Dive deeper
Wash routine
- Wet fully, then shampoo the scalp with fingertips in gentle, straight motions between rows.
- Rinse well. Apply conditioner from the mids down.
- Rinse cool to help cuticle lay flat.
- Squeeze water with a microfiber towel. Do not rub.
Dry + style
- Detangle ends upward with an extension brush.
- Blow-dry roots on cool/medium until fully dry.
- Rough-dry lengths to 90%, then smooth with a brush.
- Use heat protectant before curling or straightening. Keep hot tools away from tabs.
Daily care
- Brush morning and night.
- Sleep in a loose braid or silk scrunchie.
- Avoid oils at roots. Serum only on ends.
| Step | Key point | Wrong move |
|---|---|---|
| Shampoo | Light scalp cleanse, no scrubbing | Circular, rough motions |
| Conditioner | Mids to ends only | On roots or tapes |
| Dry | Roots 100% dry | Air-drying bonds |
| Heat styling | Protectant on mids/ends | Flat iron on tabs |
My opinion
DIY is possible and many clients do it well with patience and clean prep. If you try DIY, use full cuticle, single-donor hair with medical-grade adhesive, follow thin-slice rules, and respect the 48-hour no-wash window. If you want a major transformation or have fragile hair, I recommend a professional for the first install, then you handle routine move-ups later. Product quality matters, but process matters more.
FAQ
How long do tape-in extensions last per install?
About 6–8 weeks before a move-up.
Can I wash within 48 hours?
No. Wait 48 hours to protect the bond.
How many sandwiches for a full head?
Usually 25–35 for length and volume.
Can I reuse the hair?
Yes. Replace tapes and reinstall if the hair quality is high.
Why are my tabs slipping?
Oils near roots, thick sections, or weak edge pressure.
Can I use oil or serum?
Yes, on mid-lengths and ends only. Never on roots.
Can I dye tape-ins?
Deposit-only toning is fine on 100% human hair. Do not bleach.
Can I swim with tape-ins?
Tie hair in a braid, avoid soaking the tabs, rinse immediately, and dry roots after.
Do tape-ins damage hair?
Not with thin sections, proper aftercare, and solvent-based removal.
How do I remove at home?
Use a tape adhesive remover, saturate seams, wait 1–2 minutes, open with a tail comb, and slide out. Clean residue before retaping.
Conclusion
DIY tape-ins work when you clarify, slice thin, align perfectly, press firmly, and follow strict aftercare. Slow, clean, and precise hands create salon-level results at home.
Hibiscus Hair Manufacturer has been dedicated to producing high-quality hair extensions for 25 years and is a recognized leader in the industry. If you are interested in finding a reliable hair extensions supplier and wholesale for your brand, please visit our website for more information:


