
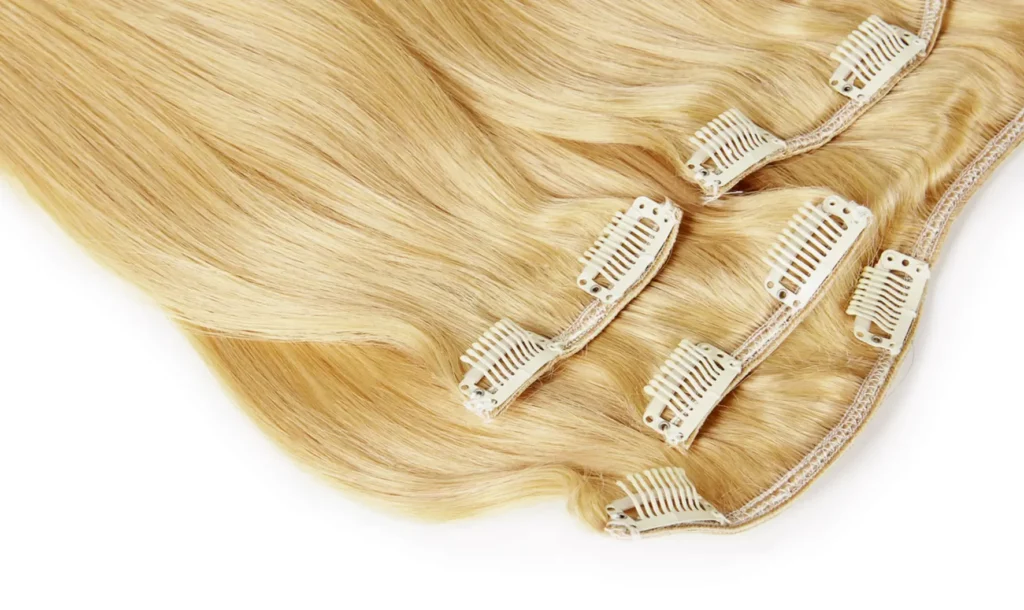
Clip-ins look easy, then the first install happens and the mirror tells the truth. The hair can feel bulky, the clips can poke, and the blend can look “separate.”
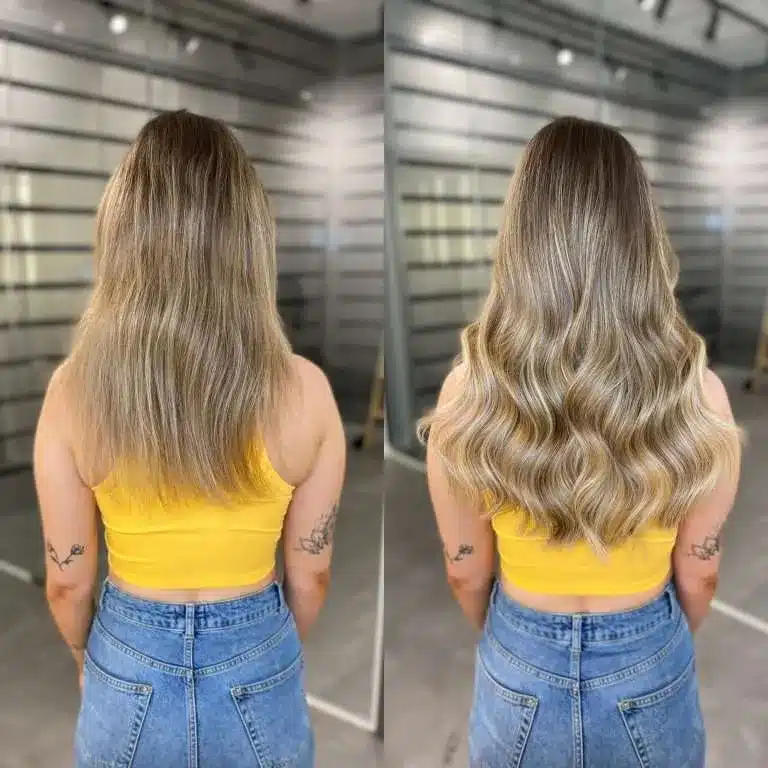
A 7 piece set can look natural and balanced when the rows sit in the right zones, the spacing stays consistent, and the weight matches the length. The two placement charts below help a lot, because they show a clean back layout and two safe side options.
If the goal is a smooth, invisible result, it helps to follow a simple system every time. The guide below keeps it practical and friendly, with small checkpoints that make the install feel easy.
Is 7 Pieces of Clip In Hair Enough?
It is frustrating when a set looks great in the package, but it feels “not full enough” on the head. It also feels bad when there are too many clips and the scalp starts to ache.
For most people, 7 pieces is enough for a full-head clip-in look because the set is built for coverage: wide pieces for the back, smaller ones for the sides. More pieces are not always better, because there is only so much safe space to place clips without stacking.
Dive deeper
A “7 piece set” is a standard design. It aims for a full-head result without turning the head into a “clip wall.” Most heads do not have unlimited room for extra rows. When extra pieces get forced in, the usual outcome is bulk, discomfort, and clips that start to slide.
Here is the common 7 piece layout you listed, and it is a solid baseline:
- 1 x 4 clip weft: 26 cm width
- 2 x 3 clip wefts: 20 cm width
- 2 x 2 clip wefts: 9.5 cm width
- 2 x 1 clip wefts: 4 cm width
That set often fits a full-head install because the wide wefts build the back shape. Then the smaller wefts fill the sides and soften the blend near the face. If someone tries to add too many extra wefts, there may not be enough clean sections left. Clips then overlap. The hair can feel heavy. The rows can start to show.
If “more fullness” is the goal, weight matters more than piece count. Length also changes what “full” looks like. Longer hair needs more grams to keep the ends looking thick.
Here is a practical weight reference by length:
| Length | Standard natural look | Extra full look |
|---|---|---|
| 16″ | 100–110g | 130–140g |
| 18″ | 110–120g | 140–160g |
| 20″ | 120–130g | 170–180g |
| 22″ | 130–140g | 180–190g |
| 24″ | 150–160g | 190–200g |
| 26″ | 160–170g | 210–220g |
A simple way to think about it: if the hair gets longer, the ends will look thinner unless the grams go up. So the set can stay “7 pieces,” and the density changes instead.
7 Piece Clip In Hair Extension Placement Diagram
It is easy to guess placement and still feel unsure. The back can look fine, but the sides can show. Or the top row sits too high and peeks through.
A good placement diagram keeps rows below the crown safety line, keeps 2–3 cm between layers, and keeps side pieces 2–3 cm away from the hairline. The two charts you will add match that idea, with a standard back layout and two side methods.
Dive deeper
These two charts can absolutely match the article, and they can make the “why” feel clear.
On the back view chart, the key details are:
- “Do not apply higher than this line” near the crown
- a 4 clip weft placed around the upper back zone
- two 3 clip wefts placed below it
- “2–3 cm space between layers”
- “2–3 cm in from hairline”
- an “occipital bone level” reference
This is exactly what most people need. The crown line is the safety line. When the top row goes above it, the weft is more likely to show when the hair moves. The 2–3 cm spacing is also important. Rows that sit too close create bumps. They also create pressure points.
On the side view chart, you have two options:
- diagonal side placement
- horizontal side placement


Both can work. The choice usually depends on head shape and styling habits. Diagonal placement often blends better when the hair gets tucked behind the ear or when the hair is worn with soft waves. Horizontal placement can feel simpler for beginners because it follows the same “straight row” idea as the back.
The side chart also shows 2 clip and 1 clip pieces. That matches the common 7 piece set, since those smaller pieces are usually reserved for side thickness and face blend. The main thing is staying away from the very front hairline. Clips placed too close to the hairline can show, and they can feel annoying.
A simple “map” that matches your charts looks like this:
| Zone | Typical piece | Placement note |
|---|---|---|
| Upper back | 4 clip weft | keep below crown safety line |
| Mid back | 3 clip weft | leave 2–3 cm above/below |
| Lower back | 3 clip weft | keep above nape comfort zone |
| Sides | 2 clip weft | diagonal or horizontal, 2–3 cm from hairline |
| Face blend | 1 clip weft | small, subtle, not too forward |
If the charts are placed in the article, the reader can look at the diagram and then follow the steps without guessing.
What Should Be Prepared Before Installing 7 Piece Clip Ins?
A lot of installs go wrong before the first clip even touches the hair. The hair might be too slippery. The section lines might be uneven. The tools might be missing.
A clean install starts with a brush, a tail comb, section clips, and a plan for slip control. Dry hair is easier to work with, and light root grip helps when the hair is very silky.
Dive deeper
Preparation is what makes the install feel smooth. It is also what reduces clip slipping. There is no need for a long list of products. A few basics are enough.
Tools that help:
- a paddle brush or detangling brush
- a tail comb for clean parting
- 2–4 section clips to hold hair up
- optional: a small mirror for the back
Hair prep that helps:
- start with dry hair
- brush through fully, especially at the nape
- avoid oils at the root right before clipping
- if the hair is very silky, use a tiny amount of texture spray at the root
A common question is: should the hair be freshly washed? It depends. Very clean hair can be slippery. Very dirty hair can also make clips slide because the scalp oils soften grip. Many people find the best balance is hair that is clean but not overloaded with conditioner at the roots. If the roots are coated, the clips may not “bite.”
Sectioning also matters. A section that is too thin will not hold. A section that is too thick will make the clip sit bulky and not close well. The clip should close with a clear snap. It should not fight to close. It should also not feel like it is hanging on one tiny strand.
A quick checklist helps before starting:
| Checkpoint | What to look for |
|---|---|
| Hair condition | dry, brushed, no knots |
| Root feel | not oily, not slippery |
| Tools ready | comb + clips + brush |
| Plan | back rows first, sides last |
| Comfort | no row too close to crown |
Once these are in place, the actual install becomes much easier.
How to Put In 7 Piece Clip In Hair Extensions Step by Step?
Most people want a simple order. They do not want to keep redoing rows. They want to finish, blend, and go.
A reliable method is bottom to top: build the back first with the 3-clip and 4-clip wefts, then add the side pieces, and finish with the small 1-clip pieces for face blend. The install stays clean when each row sits flat and the spacing stays close to 2–3 cm.
Dive deeper
Here is a clear, repeatable routine. It matches the “standard rear placement” idea shown in your chart.
Step 1: Create the first back row
Start at the nape area, but not right on the lowest hairline. Hair at the very bottom can be too fine and can feel tight. Part a straight line. Clip the rest of the hair up.
Step 2: Clip in the lower back weft
Many people place a 3 clip weft here first. Some place a wider piece if the head is wide. The goal is comfort and stability. Close each clip fully.
Step 3: Move up 2–3 cm and place the 4 clip weft
This is often the “main” weft. It creates the back fullness. Keep it below the crown line.
Step 4: Move up again and place the next 3 clip weft
Keep the spacing. Keep the row straight. This row supports the blend.
Step 5: Add the two 2 clip side pieces
Use either diagonal or horizontal side placement. Both are shown in your chart. Keep the pieces 2–3 cm in from the hairline. This helps invisibility.
Step 6: Add the two 1 clip pieces for face blend
These are small. They should be subtle. They are often placed slightly back from the very front. If they sit too forward, they can show when the hair moves.
Step 7: Blend check
Brush lightly over the hair. Look at the hair from the side. Turn the head. Check under bright light. If something looks like a “line,” it usually means a row is too high or too close to the surface hair.
A simple “mistake fix” guide can help:
| If this happens | It often means | Try this |
|---|---|---|
| weft shows near crown | top row too high | move it down |
| sides show when tucked | side piece too forward | move it back |
| clips feel tight | section too small | take a thicker section |
| bumps under hair | rows too close | keep 2–3 cm spacing |
This step-by-step flow stays practical, and it matches your diagrams well.
How Can the Blend Look Natural With a 7 Piece Set?
Sometimes the placement is correct, yet the hair still looks separate. That can be frustrating. It can also make someone think the set is “bad,” when the real issue is blending.
A natural blend comes from tone match, smart density choice, and a finish that softens lines. Soft waves can hide transitions, and a small trim on the extension ends can help when the natural hair has a blunt cut.
Dive deeper
Blend is not only about curling. It starts before the install, with the right match.
Tone match is the first key. Two colors can look close indoors and look different outside. Sunlight is honest. If the extension tone is warmer or cooler than the natural hair, the difference shows at the mid-lengths. Many people do better with a slightly multi-tonal shade because it blends with highlights and lowlights more naturally.
Density match is the next key. If the natural hair is fine and a very heavy set gets installed, the result can look “thick on top of thin.” It can also feel heavy. If the natural hair is thick and the set is too light, the ends can look see-through. This is why the grams-by-length table matters. A 24″ set needs more grams to keep the ends full. The piece layout can stay the same, but the density changes the look.
Finish choices also matter:
- Light waves often hide weft lines better than pin-straight hair.
- A small, careful trim on the extension ends can help the blend if the natural hair has layers.
- Avoid heavy product near the top rows. It can separate the hair and show the track line.
A quick blend table:
| Blend goal | What helps | What often ruins it |
|---|---|---|
| natural color | match tone in daylight | indoor-only matching |
| natural thickness | choose grams by length | too light at long lengths |
| invisible rows | keep top row low | rows too high |
| smooth finish | soft waves or light curl | stiff, separated strands |
The best clip-in installs look “boring” up close. That is a compliment. It means the extension disappears into the hair.

How to Keep Clip Ins Comfortable and Not Slipping?
A clip-in set should feel secure, but it should not feel like it is pulling the scalp. When clips slip, people tighten sections. Then discomfort starts. It becomes a cycle.
Stability comes from correct section thickness, clean root grip, and safe placement zones. Comfort comes from spacing, not overloading the head, and avoiding the very fine hairline areas.
Dive deeper
Slipping and discomfort usually share the same causes: poor grip and poor spacing.
Section thickness is the biggest factor. If the section is too thin, the clip has nothing solid to hold. It slides. If the section is too thick, the clip cannot close properly and it sits bulky. The “sweet spot” is a section that lets the clip close with a firm snap and lie flat against the head.
Root products can help or hurt. A tiny amount of texture spray at the root can improve grip. Oils and serums near the root usually reduce grip. They also make clips slide.
Placement zones matter too. The most stable areas are usually:
- mid-back of the head
- the area around the occipital bone level
- behind the ear area, but not too close to the hairline
The least stable areas are usually:
- very close to the hairline
- very high near the crown
- very fine temple hair
Spacing keeps the head comfortable. Your diagram shows 2–3 cm between layers. That is a good guideline. When rows stack too tightly, the head can feel “packed,” and bumps can show.
A quick comfort check:
- If pain appears within minutes, the section is often too small or the clip is not sitting flat.
- If itching appears, clips may be pressing into the scalp or the hair may be tangled under the weft.
- If the set feels heavy, the grams may be too high for the natural hair density.
A simple fix table:
| Problem | Likely reason | Simple fix |
|---|---|---|
| slips at sides | too close to hairline | move 2–3 cm inward |
| sore spots | sections too small | take thicker sections |
| bumps | rows too close | keep 2–3 cm space |
| feels heavy | too many grams | choose lighter weight |
Comfort and stability should improve together when the base is correct.
How Should Clip Ins Be Removed and Stored?
A great install can still end badly if removal is rushed. This is where tangles happen and hairs get pulled out. Storage also decides how long the set stays soft.
Safe removal is slow and calm: unclip one weft at a time, support the root with your hand, and detangle gently. Storage is simple: brush, keep dry, and store flat to avoid kinks.
Dive deeper
Removal should feel easy. If it feels hard, something is tangled or caught. Pulling harder is not the answer.
A clean removal routine:
1) Brush the hair lightly first, especially at the nape.
2) Start with the top pieces (often the smallest ones).
3) Open each clip fully before sliding it out.
4) Hold the hair above the clip with one hand. This reduces pulling.
5) Remove one weft, then clip the natural hair away and move to the next.
If there is tangling near the weft, a light detangling spray can help. Brushing should start at the ends and move up. That reduces snapping.
Storage tips that keep the set looking premium:
- Brush the extension hair before storing.
- Make sure it is fully dry.
- Store flat in a box or a storage bag.
- Avoid stuffing it into a small space. That creates bends.
- Keep it away from heat and sunlight when stored long term.
If the set is full cuticle hair, it can last much longer with correct care. The biggest enemies are friction, tangles, and rough handling at the weft.
A simple storage table:
| Storage habit | Result |
|---|---|
| brushed and dry | less tangling next time |
| stored flat | fewer kinks and bends |
| clips closed | fewer snags |
| clean product use | less buildup on wefts |
Good storage is one of the easiest ways to extend the life of clip-ins.

My opinion
A 7 piece set is a smart full-head structure when the placement stays below the crown safety line and the spacing stays consistent. The diagrams you will add are a strong match for this guide. Most “bad installs” are not about the hair. They come from rows placed too high, side clips placed too close to the hairline, or grams that do not match the length.
FAQ
Where should the 4 clip weft go?
It usually sits in the upper back area, below the crown safety line, where it stays covered and builds fullness.
How far from the hairline should side clip-ins be placed?
A safe guideline is about 2–3 cm in from the hairline. This matches your diagram and helps invisibility.
Why do my clips feel painful?
It is often a section that is too small, a row that is too close to another row, or a clip that is not sitting flat.
Should the side pieces be diagonal or horizontal?
Both can work. Diagonal often blends well with movement. Horizontal can feel easier for beginners. Your two charts show both options.
How long does it take to install a 7 piece set?
After practice, many people finish in 5–15 minutes. The first few installs take longer because sectioning is new.
Can the set look natural on fine hair?
Yes, but lighter grams and clean spacing matter. Too much weight can look bulky on fine hair.
Conclusion
A 7 piece clip-in set can look natural when placement follows the diagrams, rows stay below the crown line, and spacing stays around 2–3 cm. Choose grams by length, keep side pieces away from the hairline, and removal should always be gentle.