You want a flat, clean weft result for your client. You also want speed and repeatable quality. Still, one wrong row map or one wrong tension point can turn a “premium install” into bulk, discomfort, or visible tracks.
You can install genius weft hair extensions by building a stable bead foundation, choosing a row method that matches the client’s density, then sewing the weft with even tension and sealed ends. A consistent mapping and stitch routine is what keeps results smooth and predictable in a salon setting.

This guide is written for professional stylists and salon owners. The core focus is installation. You will get a clear step-by-step flow, plus a second “speed system” that helps your team deliver consistent installs across different clients.
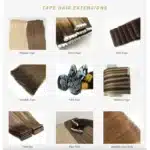
What Are Genius Weft Hair Extensions?
You see “genius weft” everywhere now. Clients ask for it by name. Some suppliers also use the label very loosely. That makes it hard to explain the real value.
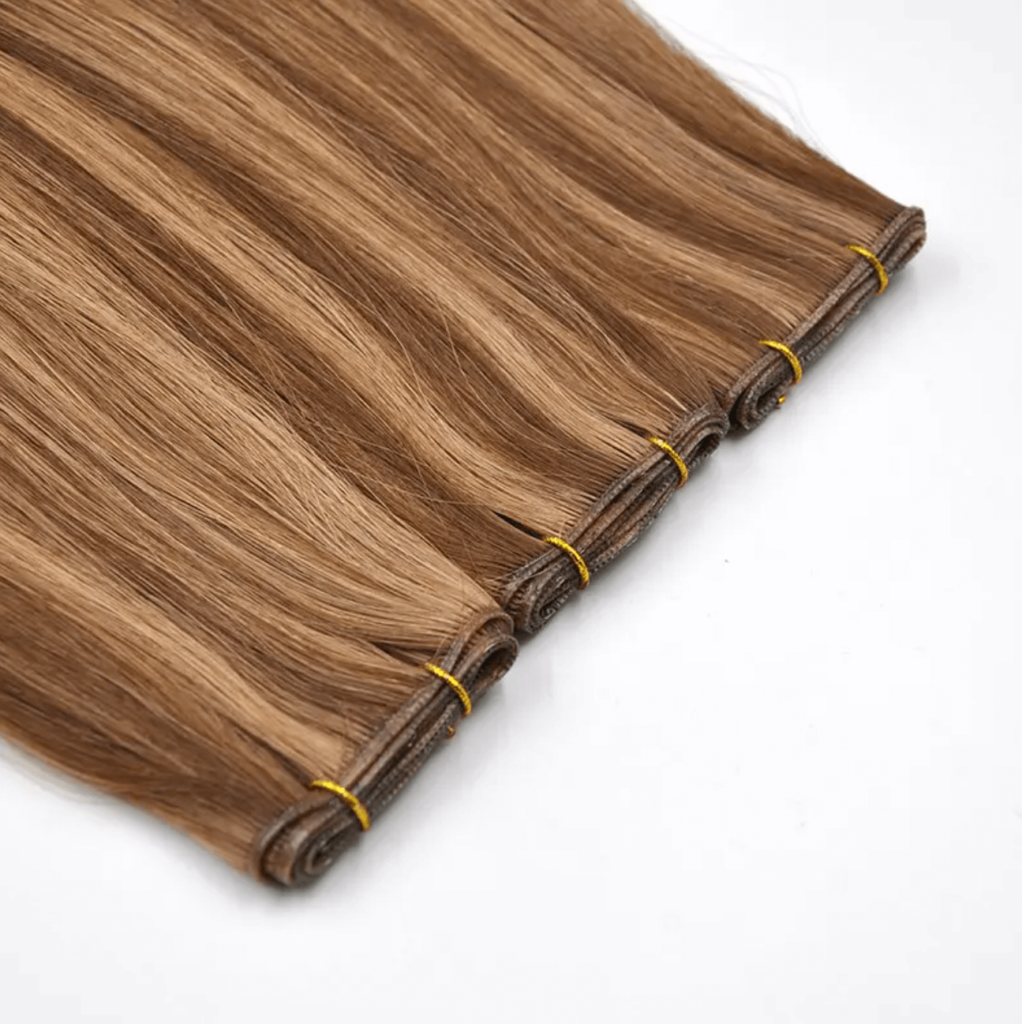
Genius weft hair extensions are thin, flexible wefts designed to lay flatter than many standard machine wefts, while allowing more customization in width. Many salons use genius wefts when they want a low-bulk finish and faster sizing during a weft service.
Dive deeper
In salon work, genius weft is not only about “thin.” Genius weft is about how the track behaves when you cut, fold, stitch, and wear it for weeks. Stylists care about three things: bulk, speed, and how the track holds up after multiple move-ups.
What a stylist should look for in a true genius weft
A strong genius weft usually has:
- a flatter track profile than a typical machine weft
- good flexibility so the row hugs the head shape
- a track structure that stays stable during wear
- predictable behavior when cut, then sealed correctly
Why clients like the result
Clients usually describe the result as:
- flatter at the root
- easier to hide with fine to medium density hair
- comfortable during sleep and styling
- natural movement because the track does not “stand up”
Where genius weft fits compared to other wefts
A hand-tied weft can be very flat, but many hand-tied styles are not meant to be cut. A machine weft can be strong, but it can feel thicker. A genius weft is often chosen when you want a flat finish and flexible sizing.
| Weft type | Track bulk | Cutting flexibility | Typical salon fit |
|---|---|---|---|
| hand-tied weft | very low | limited | fine hair, very natural result |
| genius weft | low | strong | low bulk, faster customization |
| machine weft | medium to high | strong | thick hair, heavy volume plans |
If your salon wants one weft system that covers many clients, genius weft often becomes that “main menu” option.
How To Install Genius Weft Hair Extensions?
You already know the basics of a weft install. The difference is how you standardize the details so every install looks premium. A genius weft can look perfect, but only if the foundation and tension are right.
You can install genius weft hair extensions by following a repeatable workflow: consult and map, build a clean bead foundation, set row tension, place and secure the weft, then cut and seal ends, then check concealment in motion. This workflow is what keeps the install flat and long-wearing.
Dive deeper
This is the detailed salon workflow. It is written as a system your team can follow. The goal is consistency, comfort, and concealment.
Step 0: Pre-check and client suitability (2 minutes)
You confirm:
- scalp condition and sensitivity
- hair density and hairline strength
- natural hair length and shape
- client styling habits (updos, workouts, swim, heat)
You also decide if the client needs one row, two rows, or a hybrid plan. You do not decide rows by trend. You decide by density and goal.
Step 1: Clean base and prep (5–10 minutes)
You want grip. You want clean sections. You also want less slip.
- You shampoo for a clean root area.
- You avoid heavy conditioner near the root.
- You dry the base fully.
- You smooth the hair so partings stay sharp.
A weft install on damp hair creates unreliable tension. A weft install on oily roots increases bead slip.
Step 2: Mapping and sectioning (8–12 minutes)
This is where most salons either win or lose the blend.
- You set the perimeter leave-out first.
- You plan nape row position so it hides under movement.
- You keep crown distance safe so rows do not show when the client bends.
You can standardize your salon map like this:
- nape row: low enough to hide, but above the neckline movement zone
- mid row: follows occipital curve for best fall
- optional top row: only if density supports it and the client wants more fullness
You check symmetry. You check tension zones behind the ear. You keep the map consistent.
Step 3: Build the bead foundation (10–18 minutes)
A genius weft can sit flat, but the row must be flat too.
You set:
- bead size that matches hair density
- bead spacing that is even
- section thickness that matches bead grip
Key rules that keep rows stable:
- sections should not be too thick, or the row hurts and lifts
- sections should not be too thin, or beads slip
- beads should sit in a straight line, not zig-zag
- row tension should feel secure, not tight
Many salons do a quick “tension check” here:
- client can move head with no pulling pain
- row sits flush with head
- beads do not rotate freely
Step 4: Choose the row method for this client (decision point)
You decide between:
- classic bead row + sew
- hidden bead row style
- hybrid for uneven density zones
This decision is not about your preference. This decision is about concealment and comfort for that client.
Step 5: Place the weft and stitch (12–25 minutes)
This is the heart of the install.
- You anchor the start point.
- You keep stitch tension even.
- You avoid over-tight stitching that creates ridge and discomfort.
- You avoid loose stitching that creates gaps.
A clean salon rhythm usually looks like:
- start anchor stitch
- consistent pass pattern (over-under or blanket style)
- check weft lay every few passes
- finish anchor stitch
You also manage weft behavior:
- you avoid stacking too many layers in one zone
- you distribute weight so the track does not feel thick
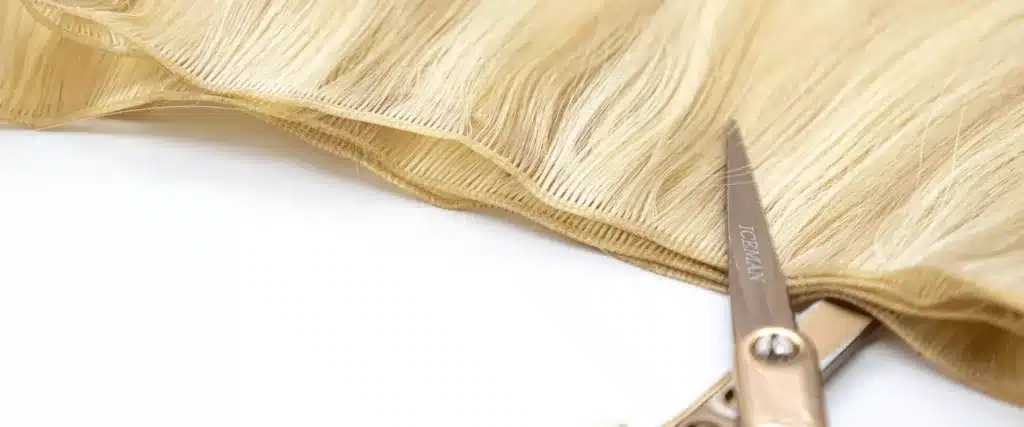
Step 6: Cut, fold, and seal ends (5–10 minutes)
This is a genius weft advantage, but it still needs rules.
- You cut with sharp scissors for a clean edge.
- You avoid jagged cuts that weaken the track.
- You seal the ends based on your salon method.
End sealing options (salon choices):
- finishing stitches at each end
- a track sealing routine your team already uses
- a clean fold-back technique when suitable
The goal is simple: the end should not unravel, and the end should not poke.
Step 7: Blend check in motion (3 minutes)
You do not only check in the mirror. You check movement.
- client looks down
- client turns left and right
- client lifts hair in a half-up style
You confirm:
- no bead show
- no track ridge line
- no tension pain at edges
- hair falls naturally
Step 8: Finish and client education (3–5 minutes)
You give salon-grade care instructions:
- brush pattern
- wash pattern
- heat protection rules
- sleep routine
- move-up timing
This protects your install and reduces emergency messages later.
Use this installation quality table:
| Step | Quality signal | Red flag |
|---|---|---|
| mapping | clean leave-out | rows too high |
| bead foundation | flush and even | beads rotate or pinch |
| stitching | flat weft lay | ridge line or gaps |
| ends | sealed and smooth | unravel or poking |
| motion check | stays hidden | shows in half-up |
If your salon wants fewer remakes, you standardize Step 2 and Step 3 first. That is where most issues start.
What Is A Fast, Repeatable Salon System For Genius Weft Installs?
Your salon needs more than “one good stylist.” Your salon needs a system that works across staff. You need install steps that new team members can learn and repeat.
A fast, repeatable genius weft system uses a fixed map template, fixed bead spacing rules, and a fixed stitching rhythm. The system also includes a quick concealment test and a standard aftercare script. This keeps installs consistent and reduces troubleshooting.
Dive deeper
This section is the “second part with steps.” It is not the full technical detail again. It is the operational system that helps a salon scale services.
Step A: Use a standard map template
You define three templates your salon uses:
- Template 1: volume fill (usually 1 row)
- Template 2: natural length + volume (often 2 rows)
- Template 3: fuller transformation (often 3 rows, only when density supports it)
Your team uses the same head landmarks to place rows. This prevents “too high” installs when a new stylist tries to hide less.
Step B: Lock bead spacing rules
You define:
- bead size by hair density class (fine / medium / thick)
- bead spacing range that your salon accepts
- section thickness rule that your salon teaches
This reduces slip and pain cases.
Step C: Lock stitch rhythm rules
You define:
- stitch type your salon prefers
- how often to check weft lay (example: every 4–6 passes)
- how to anchor ends
- your end sealing method
This reduces ridge lines and end issues.
Step D: Use a 60-second concealment test
Every install ends with:
- head down check
- side turn check
- half-up check
If it fails, you fix before the client leaves.
Step E: Use a standard aftercare script
Your salon uses one script so clients hear the same rules.
- no heavy oils near row
- brush daily with support hand
- sleep in braid or loose style
- move-up schedule in writing
Use this salon SOP table:
| SOP item | Your salon standard | Why it matters |
|---|---|---|
| map templates | 3 templates | consistent placement |
| bead rules | size + spacing | comfort and grip |
| stitch rules | rhythm + anchors | flat and secure |
| concealment test | 60 seconds | fewer callbacks |
| aftercare script | one version | fewer mistakes |
This is how you protect service quality as your salon grows.
What Tools And Products Do You Need For A Genius Weft Install?
Stylists move faster when tools match the method. Your salon also reduces mistakes when the kit is standardized.
A genius weft install usually needs a clean sectioning kit, bead tools and pliers, a curved needle and strong weft thread, and sharp scissors for track cutting. You also need a clean prep routine that reduces root slip and keeps sections sharp.
Dive deeper
A standard kit supports speed and quality. This matters for salons because time is money, and remakes waste both.
Core kit
- tail comb and sectioning clips
- bead tool and bead loading support
- smooth-edge pliers
- curved needle
- strong weft thread
- sharp scissors for track cutting
Prep products
- clean shampoo base
- light conditioner for mid-length and ends only
- heat protectant for styling finish
You should avoid heavy oils at the root area. That can increase bead slip.
Quality checks
- handheld mirror for motion concealment
- bright light check to spot ridge lines
| Tool | What it controls | Salon risk if wrong |
|---|---|---|
| pliers | bead grip | hair break or bead slip |
| thread | security | breakage and loose weft |
| scissors | clean track end | fray and shedding complaints |
| clips | clean sections | uneven rows |
A salon that wants consistent results should give the same kit to every stylist on the service.
Which Row Methods Work Best With Genius Wefts?
Your row method decides how flat the install feels and how invisible it looks in movement. Genius wefts can work on many systems, but each system has trade-offs.
Genius wefts often perform well on classic bead rows and hidden bead row styles because these foundations can support a flat, flexible track. Your best choice depends on client density, updo habits, and sensitivity.
Dive deeper
A good salon decision is not “which method is trending.” A good decision is “which method fits this client and this hair.”
Classic bead row
This is easier to teach and faster to execute. It can be very consistent in a busy salon. It needs correct placement so beads stay hidden.
Hidden bead row style
This can improve concealment, especially for clients who love updos. It also needs more skill and more attention to tension.
Hybrid approach
Some clients need lighter density at the sides and more strength at the back. A hybrid approach can solve that. Still, you should keep the install light enough for hair strength.
| Method | Best fit | Trade-off |
|---|---|---|
| classic bead row | speed + training | can show if placed high |
| hidden bead row style | concealment for updos | needs higher skill level |
| hybrid | custom density zones | more planning time |
If your salon runs many weft clients, you can keep one “main method” and add the second method as an advanced option.
How Many Rows And How Much Hair Do You Need For A Professional Result?
Clients want full ends. Stylists want a blend that stays natural. Both depend on the plan.
Most clients use 1–3 rows for genius wefts, based on density and goal. A professional result needs enough grams to match the client’s natural end density, not only the length target.
Dive deeper
Row planning is a design problem. Too little hair creates thin ends. Too much hair creates bulk and tension. Your salon wins when the plan matches the client.
Practical row guidance
- 1 row: volume fill, fine density clients, conservative length
- 2 rows: the most common “salon standard” for natural transformation
- 3 rows: thicker density or bigger length goals, only when hairline supports it
The hidden issue: end density
If you add length without enough grams, the ends look see-through. That is what clients call “stringy.” If you add too many grams on fine hair, the track can show and the client can feel pressure.
| Client base | Common plan | Plan risk |
|---|---|---|
| fine hair | 1–2 rows | track show if too heavy |
| medium hair | 2 rows | thin ends if grams too low |
| thick hair | 2–3 rows | bulk if placement is high |
This is why stylists should talk about grams and finish, not only inches.
My opinion
A genius weft install looks premium when your salon treats it like a system, not a one-time art project. Mapping, bead foundation, and stitch tension decide the result. Hair quality supports the finish, but your process protects the wear time.
FAQ
Can genius wefts be cut?
Many genius wefts can be cut to customize width. Your team should still seal ends based on your salon method to reduce fraying risk.
Why does a weft install feel tight at night?
Tightness usually comes from bead tension or heavy sectioning. A stylist should review section thickness and row placement.
Do genius wefts work for fine hair clients?
They can, if the plan stays light and the row placement stays conservative. A flat track helps, but overloading grams can still show.
What is the fastest way to reduce callbacks?
You standardize mapping and bead rules, then you run a 60-second motion concealment test before the client leaves.
How often should move-ups happen?
Timing depends on growth and method. Your salon should set a consistent schedule and explain that waiting too long increases flip, show, and tension.
Conclusion
You can install genius weft hair extensions with a clean map, stable bead foundation, even stitch tension, and sealed ends. When your salon standardizes these steps, installs stay flat, hidden, and reliable.