Have U ever removed tape-ins and thought, “The hair still looks great, so why waste it”? Do U want a clean re-tape process that keeps the tabs flat and the client comfortable?
U can re-tape tape-in extensions when the hair is in good condition and the tape area is cleaned fully. The core steps are: remove old tape, eliminate adhesive residue, dry the tabs, apply fresh replacement tape with correct alignment, then press and seal for a flat bond. Hair quality, tab condition, and maintenance timing decide how many reuse cycles are realistic.

This post is written for salon owners, stylists, and wholesale buyers who want more predictable reuse and fewer failures.
Can you reuse tape in hair extensions?
Have U heard two stylists argue about reuse, with one saying “always” and the other saying “never”? Both can be right, because reuse depends on what U are looking at.
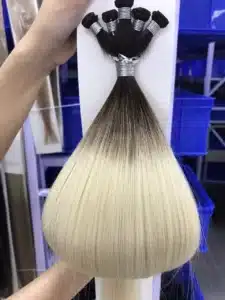
Yes, U can reuse tape in hair extensions if the hair stays smooth, the ends are not destroyed, and the tab area is intact. The hair is the asset. The tape is the consumable. Reuse works when the old tape is removed completely and the new tape is applied in a clean, flat, and aligned way.
Dive deeper
Reuse is not a “yes or no” decision. Reuse is a condition check. The simplest way to think about it is to separate the system into two parts.
The hair part
The hair can last a long time when the cuticle is aligned and the strands are not over-processed. Hair that stays soft and does not tangle at the nape is usually a good reuse candidate. Hair that feels dry like straw will not give a good second cycle, even if the tape is perfect.
The tab part
The tab must stay flat and not split. A bent tab creates a bulky bond. A split tab allows tape lift. A stretched tab reduces the contact area and lowers hold.
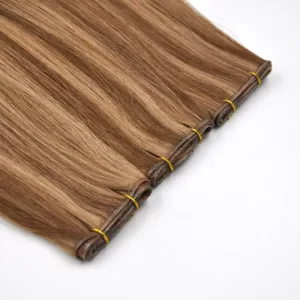
The tape part
Tape is designed for replacement. It is normal to remove it and apply fresh tape each move-up. Still, tape cannot “save” a dirty surface. Residue under new tape is the #1 reason re-tapes fail early.
A simple pass / fail test
- Pass: the hair combs through easily when dry, and the tab stays flat
- Fail: the hair mats fast at the roots or the tab is warped or cracking
Why this matters for salons and buyers
For salons, reuse reduces client cost and improves profit per install hour. For buyers, reuse reduces reorder pressure and builds trust in the hair grade. Still, reuse only helps when it is controlled. A sloppy re-tape creates more complaints than a brand-new set.
| Check point | What to look for | What it tells U |
|---|---|---|
| hair texture | smooth and consistent | hair can survive another cycle |
| shedding | normal strand loss only | weft and processing are stable |
| ends | not thin and not broken | length will still look full |
| tab shape | flat and not stretched | bond can stay seamless |
| residue level | clean plastic/PU surface | new tape can grip |
How to re tape hair extensions?
Have U ever re-taped a set and the tabs still lifted after one wash? That usually means the base was not truly clean or the tape was placed with gaps.
Re-taping means removing all old tape and residue, making the tab dry and oil-free, then applying new replacement tape with straight alignment and full contact. A good re-tape feels flat to the touch and does not create a “ridge” at the root.
Dive deeper
A re-tape process should be repeatable. The same steps should work every time. The main goal is to create full contact between new tape and the tab surface.
Step 1: remove the old tape slowly
Old tape should be peeled off in a controlled way. Fast tearing can stretch the tab. Stretching makes the next bond bulky.
Step 2: remove adhesive residue completely
This step decides success. Residue blocks tape contact. Residue also traps dirt and oils. When new tape sits on residue, it lifts early.
Common residue removal approaches include:
- a professional tape remover product
- controlled scraping with a safe tool
- repeated wipe-down until the surface feels clean
The surface should feel smooth and dry. It should not feel sticky.
Step 3: dry the tab fully
Water and remover oils can remain on the tab. Tape does not like moisture. Tape also does not like oil film. The tab must be fully dry before new tape is placed.
Step 4: apply new tape with correct alignment
Tape should cover the tab area evenly. Tape should sit straight. Tape should not be wrinkled. Wrinkles create air pockets. Air pockets lead to lifting.
Step 5: press and seal
Pressing increases contact. It also flattens the tape line. A flat bond looks better and feels better.
Step 6: storage before install
If the hair is not installed right away, it should be stored clean and dust-free. Dust on tape reduces hold.
| Re-tape step | What can go wrong | How to prevent it |
|---|---|---|
| peel old tape | tab stretching | slow peel and support the tab |
| remove residue | early lift | clean until non-sticky |
| dry tab | weak hold | dry fully before new tape |
| align tape | bulky ridge | edge-to-edge placement |
| press tape | air pockets | firm pressing and sealing |
| storage | dust contamination | keep tabs covered and clean |
How many times can you reuse tape in extensions?
Have U had a client ask for an exact number like “How many times can I reuse this hair”? The number is never universal, but it can be estimated.
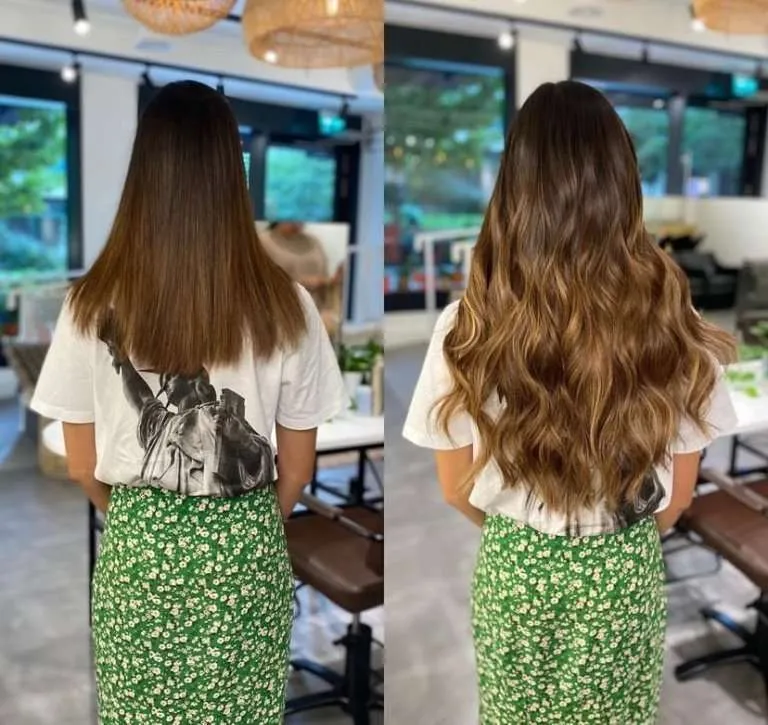
Tape-in hair can often be reused multiple times if the hair grade is high and the re-tape process is clean. Many professional wearers plan reuse in cycles, and each cycle is limited by hair condition, tab integrity, and how well the client maintained the hair between move-ups.
Dive deeper
Reuse count is a business question, not only a technique question. Salons want predictable outcomes. Buyers want stable value. The best approach is to define reuse by “pass the inspection” instead of “hit a fixed number.”
The three drivers of reuse count
1) Hair quality
Aligned cuticle hair tangles less. Less tangling means less aggressive brushing. Less aggressive brushing means longer hair life.
2) Client behavior
Clients who sleep with loose wet hair will destroy tape-in hair faster. Clients who use heavy oils at the root will cause tape lifting. These behaviors shorten reuse cycles.
3) Maintenance interval
If move-ups happen on time, the roots stay cleaner and the hair stays easier to manage. If move-ups are delayed, matting and shedding increase, and reuse becomes less realistic.
A practical way to set expectations
- “Best case”: high-end hair + correct care + on-time move-ups = multiple reuse cycles
- “Average case”: normal care and occasional residue issues = fewer cycles
- “Worst case”: heavy heat, poor care, delayed maintenance = limited reuse
How salons can protect reuse
Salons can protect reuse by controlling two points:
- teach aftercare in simple rules
- standardize the re-tape process so residue is always removed
A reuse decision table
This table helps teams decide quickly.
| Condition after removal | Reuse decision | Reason |
|---|---|---|
| hair is smooth, ends are full | reuse | hair still holds value |
| hair tangles fast at nape | limit reuse | friction damage is growing |
| tab is flat and intact | reuse | bond can stay seamless |
| tab is warped or split | stop or repair | bond will lift and feel bulky |
| heavy residue remains | do not install yet | tape will fail early |

Why does a re-tape fail early?
Have U seen a re-tape lift after only a few days and felt surprised? Early lift almost always has a visible cause.
Early re-tape failure usually comes from residue left on the tab, oil or moisture on the surface, tape applied with wrinkles or gaps, or aftercare mistakes like conditioner touching the adhesive area.
Dive deeper
This topic is important because “bad tape” is often blamed when the real issue is preparation.
Residue is the biggest offender
Even a thin film can break adhesion. Some stylists think the remover “evaporates,” so the tab is clean. Many removers leave oil behind. That oil blocks tape contact. A final wipe-down and full drying step helps.
Tape wrinkles create air pockets
Air pockets expand when the hair is washed and dried. That movement starts lifting at the edges. Once an edge lifts, the client touches it. Touching adds oil and lint. Then the bond fails fast.
Wrong product placement in aftercare
Conditioner and hair oils should not touch tape. When they do, the adhesive softens and slides. This can happen even when the client “only conditioned the ends,” because product drips in the shower.
Heat and sweat
High heat tools near the root can soften adhesive. Heavy workouts can add sweat and salts at the bond line. Those factors can shorten hold.
What to do as a salon owner
Standardize the re-tape checklist. Most re-tape issues disappear when the checklist is followed.
| Failure symptom | Likely cause | Fix |
|---|---|---|
| edges lift in 1–3 days | residue or oil film | clean again and dry fully |
| tape feels bumpy | wrinkles or misalignment | reapply tape flat |
| tabs slide down | conditioner/oil at roots | adjust aftercare routine |
| bond feels thick | tape not centered | edge-to-edge alignment |
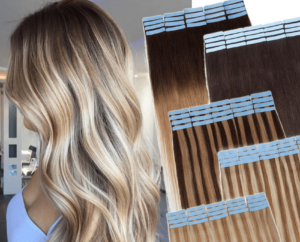
What tape type and tab style works best for re-taping?
Have U wondered if all tape is the same for re-taping? Different tapes behave differently on different tabs.
Re-taping works best when the replacement tape matches the tab width and the tab surface stays smooth and stable. A consistent tape width helps the stylist place tape quickly and evenly. A stable PU/skin base helps the tape sit flat without curling.
Dive deeper
This is a factory-level point that affects salon results.
Tape width must match the tab
If tape is narrower than the tab, edges remain exposed and collect lint. If tape is wider than the tab, it can fold and create a ridge. The ridge feels uncomfortable and can show through fine hair.
Tab surface must stay smooth
Some tabs become rough after repeated remover use and scraping. Rough surfaces reduce adhesion. That is why gentle residue removal matters.
Thin and flexible tabs help comfort
A flatter bond looks better. It also reduces client complaints. Still, thin does not mean weak. The base should be thin but stable.
A quick matching guide
- standard tabs: standard replacement tape width
- mini or slim tabs: narrower tape or trimmed tape
- wide tabs: wider tape with clean alignment
| Tab style | Tape matching tip | Common mistake |
|---|---|---|
| standard tape tab | use same width tape | leaving tape short on edges |
| slim/minimal tab | trim tape precisely | tape folding under |
| wide tab | full width contact | misalignment creates a ridge |
My opinion
Re-taping is the difference between “cheap reuse” and “professional reuse.” Clean tabs, full drying, and straight tape placement protect the bond. Hair quality decides how long the reuse plan can stay profitable.
FAQ
Do tape-in extensions need new tape every time?
Most move-ups require new tape. Old tape loses strength and collects residue.
Can tape-in hair be reused if it tangles?
Light tangling can be managed. Heavy matting at the nape often means the hair is near the end of its useful cycles.
What happens if residue is left on the tabs?
Residue blocks adhesion and leads to early lifting and slipping.
Should the tabs be washed before re-taping?
Tabs should be clean and dry. Water is not the goal. Residue removal and full drying are the goal.
Can tape be trimmed to fit smaller tabs?
Yes. Trim should be clean and straight to avoid exposed sticky edges.
How can salons reduce re-tape complaints?
A checklist works: full residue removal, full drying, correct tape alignment, and clear aftercare rules.
Conclusion
Re-taping works when the tab is truly clean, fully dry, and covered with straight, flat tape. Reuse count depends on hair grade, tab condition, and how well maintenance is controlled.