Thinking about removing your I tip extensions at home instead of making a salon appointment? Good news—you absolutely can! With the right tools and technique, you can safely take out your extensions without damaging your natural hair. I’ll walk you through the process step by step.
To remove I tip extensions at home, gently squeeze open the micro-beads with small pliers, slide the extensions out carefully, and detangle your hair while removing any residue. Finish with a deep-conditioning treatment to restore moisture and smoothness.
Want a stress-free way to take out your I tip extensions without breakage or frustration? Keep reading—I’ll share the easiest, safest home method along with expert aftercare tips to keep your hair healthy and strong.

What You Need to Remove I Tip Extensions at Home
Before you start, make sure you have these essentials:
Small pliers (jewelry pliers or micro-ring extension pliers work best)
Hair clips to section your hair
Fine-tooth comb for detangling
Hair oil or leave-in conditioner to ease removal
Clarifying shampoo to cleanse residue
Step-by-Step Guide to Taking Out I Tip Extensions at Home
Step 1: Section Your Hair
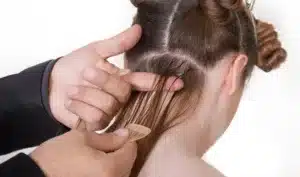
Divide your hair into small sections and use clips to keep them organized. Start at the bottom of your head and work your way up—this prevents unnecessary tangling and makes removal easier.
Step 2: Loosen the Micro-Beads
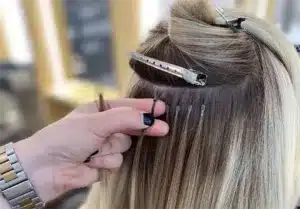
Use your pliers to gently squeeze the micro-beads in the opposite direction they were originally clamped. Avoid crushing the bead; you just need to loosen it enough for the extension to slide out easily.
Step 3: Slide Out the Extensions
Once the bead is open, hold your natural hair near the root and carefully slide the extension out. If it feels stuck, apply a small amount of hair oil to the base and try again. Never force it—patience is key to preventing damage.
Step 4: Comb Through and Remove Residue
After removing all extensions, use a fine-tooth comb to gently detangle your natural hair and remove any leftover beads or buildup. If needed, apply a leave-in conditioner to help soften any knots.
Step 5: Wash and Deep Condition
Finish the process by washing your hair with a clarifying shampoo to remove any remaining residue. Follow up with a deep-conditioning treatment to restore moisture and keep your hair soft and manageable.

Pro Tips for a Smooth Removal Process
Be Gentle—Rushing Can Cause Damage
The key to safe removal is patience. If a bead isn’t budging, don’t force it—apply oil, let it soak in, and try again.
Choose the Right Tools
Using small, rounded pliers designed for hair extensions will help you open the beads without crushing them or pulling on your hair.
Hydrate and Repair After Removal
Your natural hair might feel a little dry after removing extensions, so a deep-conditioning treatment or leave-in conditioner will help restore hydration and shine.
Avoid DIY Reinstallation
While removal at home is manageable, reinstalling I tip extensions requires precision and the right tools. For best results, visit a professional for reinstallation.

FAQs About Removing I Tip Extensions at Home
Q1: Can I remove I tip extensions without pliers?
Not really—pliers are essential for opening the micro-beads safely. Using fingers or makeshift tools can cause breakage or unnecessary pulling.
Q2: How long does it take to remove I tip extensions at home?
Around 30–60 minutes, depending on how many extensions you have.
Q3: Will removing I tip extensions damage my natural hair?
Not if done correctly. Using gentle techniques and avoiding excessive pulling will keep your hair healthy.
Q4: What should I do if a micro-bead won’t open?
Apply a few drops of hair oil to the area, wait a minute, and try again with your pliers.
Q5: Can I reuse the extensions after removing them?
Yes! As long as the hair is in good condition and the keratin tips are intact, they can be reinstalled by a professional.
Q6: What’s the best aftercare routine post-removal?
Use a deep-conditioning mask, trim split ends if needed, and avoid heavy styling for a few days to let your natural hair recover.

Conclusion
Removing I tip extensions at home doesn’t have to be a struggle. With the right tools, gentle handling, and a little patience, you can safely take out your extensions while keeping your natural hair strong and healthy. Follow these steps, treat your hair to some post-removal TLC, and you’re good to go!


