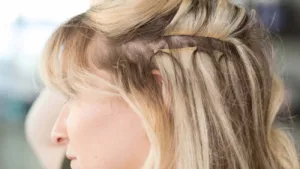
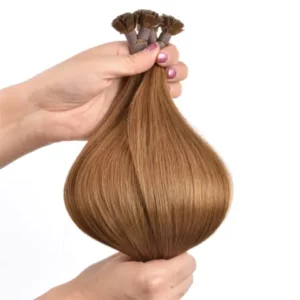
Flat Tip hair extensions are a fantastic option for clients seeking a natural, discreet look with a secure hold. If you’re wondering how to install them properly, you’re in the right place. Let’s walk through the steps to ensure you’re achieving a flawless, long-lasting result for your clients.
To install Flat Tip hair extensions, you’ll need to use a flat bonding tool to attach the extensions to your client’s natural hair. This method involves creating a flat, comfortable bond that holds the hair in place without causing discomfort or damage. Proper application and technique are essential for long-lasting results.
We’ve got the details to make sure you’re installing these extensions like a pro. Let’s get into the step-by-step process and some helpful tips for the best results!

How to Install Flat Tip Hair Extensions
Installing Flat Tip extensions isn’t as tricky as it seems, but it does require attention to detail. Here’s your guide to getting them right every time.
1. Preparation: The Key to a Successful Application
Before you dive into the actual installation, preparation is crucial. Here’s what you need to do to set yourself and your client up for success:
Client Consultation: Make sure you’ve discussed the length, color, and style of extensions that will work best for your client’s hair. Matching the hair color and texture is essential for a seamless look.
Tools You’ll Need:
Flat tip hair extensions
Flat iron or a heating tool
Sectioning clips
Comb
Sectioning comb for precise parting
Prep the Hair:
Wash the client’s hair and dry it completely. Avoid using conditioner or oils, as this can make the extensions slippery and reduce their grip. Once dry, part the hair into sections with clips to make the process smoother.
2. Sectioning the Hair
The way you section the hair plays a huge role in how neat and secure the extensions will be. Here’s the best approach:
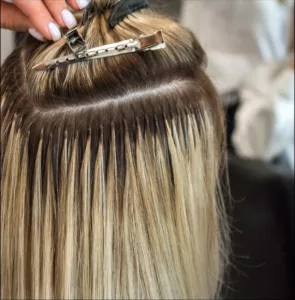
Small Sections: Create small, 1-inch sections of hair where you’ll place the Flat Tip extensions. This allows the extension to sit closer to the scalp for a natural, comfortable result.
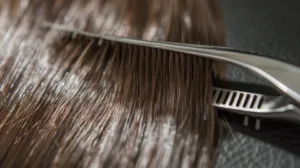
Precise Parting: Use a fine-tooth comb to ensure each section is as even and clean as possible. This will help in ensuring that no hair is left out of the extensions, creating a smooth blend.
3. Attaching the Flat Tip Extensions
Now, it’s time to add the extensions. Follow these steps to ensure proper attachment:
Placing the Extension:
Take a small section of the client’s natural hair, and hold it between the two strands of the flat-tipped extension. Position the extension at the root and clamp it into place using your flat bonding tool or a flat iron.
Heating the Bond:
The key to a good bond is heat. Apply gentle pressure with the flat iron (or bonding tool) for 2-3 seconds. This will melt the keratin bond at the tip of the extension, fusing it with the natural hair. Be careful not to overheat, as this can cause the extension to slip or break.
Securing the Extension:
Once the bond has been melted and attached, gently squeeze it with your fingers to ensure it’s fully set and secure. You want to avoid making the bond too tight or too loose—both can cause discomfort or slippage.
4. Blending the Extensions
After the extensions are in place, it’s time to blend them seamlessly with the client’s natural hair:
Check the Sections:
Make sure each extension is secured properly. If you notice any loose strands or bumps, gently press them into place.
Cut and Style:
Use shears to trim and blend the extensions with the client’s natural hair. This will give a natural, smooth finish and remove any obvious lines between the extensions and natural hair.
Final Touch-Up:
Style the hair as usual, using your favorite tools and products. Flat Tip extensions blend wonderfully with most hair types, and they can be curled, straightened, or styled in updos without the extensions showing.
Extra Tips for how to install flat tip extensions
Now that you know the basic steps, let’s dive into some extra tips that can help take your installation to the next level.
Use Quality Hair Extensions
The better the quality of the Flat Tip extensions, the better the results. Always choose high-quality hair (like full cuticle hair) to ensure the extensions last longer and maintain their shine.
Don’t Rush the Heating Process
Take your time with the heating step. If you rush it, the bonds may not properly adhere to the natural hair, causing slippage and discomfort later on.
Monitor the Tension
When attaching the extensions, avoid placing too much tension on the client’s hair. It should feel secure but not tight. Too much tension can cause the natural hair to break or the extensions to loosen prematurely.
Aftercare is Key
Advise your client on the proper aftercare for Flat Tip extensions. They should brush their hair regularly with a loop brush, avoid excessive heat, and schedule regular move-ups every 6-8 weeks to keep the extensions in top shape.

Conclusion:how to apply flat tip hair extensions
Installing Flat Tip extensions is all about getting the right tools, using the proper technique, and taking the time to ensure everything is secure and comfortable. By following these steps, you’ll be able to offer your clients a flawless, long-lasting result that looks natural and beautiful. So, next time you get a client in your chair who’s ready for extensions, you’ll know exactly how to make their hair dreams come true with Flat Tip extensions!
Hibiscus Hair Manufacturer has been dedicated to producing high-quality flat tip hair extensions for 25 years and is a recognized leader in the industry. If you are interested in finding a reliable hair extensions supplier and wholesale for your brand, please visit our website for more information:
K Tip Hair Extensions


